
In Box Review of Trimaster 1/48th Scale
Focke-Wulf Ta-152H-1
Kit no. MAB-100-4800
By Ray Mehlberger
OUT OF PRODUCTION
By Ray Mehlberger
OUT OF PRODUCTION
HISTORY:
The Ta-152H-1 s the first real high-altitude fighter of the Luftwaffe. Though quite similar to the Fw-190D-9 in appearance the Ta-152H was a totally new aircraft having the redesigned long span wing, larger tail, and the pressurized cockpit. Powered by the Jumo 213E, liquid-cooled engine equipped with a three-speed. Two-stage supercharger, the Ta-152H achieved the maximum speed of 765 km/h at the altitude of 12,500 m, which was the estimated maximum speed that a piston-engine aircraft might achieve (about 800 km/h).
There was a short-span Ta-152C powered by the DB-603LA engine, but none of its production model was built. About 60 aircraft of the Ta-152 were said to be built since December 1944 until the end of the war and some were delivered to JG-301 mainly for a duty of protecting the Me-262 jet fighters from attack of Allied fighters during their take-offs and landings. It was too late for the aircraft to demonstrate its outstanding high-altitude performance.
TECH DATA:
Crew: 1
Wingspan: 14.44 m
Length: 10.7 m
Height: 3.37 m
Fully equipped weight: 4,750 kg
Powerplant: Junkers Jumo 213E-1 of 1,730 hp with MW-50
Max speed: 765 km/h at altitude of 12,500 m using MW-50
Service ceiling: 14,800 m
Cruise range: 2,00 km with 300-liter drop tank
Fixed armament: 1 x Mk-108 30 mm cannon, 2 x MG-151 20 mm cannons
THE KIT:
Trimaster was a model company based in Japan 25 years ago. They went out of business and their molds mostly went to DML Dragon brand and a few to Italeri.
This kit came in a shrink wrapped tray and lid type box.
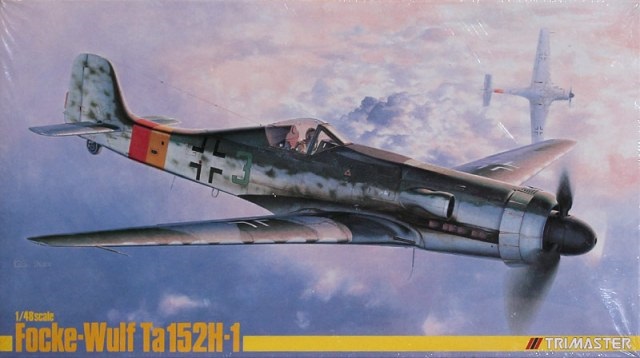
The box art shows two Ta-152H’s flying along. The one in the foreground is in a camouflage of RLM 81 (brown-violet FS-34087) and RLM 82 (dark green FS-34079) above RLM 78 (light grey FS-35622 & 36473 mixed) undercarriage. It has a mottle pattern of the the RLM 82 on the rudder. It has a black propeller and it’s spinner. There is a red and yellow fuselage band in front of the tail followed by a black skeletal German cross and a red number 3. This is an aircraft flown by Oberfeldwebel Josef Keil with stab/JG 301.
The Ta-152H behind it is peeling off and showing just its bottom side. It too has the yellow and red fuselage band and skeletal black crosses under the wings.
One side panel of the box shows 4 color walk-around type photos of the model made up in the same camouflage as the box art subject, but with a fuselage number of red 4 and a red propeller spinner. This is followed by Trimaster’s street address in Japan, the copyright of the kit of 1989 and MADE IN JAPAN.
The other side panel has a illustration of the decal sheet, steel PE frets and white metal parts in the kit, followed by a one-paragraph history of the aircraft in 6 languages, including English.
The Ta-152H-1 s the first real high-altitude fighter of the Luftwaffe. Though quite similar to the Fw-190D-9 in appearance the Ta-152H was a totally new aircraft having the redesigned long span wing, larger tail, and the pressurized cockpit. Powered by the Jumo 213E, liquid-cooled engine equipped with a three-speed. Two-stage supercharger, the Ta-152H achieved the maximum speed of 765 km/h at the altitude of 12,500 m, which was the estimated maximum speed that a piston-engine aircraft might achieve (about 800 km/h).
There was a short-span Ta-152C powered by the DB-603LA engine, but none of its production model was built. About 60 aircraft of the Ta-152 were said to be built since December 1944 until the end of the war and some were delivered to JG-301 mainly for a duty of protecting the Me-262 jet fighters from attack of Allied fighters during their take-offs and landings. It was too late for the aircraft to demonstrate its outstanding high-altitude performance.
TECH DATA:
Crew: 1
Wingspan: 14.44 m
Length: 10.7 m
Height: 3.37 m
Fully equipped weight: 4,750 kg
Powerplant: Junkers Jumo 213E-1 of 1,730 hp with MW-50
Max speed: 765 km/h at altitude of 12,500 m using MW-50
Service ceiling: 14,800 m
Cruise range: 2,00 km with 300-liter drop tank
Fixed armament: 1 x Mk-108 30 mm cannon, 2 x MG-151 20 mm cannons
THE KIT:
Trimaster was a model company based in Japan 25 years ago. They went out of business and their molds mostly went to DML Dragon brand and a few to Italeri.
This kit came in a shrink wrapped tray and lid type box.
The box art shows two Ta-152H’s flying along. The one in the foreground is in a camouflage of RLM 81 (brown-violet FS-34087) and RLM 82 (dark green FS-34079) above RLM 78 (light grey FS-35622 & 36473 mixed) undercarriage. It has a mottle pattern of the the RLM 82 on the rudder. It has a black propeller and it’s spinner. There is a red and yellow fuselage band in front of the tail followed by a black skeletal German cross and a red number 3. This is an aircraft flown by Oberfeldwebel Josef Keil with stab/JG 301.
The Ta-152H behind it is peeling off and showing just its bottom side. It too has the yellow and red fuselage band and skeletal black crosses under the wings.
One side panel of the box shows 4 color walk-around type photos of the model made up in the same camouflage as the box art subject, but with a fuselage number of red 4 and a red propeller spinner. This is followed by Trimaster’s street address in Japan, the copyright of the kit of 1989 and MADE IN JAPAN.
The other side panel has a illustration of the decal sheet, steel PE frets and white metal parts in the kit, followed by a one-paragraph history of the aircraft in 6 languages, including English.
WHAT’S IN THE BOX:
This kit contains 6 grey parts trees in 3 stapled-shut cello bags, a clear parts tree and the decal in another stapled cello bag. There is a small end-opening type box stapled by it’s end flaps to one end of the box tray with 4 stapled shut cellos with white metal parts in them, another 3 stapled cellos with steel PE frets in them. The instructions complete the kit’s contents.
The instructions consist of a single sheet that accordion-folds out into 8 pages in 8” x 11” page format.
Page 1 of the instructions begins with a black and white photo of the model made up in the box art scheme, but with a red fuselage number 4 instead. Below this is the history of the Ta-152H-1 in Japanese, English, German, French, Spanish and Chinese.
Page 2 begins with the 1st assembly step drawing. NONE of the steps are numbered. This is followed by CAUTION about the kit in the 6 languages, an international assembly symbol explanation and a list of paint colors suggested to use to complete the model. No hobby paint companies are mentioned for these colors.
Page 3 through 6 show the balance of the rest of the un-numbered assembly steps. Being un-numbered, I cannot say exactly how many steps are there. I think it’s about 30??
Page 7 has a 7-view of the box art scheme (already described above).
Page 8 has he parts trees illustrations, followed by the decal application instructions in the 6 languages and Trimaster’s street address, telephone and FAX numbers in Japan, the copyright date of 1989 and PRINTED IN JAPAN.
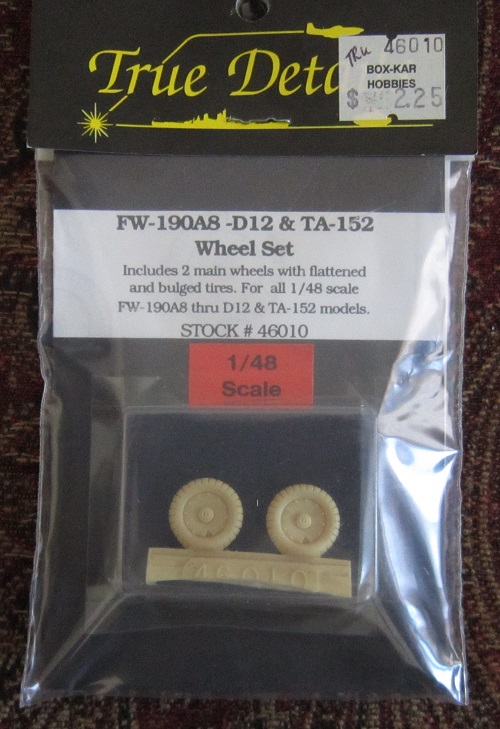
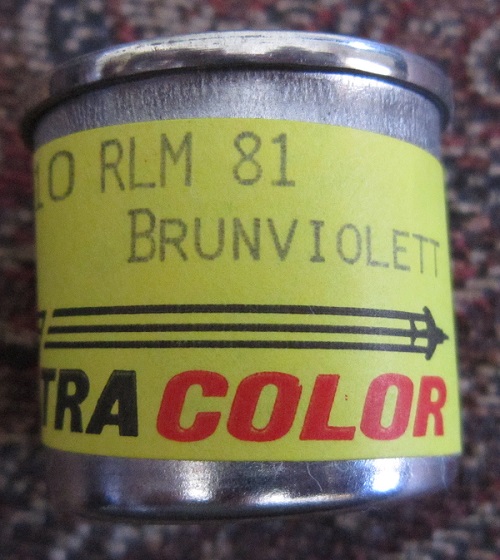
I further bought the True-Details brand set of resin main wheels for this kit, set no. 46010 and a tinlet of Xtracolor brand RLM 81 brunviolett no. X210.
This kit contains 6 grey parts trees in 3 stapled-shut cello bags, a clear parts tree and the decal in another stapled cello bag. There is a small end-opening type box stapled by it’s end flaps to one end of the box tray with 4 stapled shut cellos with white metal parts in them, another 3 stapled cellos with steel PE frets in them. The instructions complete the kit’s contents.
The instructions consist of a single sheet that accordion-folds out into 8 pages in 8” x 11” page format.
Page 1 of the instructions begins with a black and white photo of the model made up in the box art scheme, but with a red fuselage number 4 instead. Below this is the history of the Ta-152H-1 in Japanese, English, German, French, Spanish and Chinese.
Page 2 begins with the 1st assembly step drawing. NONE of the steps are numbered. This is followed by CAUTION about the kit in the 6 languages, an international assembly symbol explanation and a list of paint colors suggested to use to complete the model. No hobby paint companies are mentioned for these colors.
Page 3 through 6 show the balance of the rest of the un-numbered assembly steps. Being un-numbered, I cannot say exactly how many steps are there. I think it’s about 30??
Page 7 has a 7-view of the box art scheme (already described above).
Page 8 has he parts trees illustrations, followed by the decal application instructions in the 6 languages and Trimaster’s street address, telephone and FAX numbers in Japan, the copyright date of 1989 and PRINTED IN JAPAN.
I further bought the True-Details brand set of resin main wheels for this kit, set no. 46010 and a tinlet of Xtracolor brand RLM 81 brunviolett no. X210.
This kit has a complete engine that can be seen if the side cowling panels are left off. The canopy is in 2 parts and can be posed open or shut so the great cockpit detail and pilot figure inside can be viewed.
I recommend this kit to modelers that have built multi-media parts kits previously and also because of it’s complexity. This kit is not for the novice, nor is it a weekend project.
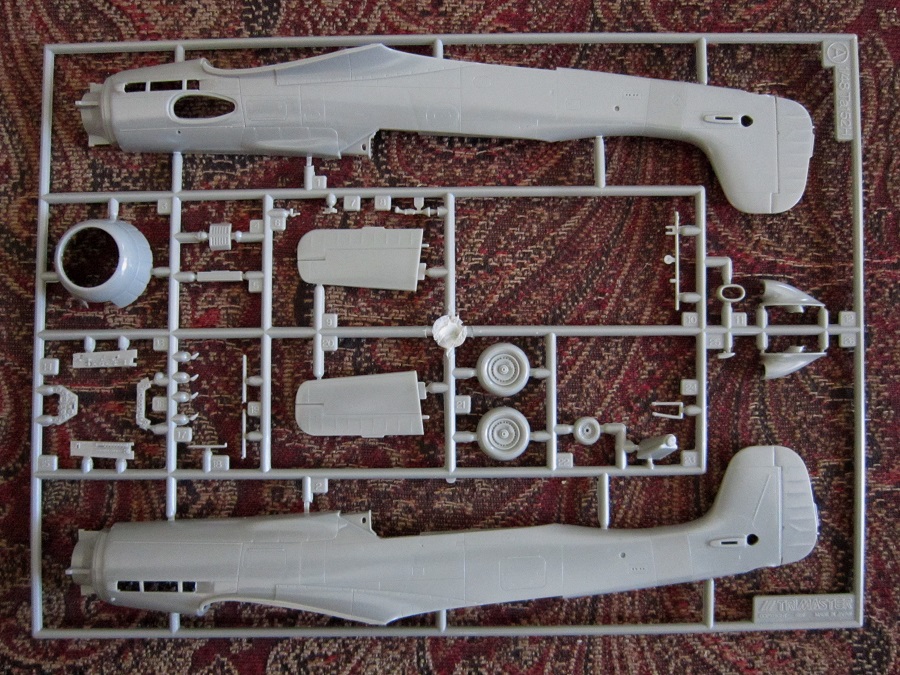
Grey letter A parts tree holds: the fuselage halves, elevators, main wheels etc. (34 parts) One part is grayed out on the parts tree drawing as being excess and not needed to complete the model.
I recommend this kit to modelers that have built multi-media parts kits previously and also because of it’s complexity. This kit is not for the novice, nor is it a weekend project.
Grey letter A parts tree holds: the fuselage halves, elevators, main wheels etc. (34 parts) One part is grayed out on the parts tree drawing as being excess and not needed to complete the model.
Grey letter B parts tree holds: the propeller blades, wing halves and their strengthening rib (6 parts) The bottom wing part is full span.
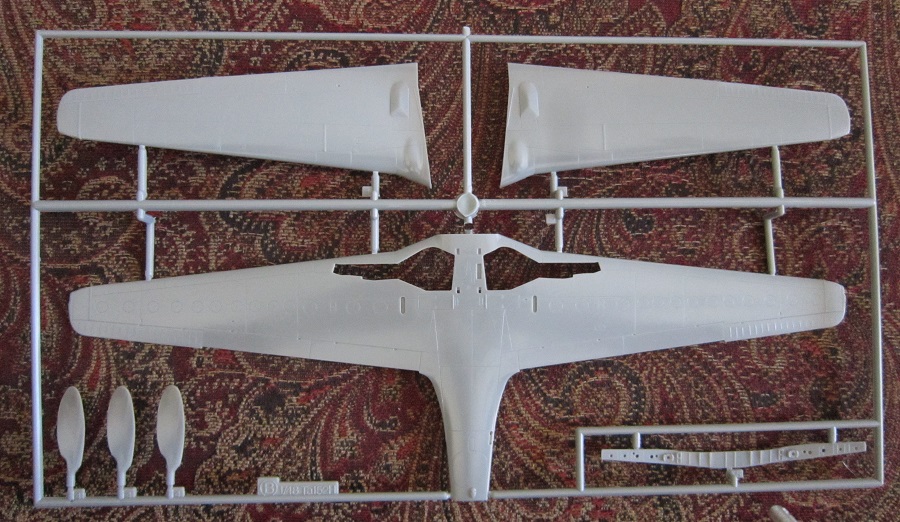
Grey letter C parts tree holds: the landing gear doors etc. (11 parts)
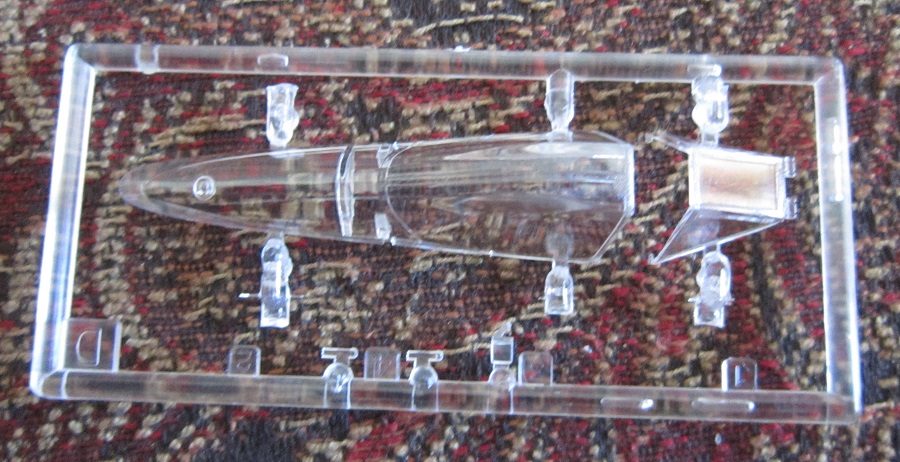
Clear letter D parts tree holds cockpit canopy parts etc. (4 parts)
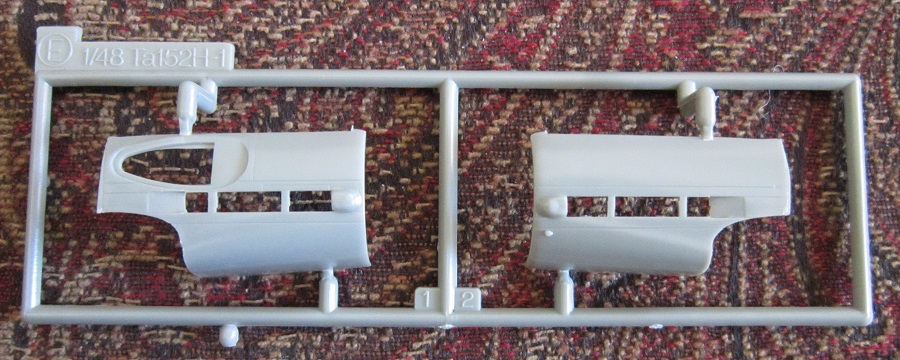
Grey letter E parts tree holds the 2 cowling side panels.
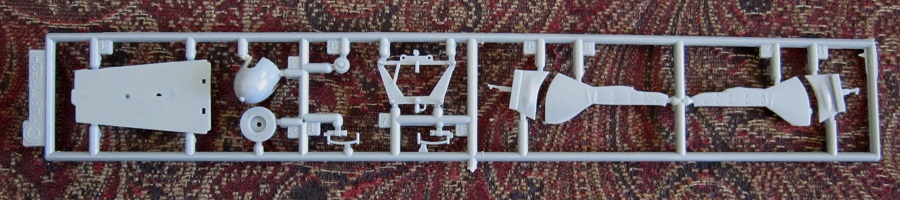
Grey letter F holds engine parts etc. (46 parts)

Steel PE fret CA holds: the cockpit rear turtle deck, shoulder straps, foot pedals, engine wire harnesses, air scoop intake screen, internal exhaust area band etc. (18 parts)
Steel PE fret CB holds: the radio aerial, wing flaps inner structures, wings internal braces, DF loop, headrest wall etc. (19) Four parts are grayed out as being excess on the parts trees illustrations.
2 identical steel PE frets letter CC each hold 2 wing flap internal parts.
BM tree is the white metal parts: the pilot figure (in separate torso, head and arm parts), tail wheel yoke, pilot seat, exhaust stacks, landing gear legs, guns, engine bearers etc. (18 parts)
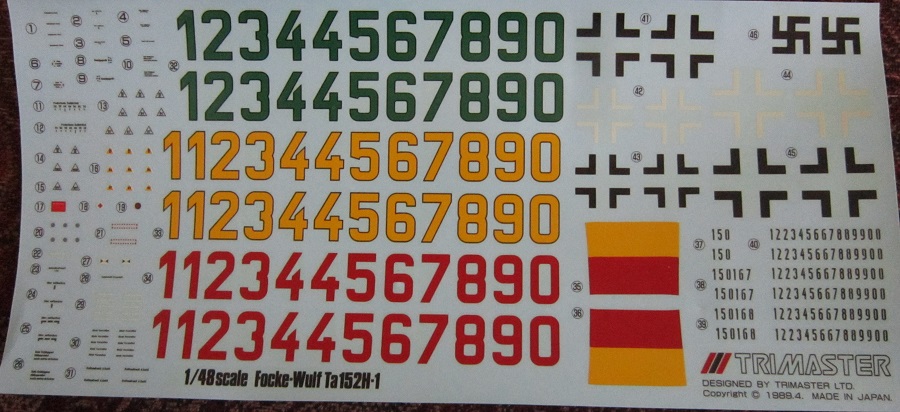
The decal sheet completes the parts in the kit. It holds fuselage numbers from 0 to 9 in red, yellow and black. Also, many stencil markings and the tail swastikas are on the sheet where they are not shown on the box art to keep it politically correct when sold in Germany where the emblem is forbidden to be displayed.
So you can build your own set of markings. Check your resource sources.
Numbers are also provided to make your own werk number for the tail.
Steel PE fret CB holds: the radio aerial, wing flaps inner structures, wings internal braces, DF loop, headrest wall etc. (19) Four parts are grayed out as being excess on the parts trees illustrations.
2 identical steel PE frets letter CC each hold 2 wing flap internal parts.
BM tree is the white metal parts: the pilot figure (in separate torso, head and arm parts), tail wheel yoke, pilot seat, exhaust stacks, landing gear legs, guns, engine bearers etc. (18 parts)
The decal sheet completes the parts in the kit. It holds fuselage numbers from 0 to 9 in red, yellow and black. Also, many stencil markings and the tail swastikas are on the sheet where they are not shown on the box art to keep it politically correct when sold in Germany where the emblem is forbidden to be displayed.
So you can build your own set of markings. Check your resource sources.
Numbers are also provided to make your own werk number for the tail.

This kit was the cat’s pajamas 36 years ago and was much sought after by aircraft modelers. The PE and metal parts were something new to the game back then too,.
I highly recommend this kit to advanced modelers.
I highly recommend this kit to advanced modelers.
Kit was courtesy of my wallet at my local hobby shop.
