
Progressive Build Review of
Bronco Models 1/35th Scale
German Adler Kfz. 13 Armored Car
Kit no. CB35032
By Ray Mehlberger
MSRP: $49.95
By Ray Mehlberger
MSRP: $49.95
HISTORY:
In 1929, the Reichswehr, the regular German army, authorized by the Versailles Treaty, was forbidden to have tanks. Armored cars were allowed, but only for police purposes, and later for the army itself, although in limited armament and quantities. Until then, exercises were often performed with dummy tanks mounted on regular cars. WWI armored cars, Ehrhart and others, were still in service. Nevertheless, the first interwar new “official” armored vehicle design called for a light scout car. Adler proposed its own design, based on the sturdy chassis of the successful commercial model “Standard-6”.
The vehicle was known as the Panzerspahwagen Kfz. 13 (scout armored car).
Adlerwerke, based in Frankfurt-on-Main, chose to use a framework wrapped in armor plates, to create an armored hull with sloped sides for better bullet protection. A quick solution then rendered possible by the way cars were made at that time, moreover for luxury brands was used. The chassis was factory-built and then turned over to specialized bodybuilders and coach builders, sometimes for tailored designs.
Yet, by the standards of 1931, the Kfz. 13 (the Waffenant designation was later changed to Sd.Kfz. 13 for “Special Purpose Vehicle”) received a welded hull, a technology already mastered by Adler.This proved less time consuming and made for a lighter body.
However, the light protection was only capable of stopping small arms infantry fire.
Moreover, for better visibility and strength, the body was of a “bath-tub” style, with no access doors, and completely open topped. This left the crew unprotected against shrapnel. The Standard-6 engine was water-cooled. It was equipped with a four-wheel drive for off-road rides. The early MG-13 machine gun was protected by a short, sloped shield. The driver had a single-vision slit visor, but there was no other apertures in the hull.
During trials, the vehicle proved satisfactory, but it later turned out to have bad ride over average roads and even worse ride off-road. It was more or less relegated to work on paved roads and flat terrain. In all, 147 vehicles left the factory until 1935. There was no evolution during production, although the original MG-13 machine gun was later replaced by the new MG-34.
A few models later received a vertical sloped extension and armored roof, with a large access hatch.
Bronco Models is a model company based in Hong Kong, China.
THE KIT:
This kit comes in a shrink-wrapped tray and lid type box.
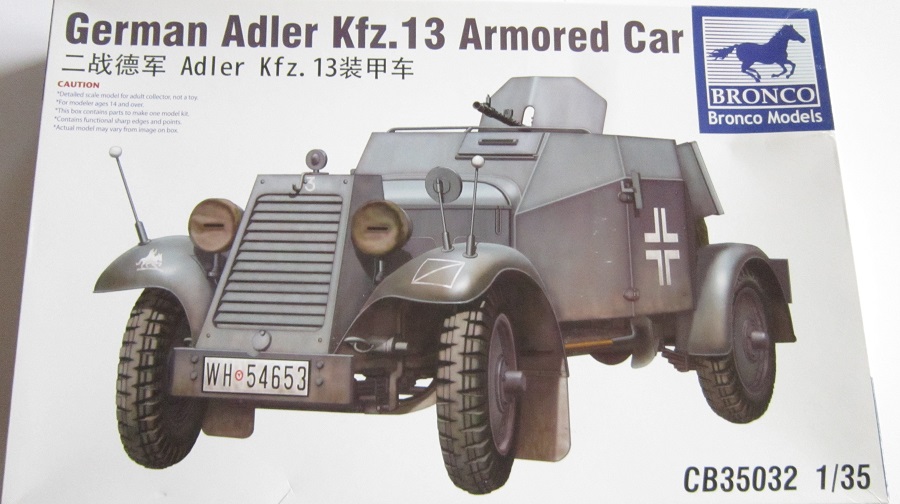
The box art shows a Kfz.13 posed on an all white background. This is similar to how Tamiya does their box arts too. It is overall Panzer grey with a large white skeletal German cross on the sides and the license number WH-54653 on the front. A tactical mark in white of a rectangle with a diagonal line through it is on the right fender. A division mark in white of a man on horseback is on the left front fender. A small white number 3 is above the armored grill.
One side panel says the kit contents include decals and a PE fret and both are illustrated. The kit is said to be for modelers over 14 to adult, in 10 languages including English. Bronco’s street address in Hong Kong, their E-mail and web addresses are provided here.
The other side panel has a small color 3-view of the box art subject, followed by features of the kit:
Optional MG-13 or MG-34 machine guns.
Fully detailed interior.
Hull bottom fully detailed.
Optional side doors can be positioned open or closed.
A warning about sharp edges of parts in the kit says that they should be kept away form kids under 3.
In 1929, the Reichswehr, the regular German army, authorized by the Versailles Treaty, was forbidden to have tanks. Armored cars were allowed, but only for police purposes, and later for the army itself, although in limited armament and quantities. Until then, exercises were often performed with dummy tanks mounted on regular cars. WWI armored cars, Ehrhart and others, were still in service. Nevertheless, the first interwar new “official” armored vehicle design called for a light scout car. Adler proposed its own design, based on the sturdy chassis of the successful commercial model “Standard-6”.
The vehicle was known as the Panzerspahwagen Kfz. 13 (scout armored car).
Adlerwerke, based in Frankfurt-on-Main, chose to use a framework wrapped in armor plates, to create an armored hull with sloped sides for better bullet protection. A quick solution then rendered possible by the way cars were made at that time, moreover for luxury brands was used. The chassis was factory-built and then turned over to specialized bodybuilders and coach builders, sometimes for tailored designs.
Yet, by the standards of 1931, the Kfz. 13 (the Waffenant designation was later changed to Sd.Kfz. 13 for “Special Purpose Vehicle”) received a welded hull, a technology already mastered by Adler.This proved less time consuming and made for a lighter body.
However, the light protection was only capable of stopping small arms infantry fire.
Moreover, for better visibility and strength, the body was of a “bath-tub” style, with no access doors, and completely open topped. This left the crew unprotected against shrapnel. The Standard-6 engine was water-cooled. It was equipped with a four-wheel drive for off-road rides. The early MG-13 machine gun was protected by a short, sloped shield. The driver had a single-vision slit visor, but there was no other apertures in the hull.
During trials, the vehicle proved satisfactory, but it later turned out to have bad ride over average roads and even worse ride off-road. It was more or less relegated to work on paved roads and flat terrain. In all, 147 vehicles left the factory until 1935. There was no evolution during production, although the original MG-13 machine gun was later replaced by the new MG-34.
A few models later received a vertical sloped extension and armored roof, with a large access hatch.
Bronco Models is a model company based in Hong Kong, China.
THE KIT:
This kit comes in a shrink-wrapped tray and lid type box.
The box art shows a Kfz.13 posed on an all white background. This is similar to how Tamiya does their box arts too. It is overall Panzer grey with a large white skeletal German cross on the sides and the license number WH-54653 on the front. A tactical mark in white of a rectangle with a diagonal line through it is on the right fender. A division mark in white of a man on horseback is on the left front fender. A small white number 3 is above the armored grill.
One side panel says the kit contents include decals and a PE fret and both are illustrated. The kit is said to be for modelers over 14 to adult, in 10 languages including English. Bronco’s street address in Hong Kong, their E-mail and web addresses are provided here.
The other side panel has a small color 3-view of the box art subject, followed by features of the kit:
Optional MG-13 or MG-34 machine guns.
Fully detailed interior.
Hull bottom fully detailed.
Optional side doors can be positioned open or closed.
A warning about sharp edges of parts in the kit says that they should be kept away form kids under 3.
WHAT’S IN THE BOX:
First thing you notice is that the box is oversized. There is a large letter L void around the contents.
This kit contains 5 tan parts trees, a brass PE fret, the decal sheet and the instructions.
Trees are nicely packaged in sealed clear cello bags.
The instructions consist of a staple-bound booklet, printed on slick-coated paper. It is 12 pages long in 8 ½” x 12” page format.
Page 1 of the instructions begins with a repeat in color of the box art, followed by the history of the Kfz.13 in English, German and Chinese.
Page 2 begins with decal application instructions in English and Chinese, followed by international assembly symbol explanations in the 2 languages, a suggested color listing of Gunze Sangyo, Mr. Color, Humbrol and Tamiya brands of hobby paints and READ BEFORE ASSEMBLING instructions.
Page 3 is the parts trees illustrations. Almost all the parts on the letter E parts tree are shown shaded-out, meaning they are excess and not needed to complete assembly of the kit. Only the parts for the alternate MG-13 or MG-34 are not shaded. The balance of the parts on tree E are pioneer gear that are excess.
Page 4 through 10 give a grand total of 13 assembly steps.
Page 11 has two full-color 3-views for a couple of painting and marking schemes.
The first one is the box art subject, already described above. It is a vehicle with an unknown unit, France 1940. I would think with the white man on horseback insignia that Bronco would have done some research to find out what Panzer division that was for.
The second scheme shows a vehicle in overall Panzer-grey with a large all white German cross on the sides and a white word “MARDER”. It has a flag frame mounted on the left front fender and the license number WH-180475 and a white tactical symbol is on the front and rear right fenders. It is with another unknown unit, Poland, 1939.
Page 12 has another larger full-color 3-view scheme. It is in overall camouflage scheme of grey, red-brown, blue-green and field yellow. This pattern is also on the canvas spare tire cover on the rear. This vehicle also has the flag frame on the left front fender. The license number is WH-66042. This vehicle is with a unknown unit, training in Germany, 1937.
Bronco really needed to identify the units on these schemes.
Tan letter A parts tree holds: the frame with front fenders attached, the floor, grill, engine compartment hood and side panels, the seat, steering wheel, radiator, axles, dash board, drive shaft etc. (35 parts)
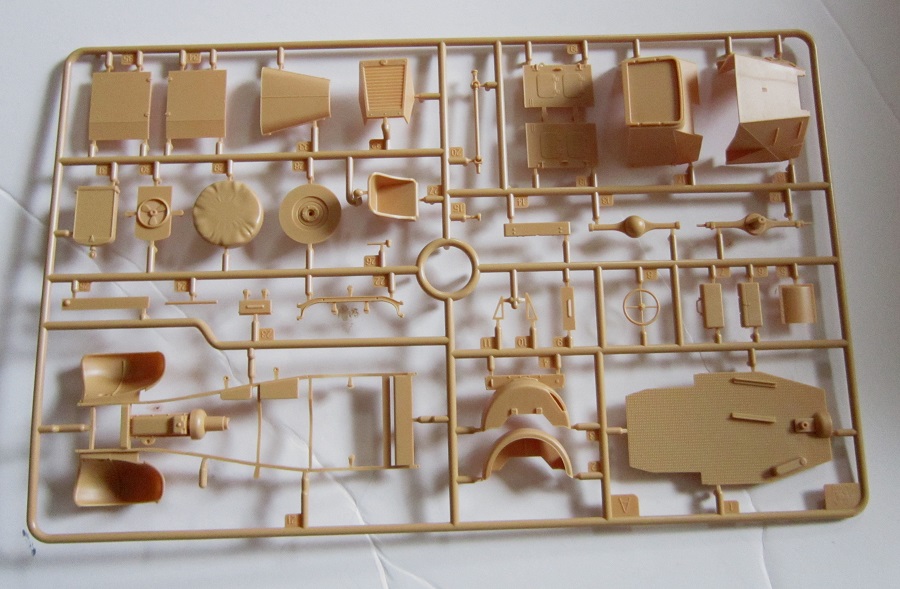
I lost part number A23, which is the driver’s slit visor and contacted Bronco for one. They sent me the WHOLE letter A tree. This tree holds 75% of the parts needed to build the car, minus the tires and a few other parts. So, although a lot of spares, you cannot build a second car…sigh.
Perhaps if you have 4 wheels with tires you might be able to scratch-build enough parts to make a second car.
Tan letter B parts tree Holds: a shovel, the muffler, the MG shield, headlight housings etc. (33 parts)
There are no clear parts for the headlight lenses. Instead the kit provides silted covers.
There are two identical tan letter C parts trees. They each hold: wheel and tire parts, leaf springs etc. (20 parts each).
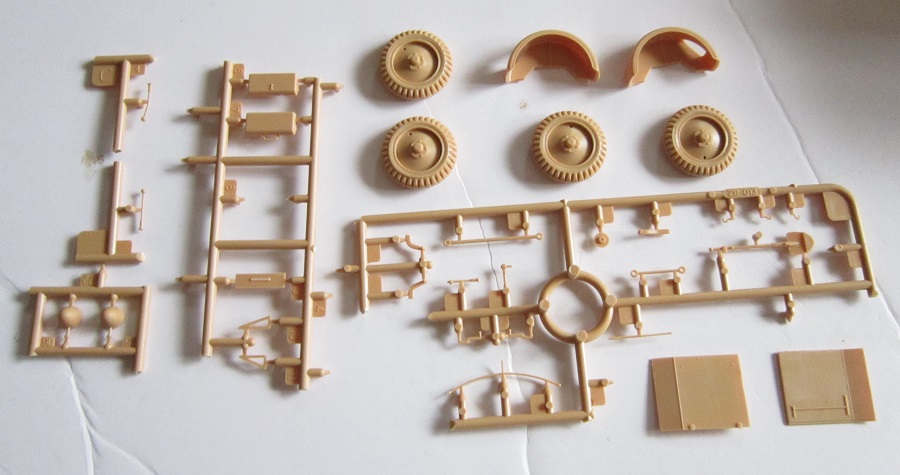
There is no letter D parts tree.
Tan letter E parts tree holds: jerry cans, an anti-tank gun with it’s ammo clips and bipod, 2 canteens, a MP-40 machine pistol, 2 mess kits, a steel helmet, pouches, 6 potato masher type grenades, a shovel, blackout siitted headlight covers. Shift levers, large headlight housings, a gas mask canister, fire extinguisher a jack, parts for the MG-13 and the alternate MG-34 machine guns. Only the 2 MG parts are shown to be used.
Tan letter E parts tree holds: jerry cans, an anti-tank gun with it’s ammo clips and bipod, 2 canteens, a MP-40 machine pistol, 2 mess kits, a steel helmet, pouches, 6 potato masher type grenades, a shovel, blackout siitted headlight covers. Shift levers, large headlight housings, a gas mask canister, fire extinguisher a jack, parts for the MG-13 and the alternate MG-34 machine guns. Only the 2 MG parts are shown to be used.
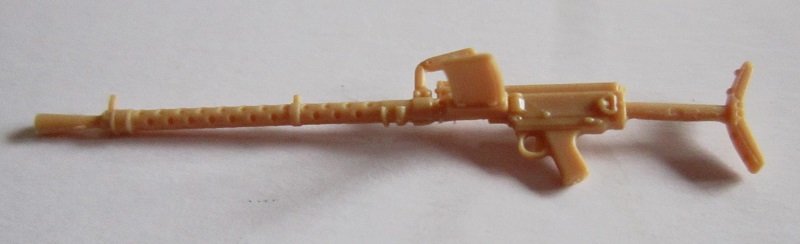
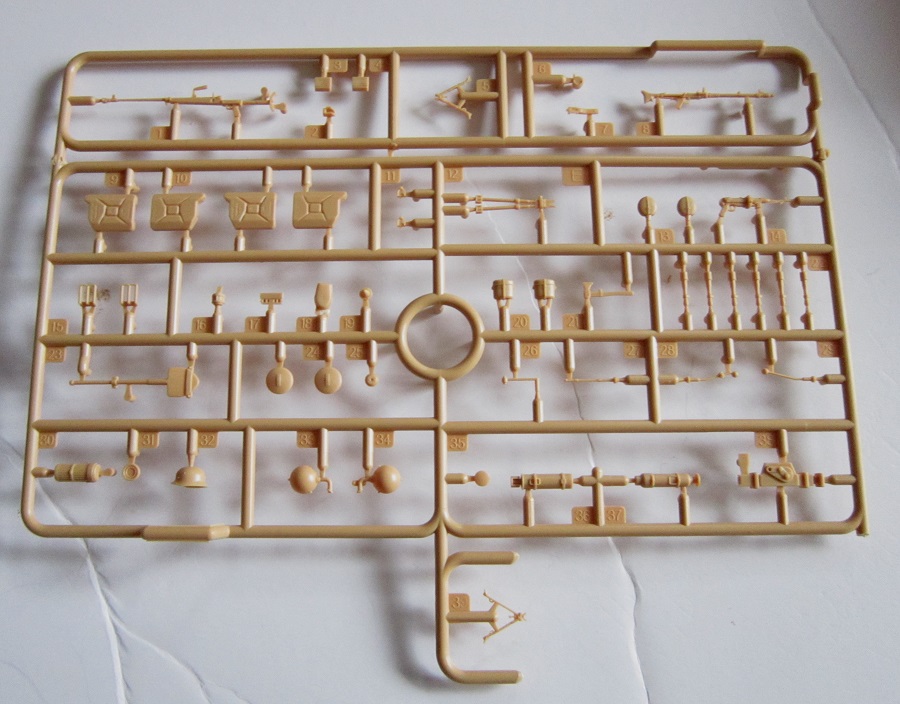
Everything else on the tree is shaded out as being excess. Bronco really could have just put the 2 MG’s in the kit, but it is nice to have all those spares for other projects later. There are 54 parts on this tree and 49 of them are excess!
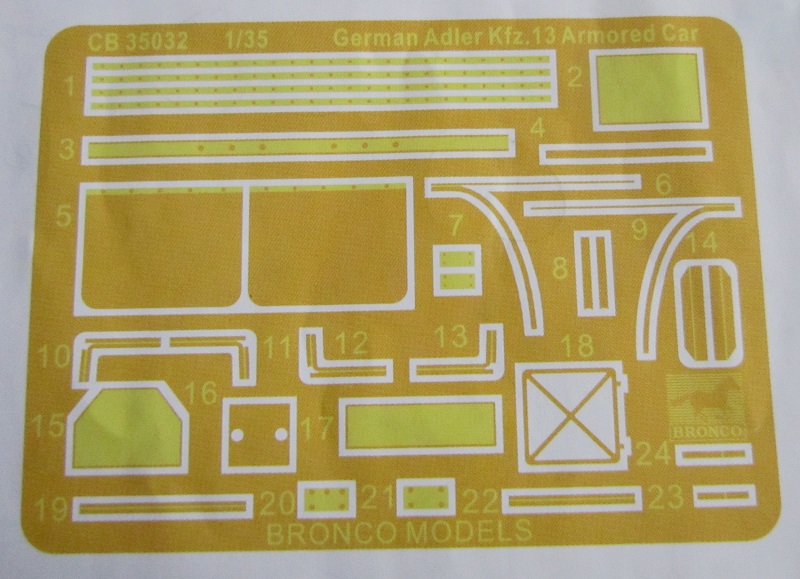
The brass PE fret holds the flag frame, license plates and various brackets (29 parts)
The brass PE fret holds the flag frame, license plates and various brackets (29 parts)
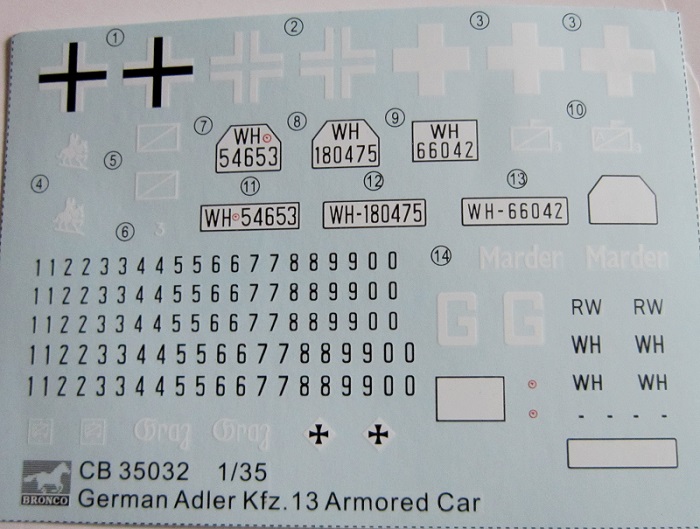
Decal sheet.
THE BUILD:
I started assembly in steps 1 and 2. I glued the leaf springs to the frame, the cross members, drive shaft and rear axle. I also assembled the hood parts and radiator with its armored grill.
The 2 parts number C17 that go inside the front fenders are very tiny and tricky to handle therefore. I lost one and stretched sprue to make another.
Part no. C12 is supposed to move after assembly and not to be glued. It is part of the front steering apparatus. It was a very loose fit, so I went ahead and glued it.
The two PE parts no. P6 are fender braces that are to go inside the front fenders. The have to be folded and curved. A very difficult procedure.
In step 3, I opted for the MG-13 machine gun and assembled it with its shield and ammo box. It and the driver’s seat were glued to the floor along with the shift levers. The location holes in the floor were just cups and needed to be drilled through.
One of the seat supports, part no. C11 was brittle and I broke it in two and had to glue it back together.
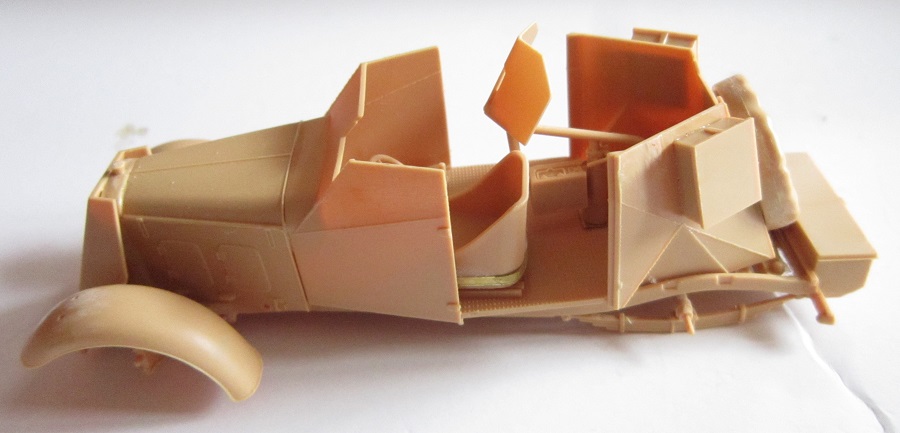
In steps 4 and 5 I assembled the body panels, one of the doors and steering wheel to the dash.
I left one door off to paint it and add it ajar later. There were 2 little box shapes at the top edges of the front and rear body panels that were indicated to remove and sand off, which I did.
In step 6 I glued the hood and armored grill to the frame, the driver’s compartment and added the front bumper and PE license plate. I also added a rear under body panel.
Here I Jumped to step 8 and added the muffler and tail pipe part and some steering assembly small parts..
In step 9 I glued the rims and tire parts together and then stopped assembly.
Step 10 shows you to hot rivet some parts in the steering apparatus. I haven’t done this and think I will probably just glue things. Hot riveting sometimes is a disaster waiting to happen.
In step 11 I glued together some storage boxes and the canvas covered spare tire and added them to the car.
In Step 12 all I did so far was glue the headlight housing and their silted covers together. There is no clear parts for an alternate to the covers.
There is no driver or gunner figure provided in this kit and I think it sorely needs both.
I started assembly in steps 1 and 2. I glued the leaf springs to the frame, the cross members, drive shaft and rear axle. I also assembled the hood parts and radiator with its armored grill.
The 2 parts number C17 that go inside the front fenders are very tiny and tricky to handle therefore. I lost one and stretched sprue to make another.
Part no. C12 is supposed to move after assembly and not to be glued. It is part of the front steering apparatus. It was a very loose fit, so I went ahead and glued it.
The two PE parts no. P6 are fender braces that are to go inside the front fenders. The have to be folded and curved. A very difficult procedure.
In step 3, I opted for the MG-13 machine gun and assembled it with its shield and ammo box. It and the driver’s seat were glued to the floor along with the shift levers. The location holes in the floor were just cups and needed to be drilled through.
One of the seat supports, part no. C11 was brittle and I broke it in two and had to glue it back together.
In steps 4 and 5 I assembled the body panels, one of the doors and steering wheel to the dash.
I left one door off to paint it and add it ajar later. There were 2 little box shapes at the top edges of the front and rear body panels that were indicated to remove and sand off, which I did.
In step 6 I glued the hood and armored grill to the frame, the driver’s compartment and added the front bumper and PE license plate. I also added a rear under body panel.
Here I Jumped to step 8 and added the muffler and tail pipe part and some steering assembly small parts..
In step 9 I glued the rims and tire parts together and then stopped assembly.
Step 10 shows you to hot rivet some parts in the steering apparatus. I haven’t done this and think I will probably just glue things. Hot riveting sometimes is a disaster waiting to happen.
In step 11 I glued together some storage boxes and the canvas covered spare tire and added them to the car.
In Step 12 all I did so far was glue the headlight housing and their silted covers together. There is no clear parts for an alternate to the covers.
There is no driver or gunner figure provided in this kit and I think it sorely needs both.
The copyright date at the bottom of all the pages is 2000.
I recommend this kit to modelers of average building skills.
More to come later.
More to come later.
