
Book Review of
Sherman Medium Tank
Canadian, New Zealand & S. African Armies
Italy, 1943-1945
Author: Dennis Oliver
Copyright: 2023
MSRP: $29.99
HISTORY:
The M4 Sherman, officially Medium Tank, M4, was the most widely used medium tank by the United States and Western Allies in World War II. The M4 Sherman proved to be reliable, relatively cheap to produce, and available in great numbers. It was also the basis of several other armored fighting vehicles including self-propelled artillery, tank destroyers, and armored recovery vehicles. Tens of thousands were distributed through the Lend-Lease program to the British Commonwealth and Soviet Union. The tank was named by the British after the American Civil War General William Tecumseh Sherman.
The M4 Sherman evolved from the M3 Medium Tank,[a] which – for speed of development – had its main armament in a side sponson mount. The M4 retained much of the previous mechanical design, but moved the main 75 mm gun into a fully traversing central turret. One feature, a one-axis gyrostabilizer, was not precise enough to allow firing when moving but did help keep the gun aimed in roughly the right direction for when the tank stopped to fire. The designers stressed reliability, ease of production and maintenance, durability.
Standardization of parts and ammunition in a limited number of variants, and moderate size and weight (to facilitate shipping and for compatibility with existing bridging equipment size and weight limit restrictions. These factors, combined with Sherman's then-superior armor and armament, outclassed German light and medium tanks fielded in 1939–42. The M4 was the most-produced tank in American history, with 49,324 produced (including variants); During World War II, the Sherman spearheaded many offensives by the Allies after 1942.
When the M4 tank went into combat in North Africa with the British Army at the Second Battle of El Alamein in late 1942, it increased the advantage of Allied armor over Axis armor and was superior to the lighter German and Italian tank designs. For this reason, the US Army believed that the M4 would be adequate to win the war, and relatively little pressure was initially exerted for further tank development. Logistical and transport restrictions, such as limitations imposed by roads, ports, and bridges, also complicated the introduction of a more capable but heavier tank.
Tank destroyer battalions using vehicles built on the M4 hull and chassis, but with open-topped turrets and more potent high-velocity guns, also entered widespread use in the Allied armies. Even by 1944, most M4 Shermans kept their dual-purpose 75 mm gun. By then, the M4 was inferior in firepower and armor to increasing numbers of German upgraded medium tanks and heavy tanks but was able to fight on with the help of considerable numerical superiority, greater mechanical reliability, better logistical support, and support from growing numbers of fighter-bombers and artillery pieces.
Later in the war a more effective armor-piercing gun, the 76 mm gun M1, was incorporated into production vehicles. For anti-tank work, British refitted Shermans with a 76.2 mm Ordnance QF 17-pounder gun (as the Sherman Firefly). Some were fitted with a 105 mm gun to act as infantry support vehicles.
The relative ease of production allowed large numbers of the M4 to be manufactured, and significant investment in tank recovery and repair units allowed disabled vehicles to be repaired and returned to service quickly. These factors combined to give the Allies numerical superiority in most battles, and many infantry divisions were provided with M4s and tank destroyers. By 1944, a typical U.S. infantry division had attached for armor support an M4 Sherman battalion, a tank destroyer battalion, or both.
After World War II, the Sherman, particularly the many improved and upgraded versions, continued to see combat service in many conflicts around the world, including the U.N forces in the Korean War, with Israel in the Arab–Israeli wars, briefly with South Vietnam in the Vietnam War, and on both sides of the Indo-Pakistani War of 1965.
SPECIFICATIONS:
Type: Medium tank
Place of origin: United States
In service: 1942–1957 (United States)
Used by: United States, and many others
Wars: World War II, Indonesian National Revolution, Greek Civil War, First Indochina War, 1948 Arab–Israeli War, Korean War, Cuban Revolution, Revolución Libertadora, Suez Crisis, 1958 Lebanon crisis, Nicaraguan Revolution, Indo-Pakistani War of 1965, Six-Day War, Indo-Pakistani War of 1971, Yom Kippur War, Lebanese Civil War, Uganda–Tanzania War, Iran–Iraq War
Designer: U.S. Army Ordnance Department
Designed: 1940
Manufacturer: American Locomotive Company, Baldwin Locomotive Works, Detroit Tank Arsenal, Federal Machine and Welder Company, Fisher Tank Arsenal, Ford Motor Company, Lima Locomotive Works, Pacific Car and Foundry Company, Pressed Steel Car Company, Pullman-Standard Car Company
Unit cost: $44,556–64,455 in 1945 dollars, depending upon variant ($607,861–879,336 in 2017 dollars)
Produced: September 1941 (prototype), February 1942 – July 1945
No. built: 49,234, excluding prototype
Mass: 66,800–84,000 lb (33.4–42.0 short tons, 30.3–38.1 tonnes) depending upon variant
Length: 19 ft 2 in–20 ft 7 in (5.84–6.27 m) depending upon variant
Width: 8 ft 7 in (2.62 m) to 9 ft 10 in (3.00 m) depending upon variant
Height: 9 ft 0 in–9 ft 9 in (2.74–2.97 m) depending upon variant
Crew: 5 (commander, gunner, loader, driver, assistant driver/bow gunner)
Armor: 12.7 to 177.8 mm (0.50 to 7.00 in) depending on location and variant
Main armament: 75 mm gun M3 (90–104 rounds) or 76 mm gun M1A1, M1A1C, or M1A2 (71 rounds) or 105 mm howitzer M4 (66 rounds)
Secondary armament: .50 caliber Browning M2HB machine gun (300–600 rounds), 2-4.30 caliber Browning M1919A4 machine guns (6,000–6,750 rounds) depending on variant
Engine: M4 and M4A1 model: Continental R975-C1 or -C4 9 cylinder radial gasoline engine of 350 or 400 hp (261 or 298 kW) at 2,400 rpm, M4A2 model: General Motors 6046 twin inline diesel engine; 375 hp (280 kW) at 2,100 rpm, M4A3 model: Ford GAA V8 gasoline engine; 450 hp (336 kW) at 2,600 rpm, M4A4 model: Chrysler A57 multibank ~(30 cylinder) gasoline engine; 370 hp (276 kW) at 2,400 rpm, M4A6 model: Caterpillar D-200A (Wright RD-1820) 9 cylinder radial diesel engine; 450 hp (336 kW) at 2,400 rpm
Power/weight: 10.46–13.49 hp/short ton (8.60–11.09 kW/t) depending upon variant
Transmission: Spicer manual synchromesh transmission, 5 forward and 1 reverse gears
Suspension: Vertical volute spring suspension (VVSS) or horizontal volute spring suspension (HVSS)
Fuel capacity: 138–175 US gal (520–660 l; 115–146 imp gal) depending upon variant
Operational range: Road: 100–150 mi (160–240 km) depending upon variant, Cross-country: 60–100 mi (97–161 km) depending upon variant
Maximum speed: 22–30 mph (35–48 km/h) on road, depending upon variant
THE BOOK:
Pen & Sword Books is located in the UK.
This book is of soft-cover. It is in 65 pages in 8” x 11 ¾” page format.
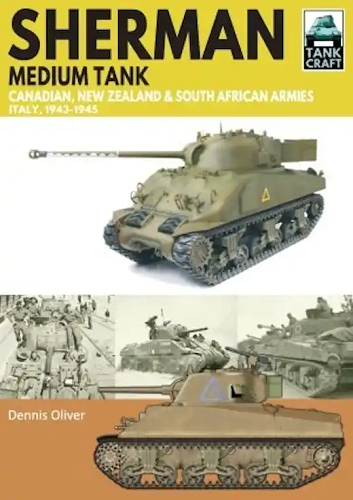
The cover art shows at the top Gary Boxall’s 1/35th scale model depicting a Sherman III of the 20th New Zealand Armoured Regiment. Other images of this model are reproduced in the Model Showcase section of the book,The photographs in the center depict, from left to right, tanks of the 4th New Zealand Tank Brigade lined up near the port of Trieste in May 1945. A Sherman V of C Squadron, 11th Armoured Regiment (the Ontario Regiment), 1st Canadian Armoured Brigade in Southern Italy in late 1943. Sherman VC Fireflies of C Squadron, the Pretoria Regiment, 11th South African Armoured Brigade.
The illustration at the foot of the cover art depicts a Sherman V of 14th Armoured Regiment (the Three Rivers Regiment) of 1st Canadian Armoured Brigade.
The colors used on these tanks are discussed in detail in the Camouflage & Markings and Technical Details and Modifications sections of this book.
The back cover shows a black and white photo at the top of a tank crew from 18th Armoured Regiment, of the 4th New Zealand Brigade, photographed after the fighting for Cassino in the summer of 1944. The Sherman III in the background is one of the 19th Armoured Regiment tanks abandoned after an earlier attempt to take the town. The photo-etched brass upgrade set for Dragon Models 1/35th scale Sherman IC Firefly produced by E.T. Model. Major General Bert Hoffmeister, commanding officer of5th Canadian Armoured Division, photographed with his Sherman V tank, The name VANCOUVER is painted on the transmission cover. This vehicle is also shown in the Camouflage & Markings section of this book. A Sherman V Observation Post (AOP) of 4/22 Field Artillery Regiment, 6th South African Armoured Division.
Inside the book there are 76 black and white photos and 81 color ones.
There is one line drawing, 5 charts of unit make-ups done with black silhouettes of the tanks in the units.
In the color profiles section there are 10 pages with a total of 30 profile illustrations.
The first page shows 3 Sherman V’s.
The first one is a 3-view in a camouflage of a base of stone with black blotch pattern.
It has a British Air Force roundel on top of the turret, a stenciled white circle on the box, a black triangle with a white 2 on it on the side of the turret, a yellow CC8|1|6 on the forward end of the side of the hull, followed by a rectangle that is divided into red, white, red and a white serial no. T-146563. Above these is the white word ATLAS. It was with A Squadron, 11th Armoured Regiment, (the Ontario Regiment), 1st Canadian Armoured Brigade, Sicily, August 1943.
The second one is in U.S. Army type olive-drab. It has a black circle, outlined in red, with a white no. 15 on it on the side of the turret, a white serial no. T-136514 followed by a rectangle that is divided into red, white, red, large white CONDOR over white CC14|1/2. It was with C Squadron, 11th Armoured Regiment, (the Ontario Regiment), 1st Canadian Armoured Brigade, Sicily, August 1943.
The third one is in the same scheme as the second one. It has a black circle, outlined in yellow on the side of the turret, a yellow CCE|1|14, under a white COBALT, followed by a rectangle, divided into red, white, red and a white serial no. T-147345 on the side of the hull. It was with C Squadron, 12th Armoured Regiment, (The Tree-rivers Regiment), 1st Canadian Armoured Brigade, Sicily, August 1942.
A black and white photo of the Swabey-sight having maintenance is in the upper right corner of the page.
Page 2 shoes profiles of 3 more V type Shermans and a row of squares that are divided into the top being blue and the bottom red. With the white numbers 172 trough to 175, also a red square with a yellow maple leaf on it.
The first 2-view is overall olive drab. It has a black triangle, outlined in red, with a white 4 on it on the side of the turret, white serial no. T-147477 followed by the red, white, red triangle, yellow , below a black rectangle with white ACE on it on the hull side. It was with A Squadron, 11th Armoured Regiment, (The Ontario Regiment), 1st Canadian Armoured Brigade, Sicily, August 1943.
The second 2-view shows a RAF roundel on top of the turret. The tank is in a camouflage of light and dark brown wave pattern. It has a black triangle, outlined in grey, with a white 14 on it on the side of the turret, white serial no. T-147294 over the red, white, red triangle that is followed by white ADJUNCT on the side of the hull. It was with A Squadron, 14th Armoured Regiment, (The Calgary Regiment), 1st Canadian Armoured Brigade, Italy, September 1943.
The third 2-view is overall olive-drab, with a white diamond on the side of the turret and rear of the hull, a white serial no. T-148367 followed by the red, white, red rectangle, some unreadable text (too small to make out) and white DEFIANT on the side of the hull. It was with Brigade Headquarters, 1st Canadian Armored Brigade, Italy, early 1944.
The third page of the profile section shows three more V type Shermans.
The first one is a two-view in overall olive-drab. It has a white diamond outlined with a no. 9 on it on the side of the turret. A white serial no. T-147638 over white VANCOUVER on the sides of the hull. A black square with white 40 on it on the left of its nose, white VANCOUVER repeated in the center of the nose and a black square with a yellow maple leaf on it on the right of the nose. It was with Divisional Headquarters, 5th Canadian Armoured Division, Italy, early 1944.
The second one is just a side-view profile. It too is overall olive-drab. It has a black circle, outlined in yellow on the side of the turret, a white serial no. T-147291 done twice, with one over the other one, followed by the red.white and red rectangle and CHALLENGER on the side of the hull. It was with 5th Armoured Brigade Headquarters, 2nd Armoured Regiment (Lord Strathcona’s Horse), 5th Armoured Regiment (8th Princess Louis’s (New Brunswick) Hussars) and 9th Armoured Regiment (The British Columbia Dragoons).
The third one is a two-view in a camouflage of light mud with black blotch pattern. It has an outlined yellow square with a white no. 2 on it, on the side and rear of the turret. It was with B Squadron, 5th Armoured Brigade, Italy, December 1944.
Across the top of the page is a black square with a yellow maple leaf on it and five more black squares with numbers 40, 50, 51, 52 and 53 in white on them.
The fourth page of profiles begins with a side profile of a Sherman II type. It is overall olive-drag. It just has the name COBOURC III on the side of its hull. It was with C Squadron, 3rd Armoured Reconnaissance Regiment, (The Governor General’s Horse Guards), 5th Canadian Armoured Division, Italy, Spring 1945.
The second one is also a side-view of a Sherman V type. It is in overall olive-drab with a white 0 on the side of the turret and a white serial no. T14747 on the side of the hull. It was with the 5th Canadian Armoured Brigade, Italy 1945.
The third one is a Sherman II type. It is a 2-view. It has a white circled star on top of the turret, a white BUNYON on the side of the hull, followed by white serial no. T 264813. It was with B Squadron, 3rd Armoured Reconnaissance Regiment, (The Governor General’s Horse Guards), 5th Canadian Armoured Division, Italy, Spring 1945.
There is also illustrated a square divided in half with a red top and blue bottom with a white 45 on it shown.
The fifth page of the profile section begins with a black and white photo of mechanics working on a Sherman.
Pen & Sword Books is located in the UK.
This book is of soft-cover. It is in 65 pages in 8” x 11 ¾” page format.
The cover art shows at the top Gary Boxall’s 1/35th scale model depicting a Sherman III of the 20th New Zealand Armoured Regiment. Other images of this model are reproduced in the Model Showcase section of the book,The photographs in the center depict, from left to right, tanks of the 4th New Zealand Tank Brigade lined up near the port of Trieste in May 1945. A Sherman V of C Squadron, 11th Armoured Regiment (the Ontario Regiment), 1st Canadian Armoured Brigade in Southern Italy in late 1943. Sherman VC Fireflies of C Squadron, the Pretoria Regiment, 11th South African Armoured Brigade.
The illustration at the foot of the cover art depicts a Sherman V of 14th Armoured Regiment (the Three Rivers Regiment) of 1st Canadian Armoured Brigade.
The colors used on these tanks are discussed in detail in the Camouflage & Markings and Technical Details and Modifications sections of this book.
The back cover shows a black and white photo at the top of a tank crew from 18th Armoured Regiment, of the 4th New Zealand Brigade, photographed after the fighting for Cassino in the summer of 1944. The Sherman III in the background is one of the 19th Armoured Regiment tanks abandoned after an earlier attempt to take the town. The photo-etched brass upgrade set for Dragon Models 1/35th scale Sherman IC Firefly produced by E.T. Model. Major General Bert Hoffmeister, commanding officer of5th Canadian Armoured Division, photographed with his Sherman V tank, The name VANCOUVER is painted on the transmission cover. This vehicle is also shown in the Camouflage & Markings section of this book. A Sherman V Observation Post (AOP) of 4/22 Field Artillery Regiment, 6th South African Armoured Division.
Inside the book there are 76 black and white photos and 81 color ones.
There is one line drawing, 5 charts of unit make-ups done with black silhouettes of the tanks in the units.
In the color profiles section there are 10 pages with a total of 30 profile illustrations.
The first page shows 3 Sherman V’s.
The first one is a 3-view in a camouflage of a base of stone with black blotch pattern.
It has a British Air Force roundel on top of the turret, a stenciled white circle on the box, a black triangle with a white 2 on it on the side of the turret, a yellow CC8|1|6 on the forward end of the side of the hull, followed by a rectangle that is divided into red, white, red and a white serial no. T-146563. Above these is the white word ATLAS. It was with A Squadron, 11th Armoured Regiment, (the Ontario Regiment), 1st Canadian Armoured Brigade, Sicily, August 1943.
The second one is in U.S. Army type olive-drab. It has a black circle, outlined in red, with a white no. 15 on it on the side of the turret, a white serial no. T-136514 followed by a rectangle that is divided into red, white, red, large white CONDOR over white CC14|1/2. It was with C Squadron, 11th Armoured Regiment, (the Ontario Regiment), 1st Canadian Armoured Brigade, Sicily, August 1943.
The third one is in the same scheme as the second one. It has a black circle, outlined in yellow on the side of the turret, a yellow CCE|1|14, under a white COBALT, followed by a rectangle, divided into red, white, red and a white serial no. T-147345 on the side of the hull. It was with C Squadron, 12th Armoured Regiment, (The Tree-rivers Regiment), 1st Canadian Armoured Brigade, Sicily, August 1942.
A black and white photo of the Swabey-sight having maintenance is in the upper right corner of the page.
Page 2 shoes profiles of 3 more V type Shermans and a row of squares that are divided into the top being blue and the bottom red. With the white numbers 172 trough to 175, also a red square with a yellow maple leaf on it.
The first 2-view is overall olive drab. It has a black triangle, outlined in red, with a white 4 on it on the side of the turret, white serial no. T-147477 followed by the red, white, red triangle, yellow , below a black rectangle with white ACE on it on the hull side. It was with A Squadron, 11th Armoured Regiment, (The Ontario Regiment), 1st Canadian Armoured Brigade, Sicily, August 1943.
The second 2-view shows a RAF roundel on top of the turret. The tank is in a camouflage of light and dark brown wave pattern. It has a black triangle, outlined in grey, with a white 14 on it on the side of the turret, white serial no. T-147294 over the red, white, red triangle that is followed by white ADJUNCT on the side of the hull. It was with A Squadron, 14th Armoured Regiment, (The Calgary Regiment), 1st Canadian Armoured Brigade, Italy, September 1943.
The third 2-view is overall olive-drab, with a white diamond on the side of the turret and rear of the hull, a white serial no. T-148367 followed by the red, white, red rectangle, some unreadable text (too small to make out) and white DEFIANT on the side of the hull. It was with Brigade Headquarters, 1st Canadian Armored Brigade, Italy, early 1944.
The third page of the profile section shows three more V type Shermans.
The first one is a two-view in overall olive-drab. It has a white diamond outlined with a no. 9 on it on the side of the turret. A white serial no. T-147638 over white VANCOUVER on the sides of the hull. A black square with white 40 on it on the left of its nose, white VANCOUVER repeated in the center of the nose and a black square with a yellow maple leaf on it on the right of the nose. It was with Divisional Headquarters, 5th Canadian Armoured Division, Italy, early 1944.
The second one is just a side-view profile. It too is overall olive-drab. It has a black circle, outlined in yellow on the side of the turret, a white serial no. T-147291 done twice, with one over the other one, followed by the red.white and red rectangle and CHALLENGER on the side of the hull. It was with 5th Armoured Brigade Headquarters, 2nd Armoured Regiment (Lord Strathcona’s Horse), 5th Armoured Regiment (8th Princess Louis’s (New Brunswick) Hussars) and 9th Armoured Regiment (The British Columbia Dragoons).
The third one is a two-view in a camouflage of light mud with black blotch pattern. It has an outlined yellow square with a white no. 2 on it, on the side and rear of the turret. It was with B Squadron, 5th Armoured Brigade, Italy, December 1944.
Across the top of the page is a black square with a yellow maple leaf on it and five more black squares with numbers 40, 50, 51, 52 and 53 in white on them.
The fourth page of profiles begins with a side profile of a Sherman II type. It is overall olive-drag. It just has the name COBOURC III on the side of its hull. It was with C Squadron, 3rd Armoured Reconnaissance Regiment, (The Governor General’s Horse Guards), 5th Canadian Armoured Division, Italy, Spring 1945.
The second one is also a side-view of a Sherman V type. It is in overall olive-drab with a white 0 on the side of the turret and a white serial no. T14747 on the side of the hull. It was with the 5th Canadian Armoured Brigade, Italy 1945.
The third one is a Sherman II type. It is a 2-view. It has a white circled star on top of the turret, a white BUNYON on the side of the hull, followed by white serial no. T 264813. It was with B Squadron, 3rd Armoured Reconnaissance Regiment, (The Governor General’s Horse Guards), 5th Canadian Armoured Division, Italy, Spring 1945.
There is also illustrated a square divided in half with a red top and blue bottom with a white 45 on it shown.
The fifth page of the profile section begins with a black and white photo of mechanics working on a Sherman.
There are four black squares along the top of the page that have a white leaf over white numbers 65, 80, 91 and 52 on them, another solid black square is illustrated in the left hand lower corner of the page with a white 50 on it. This symbol is on the right side of the nose of the 2-view profile.
The first illustration is a 2-view of a Sherman III. It is in a camouflage of light-mud and black wave pattern. It has a yellow circle with a white 10 on it on the turret side and a large no. 8 on the hull side. It was with C Squadron, 19th Armoured Regiment, 4th New Zealand Armoured Brigade, Italy, Spring 1944.
The second profile is a side-view, also of a Sherman III. It is in a camouflage of green and brown wave pattern. Which was short-lived in use. It has a white 442 over 2 small circles that are divided into 4 sections, two sections in red and two in white, followed by white serial no. T-152596 on the side of the hull.
The sixth page of the color profiles section shows two 2-views.
The both are overall olive-drab and are Sherman III type.
The first one has a red outlined circle on the side of the turret, maintenance info that says: This vehicle is filled with anti-freeze 1/3 and 2/3 and should not be drained. Next to a large white letter T and white serial no. T-150925 followed by a large red no. 7 that is outlined in white on the side of the hull. It has a black square with a white leaf over white no. 91 on the right side of its nose. It was with Headquarters Squadron, 20th Armoured Regiment, 4th New Zealand Armoured Brigade, Italy, Summer 1944.
The second one has a pale blue triangle on the side of its turret and a pale blue no. 17 on the side of the hull, followed by a white serial no. T-269633 on the side of the hull. It was with C Squadron, 18th Armoured Regiment, 8th New Zealand Armoured Brigade, early summer 1944.
The seventh page of the color profiles section shows three 2-views.
The first one is a Sherman VC type. It is overall olive-drab. It has a yellow outlined circle with yellow 9 on it on the turret side. A yellow no. 7 on the hull side. Both of these repeated on the back of the hull too. Also on the back there is a black and red rectangle with a white leaf over a white 80 on it. It was with C Squadron, 19th Armoured Regiment, 4th New Zealand Armoured Brigade, Italy, early 1945.
The second one is almost an exact copy of the first Sherman. However the hull number is a yellow 5. It was also with the same unit as the first one.
The third one is a Sherman III Kangaroo, in a camouflage wave pattern of mud and black. It has a large white square with white T2 next to it on the side of the hull. The white square is repeated on its rear. This tank has its turret gone. It was with the 28th Assault Squadron, New Zealand Engineers, Italy, Spring 1945.
The eighth page of the color profile section shows two 2-views.
They are both Sherman V’s. Both are in camouflages of mud and black blotch pattern.
The first one has a outlined yellow circle with a yellow 4 and triangle on it on the side of the turret, a blue and red square with white no. 78 on it on the left side of its nose and a white square with yellow triangle that has a red border on the left on its nose. It was with C Squadron, The Pretoria Regiment (Princess Alice’s Own), 11th South African Armoured Brigade, Italy, spring 1944.
The second one just has a circle that is red at the top and blue at the bottom, outlined in white with an X on it. It was with Armoured Observation Post (AOP), 7/23 Medium Artillery Regiment, 6th South Africa Armoured Division, Italy, Spring 1944. Down the right side of the page there are 5 square insignias; the white square with yellow triangle bordered in red, one divided into red at the top and blue at the bottom with a white 78 on it, a diamond shape, divided the same in the same colors with a white letter Z on it, a circle divided the same with a white X on it and one divided the same with a white 76 on it.
The ninth page in the color profiles section shows three profiles.
All 3 are overall olive-drab.
The first one is a 2-view of a Sherman V. it has a yellow RAT 3, followed by a circle divided into red at the top and blue at the bottom, outlined in white with white letters XB on it on the side of the turret. A small white square with a olive-drab circle in the center and 4 arms around its edges and a sun-burst of 5 small stars on the side of the hull and a white square with a yellow triangle outlined in red on its rear. It was with AOP 4/22 Field Artillery Regiment, 6th South African Armoured Division, Italy, late 1944.
The second one is a Sherman IIA . It is a side view. It has an outlined white circle with letter A on it on the side of the turret and no other markings shown. It was with C Squadron, Special Service Battalion, 11th South African Armoured Brigade, Italy, Spring 1945.
The third one is a Sherman VC. It was with the Pretoria Regiment (Princess Alice’s Own), 11th South Africa Armoured Brigade, Italy, Spring 1945.
Across the top of the page there are 5 square insignia and a wood sign board. The first square is black with white no. 40 on it. The second square is red at the top and blue at the bottom with white 45 on it. The next 3 squares are red with white no. 50, 51 and 52 on them. The wood sign has a red circle outlined in white with a red square with a white 53 on it.
The tenth page of the color profiles section has three more profiles on it.
The Sherman’s are all olive-drab.
The first one is a side-view of a Sherman V. It Has a yellow of a dome shaped symbol on the side of its turret, a white WALRUS and white serial no. T-269487 on the side of the hull. It was with D Squadron, The Pretoria Regiment, (Princess Alice’s Own), 11th South African Armoured Brigade, Italy, Spring 1945.
The second one is a Sherman II. It is a 2-view. It has a red outlined square on the side of the turret. A red square with white 51 on it on the left of its nose and a white square with a yellow triangle outlined in white on it on the right of its nose. It was with B Squadron, Prince Alfred’s Guard, 11th South African Armoured Brigade, Italy, Spring 1945.
The third one is a Sherman IIA. It is 2-view. It just shows an outlined yellow square on the side of the turret. The illustration of its rear shows no markings. Strange to have included it. It was
The last page of the book shows 12 black and white cover arts of other Pen & Sword books and a listing of the names of 30 more..
Neat book on Sherman's used by other countries. It will be of interest to modelers and military historians alike.
I sincerely wish to thank Casemate Publishers for this review sample. They are the N. American distributor of Pen & Sword Books and all Pen & Sword titles can be viewed on Casemate’s website at:
Highly recommended.
