
Building a 15 mm Desert Diorama
John Kelley
I wanted to make a desert diorama a couple of years ago for some 15 mm models I had just finished but I found little information on making a desert diorama on the web or in books. I did find quite a few photos of desert landscapes which helped greatly. After showing it to my club one of our members asked how I built it and what materials I used. I thought it might be a good idea to do another one only this time explain the process I went through to make it. While this diorama has vehicles and figures on it we will concentrate on building the base rather than assembling and finishing them. This is a relatively low budget diorama using craft store and home center materials, some of which can be used around the home for their intended purposes or on future diorama projects. It is easy to do and only takes a few days to complete. There is not a great deal of skill involved in making a diorama, just patience,research and good planning. The methods I used here can be utilized in larger scales; I just preferred the Sci-Fi theme to historical models, so lets get started.
Planning
In any diorama planning is an essential element and should include a story that the viewer can readily see. I went through a couple of ideas before deciding on a finale concept. Much of this planning involved sketching plans on paper while watching T.V. and finally adding the parts to the base to check if the idea was feasible. After rethinking the plan several times the idea eventually matured into the final product. At first I had planned on mounting three vehicles but it seemed too lifeless and with little direction so I reduced the vehicles to two which made the base less crowded, but it was still lacking something.
In any diorama planning is an essential element and should include a story that the viewer can readily see. I went through a couple of ideas before deciding on a finale concept. Much of this planning involved sketching plans on paper while watching T.V. and finally adding the parts to the base to check if the idea was feasible. After rethinking the plan several times the idea eventually matured into the final product. At first I had planned on mounting three vehicles but it seemed too lifeless and with little direction so I reduced the vehicles to two which made the base less crowded, but it was still lacking something.
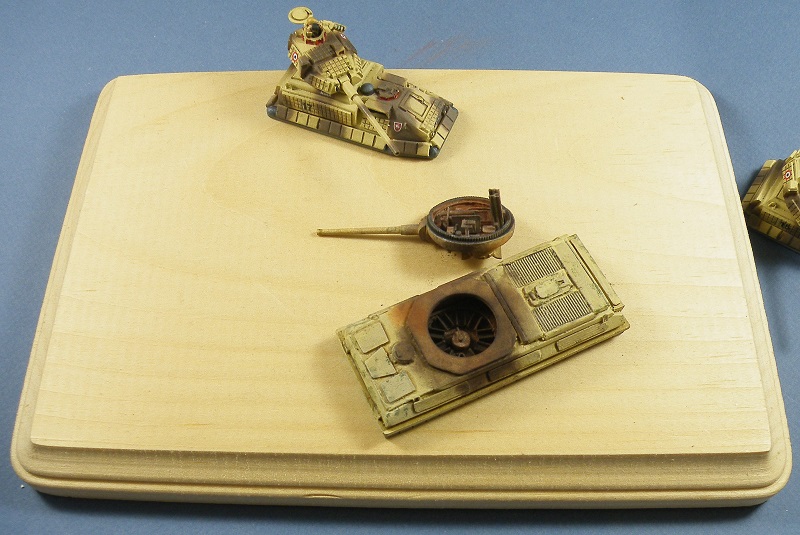
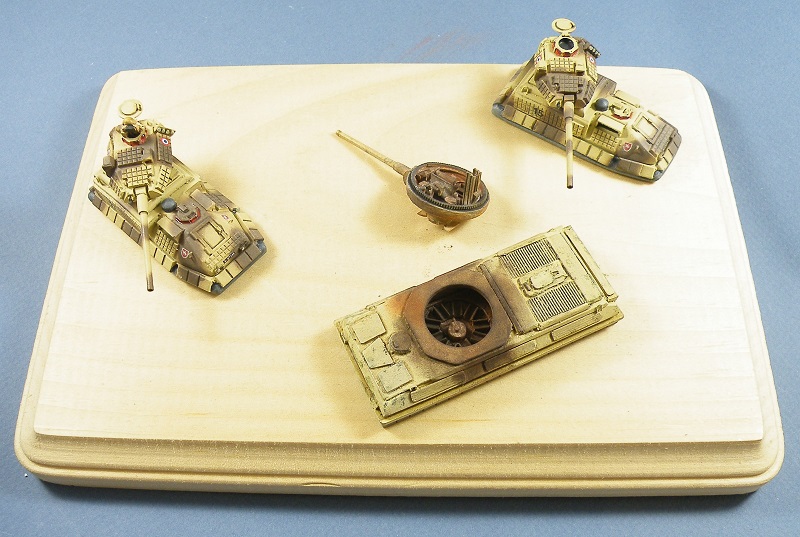
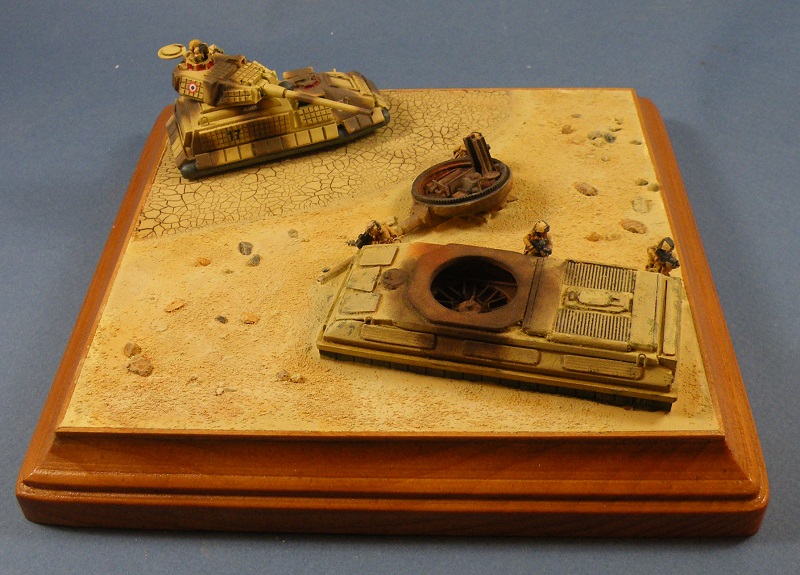
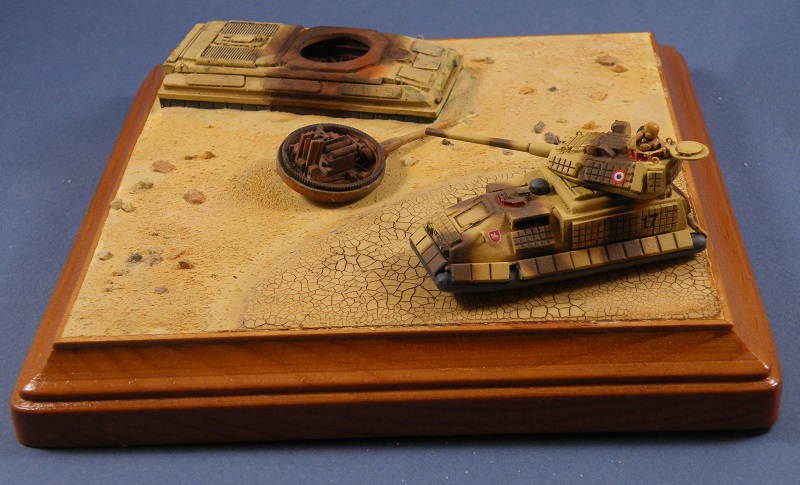
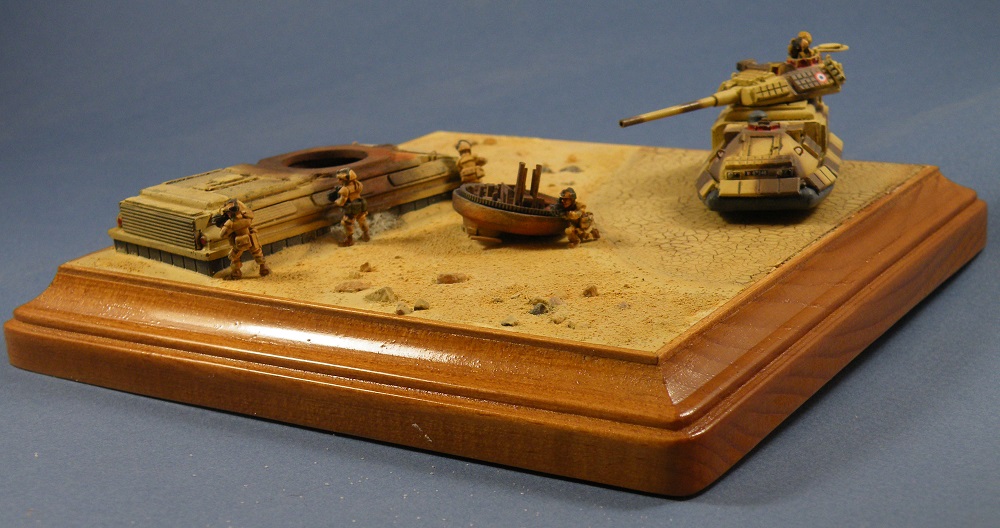
Figures! That's what it needed! So I added four figures to direct the viewers eyes to the direction of the conflict and add the needed life to the diorama. You will notice in the final version, sans figures, it is much more compact and each component of the base is at an angle to the viewer. Setting the vehicles and figures at an angle creates a more visually interesting diorama.
Materials list
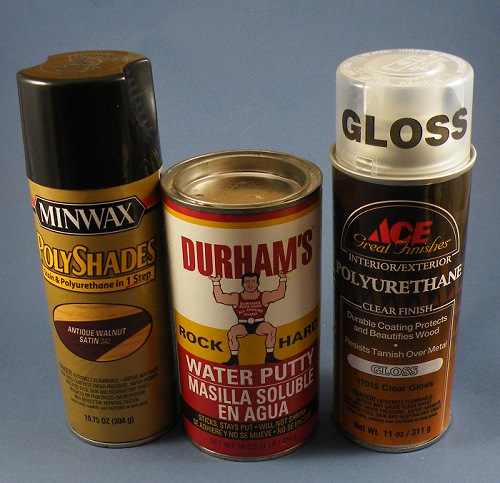
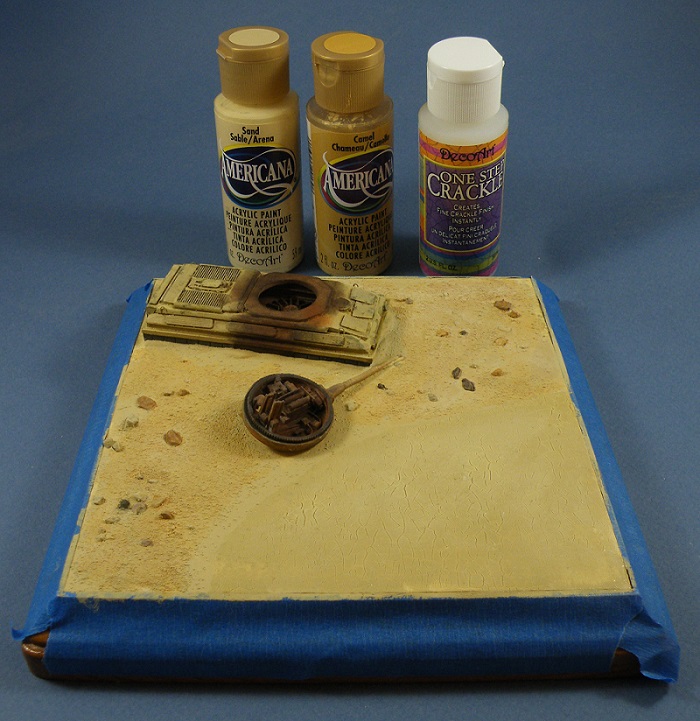
Every modeler that builds a diorama will have their own preferred materials and methods to build the base ground work. I too have my own preferences and for this base I used was Durham's Water Putty for the ground cover which can be found at any home center or hardware store. Durham's Water Putty can be mixed to almost any thickness, dries quickly and absorbs paint very well. There are a variety of materials that can be used for ground work but my two favorites are the water putty and Aves Apoxie Sculpt. Since the water putty is a little more economical I chose it. I wanted to add rocks to the diorama and these were obtained from my street which I washed with soap and water and left to dry in a paper towel. For a base to apply the ground work to I used a wooden plaque and 1/16 square wood strips for edging from the sources listed at the end of the article. For the base finish colors I chose to paint them on using Deco Art Americana acrylic paints and One Step Crackle Paint for the dry lake bed. I also used a bag of fine sand but even in this small scale the grit is fairly big so I used it to represent areas of small stones rather then as sand. I have read that pet store sand is very fine and more scale like but I have not tried it so I cannot be certain how well it would work. I used wood working glue to attach the strips to the base but white glue will work too, however, it will take longer to cure. I had purchased a spray can of polyurethane stain and a can of clear gloss polyurethane for the base finish a few years years ago so I used them on this base too. While the spray is faster I think using the stain in cans is a better option using a brush or rag to apply the stain to the surface.
Every modeler that builds a diorama will have their own preferred materials and methods to build the base ground work. I too have my own preferences and for this base I used was Durham's Water Putty for the ground cover which can be found at any home center or hardware store. Durham's Water Putty can be mixed to almost any thickness, dries quickly and absorbs paint very well. There are a variety of materials that can be used for ground work but my two favorites are the water putty and Aves Apoxie Sculpt. Since the water putty is a little more economical I chose it. I wanted to add rocks to the diorama and these were obtained from my street which I washed with soap and water and left to dry in a paper towel. For a base to apply the ground work to I used a wooden plaque and 1/16 square wood strips for edging from the sources listed at the end of the article. For the base finish colors I chose to paint them on using Deco Art Americana acrylic paints and One Step Crackle Paint for the dry lake bed. I also used a bag of fine sand but even in this small scale the grit is fairly big so I used it to represent areas of small stones rather then as sand. I have read that pet store sand is very fine and more scale like but I have not tried it so I cannot be certain how well it would work. I used wood working glue to attach the strips to the base but white glue will work too, however, it will take longer to cure. I had purchased a spray can of polyurethane stain and a can of clear gloss polyurethane for the base finish a few years years ago so I used them on this base too. While the spray is faster I think using the stain in cans is a better option using a brush or rag to apply the stain to the surface.

Wooden base
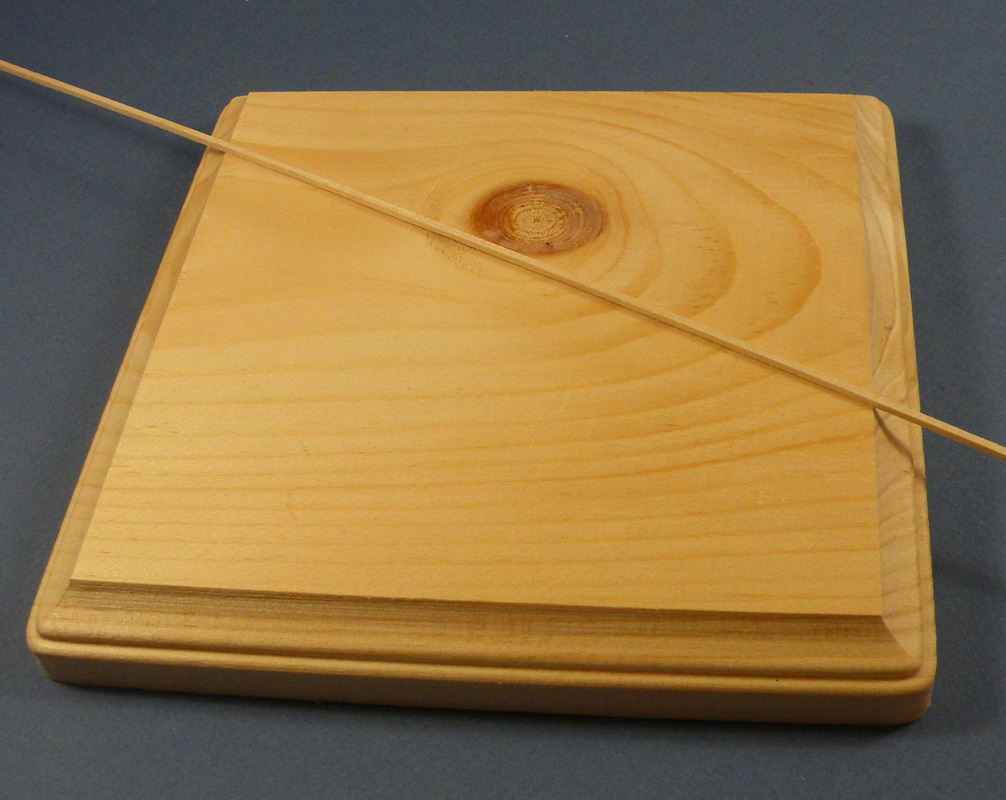
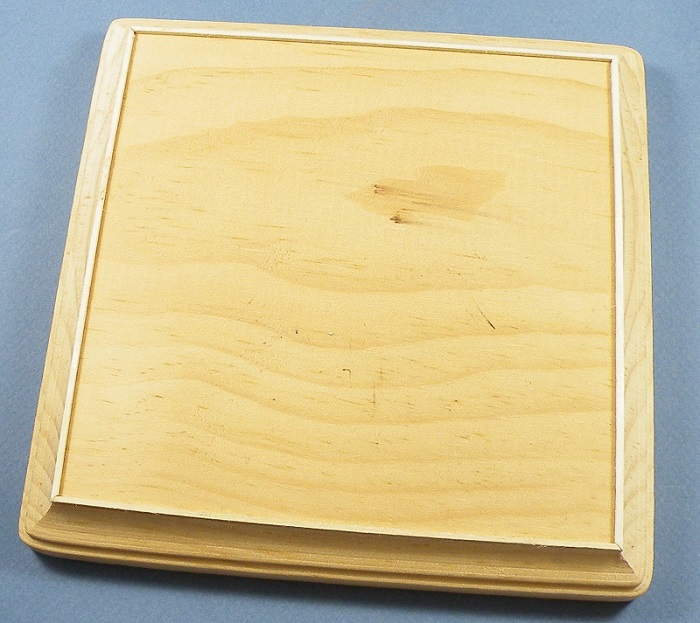
Since I planned on using the water putty in a slightly thin mixture I wanted to keep the base edges neat so I made a border using the wood strips. The ends were cut at a 45 degree angle using a razor saw and miter box but a simple butt joint would work in the absence of these tools. They were attached to the base using the wood working glue. Once everything had dried I sanded the base sides with 150 grit sandpaper making sure the end grain was as smooth as possible and then finished it up with 220 grit sandpaper. Once I was satisfied with the finish I wiped off the base and sprayed on the polyurethane stain in several light coats over all of the surfaces. This way I could gradually build up the color until I achieved the depth I wanted. The stain not only provides an attractive finish it also keeps the base from warping because of the water in the putty. Once dried I applied the clear gloss coat concentrating on the sides and not worrying about the top where the water putty would be applied. After it had cured I scored the top with an X-Acto knife to roughen up the surface so the water putty had a good surface to adhere to. Looking back I should have done this last step before applying the finish to the base.
Since I planned on using the water putty in a slightly thin mixture I wanted to keep the base edges neat so I made a border using the wood strips. The ends were cut at a 45 degree angle using a razor saw and miter box but a simple butt joint would work in the absence of these tools. They were attached to the base using the wood working glue. Once everything had dried I sanded the base sides with 150 grit sandpaper making sure the end grain was as smooth as possible and then finished it up with 220 grit sandpaper. Once I was satisfied with the finish I wiped off the base and sprayed on the polyurethane stain in several light coats over all of the surfaces. This way I could gradually build up the color until I achieved the depth I wanted. The stain not only provides an attractive finish it also keeps the base from warping because of the water in the putty. Once dried I applied the clear gloss coat concentrating on the sides and not worrying about the top where the water putty would be applied. After it had cured I scored the top with an X-Acto knife to roughen up the surface so the water putty had a good surface to adhere to. Looking back I should have done this last step before applying the finish to the base.

Applying the ground work
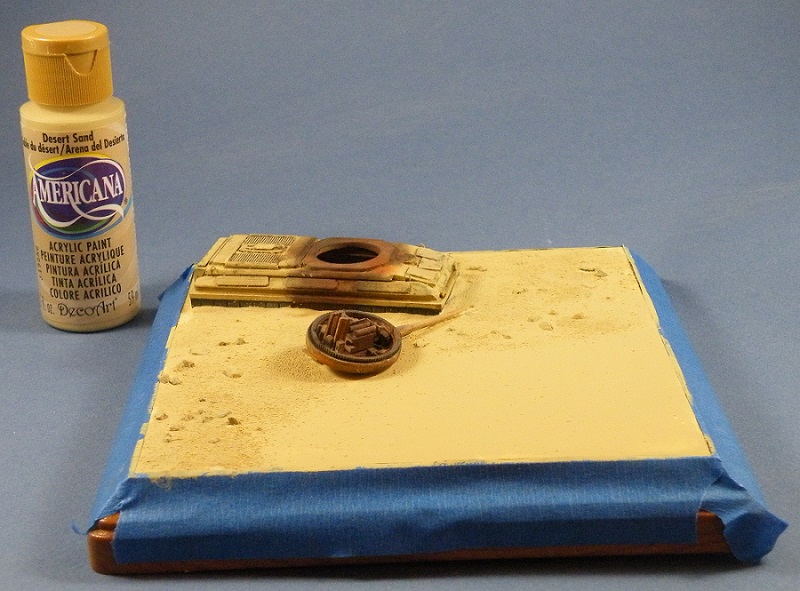
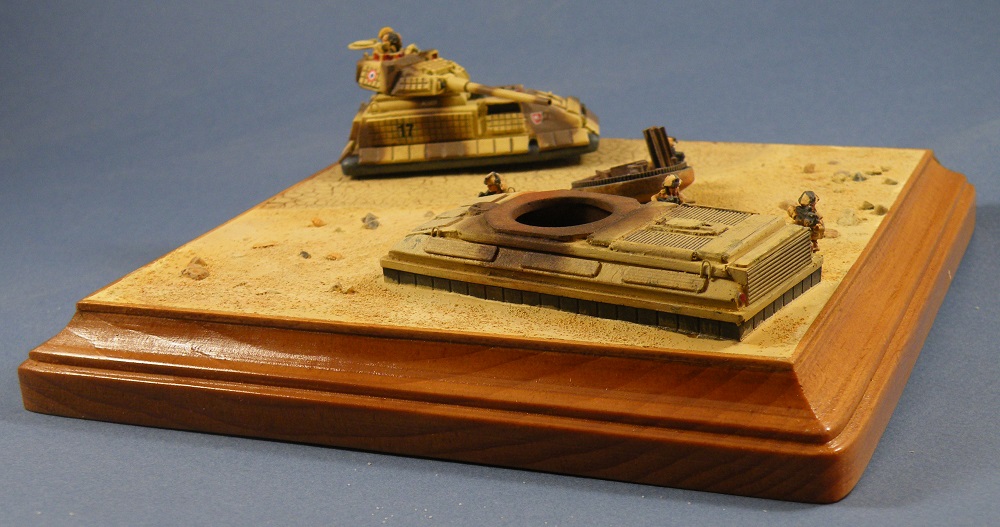
I taped the sides to keep the putty off of them and to have a nice clean edge between the ground work and the trim. I mixed the water putty up in a container adding warm water a little at a time until it was about the consistency of modeling putty. I spread it onto the base with a wide blade plastic dry wall tape knife. If you don't have one of these a sheet of thick plastic will work too. I used the tape knife because I wanted a really flat landscape with a cracked dry lake bed meeting the shore. I applied a little water to the knife so the water putty would not stick to it. Once the putty was spread I added the rocks and sand in various spots making sure to leave a corner of the base bare for the lake bed. At this time I embedded the lower hull and turret of the destroyed Grav Tank. After I had finished applying the ground work I removed the tape to prevent any putty that might have been spread on it from drying and cracking the base edges.
I taped the sides to keep the putty off of them and to have a nice clean edge between the ground work and the trim. I mixed the water putty up in a container adding warm water a little at a time until it was about the consistency of modeling putty. I spread it onto the base with a wide blade plastic dry wall tape knife. If you don't have one of these a sheet of thick plastic will work too. I used the tape knife because I wanted a really flat landscape with a cracked dry lake bed meeting the shore. I applied a little water to the knife so the water putty would not stick to it. Once the putty was spread I added the rocks and sand in various spots making sure to leave a corner of the base bare for the lake bed. At this time I embedded the lower hull and turret of the destroyed Grav Tank. After I had finished applying the ground work I removed the tape to prevent any putty that might have been spread on it from drying and cracking the base edges.
Painting the ground work
After the ground work had cured I once again masked the base and painted it with Americana Acrylic Paints starting with Desert Sand DA077.
After the ground work had cured I once again masked the base and painted it with Americana Acrylic Paints starting with Desert Sand DA077.
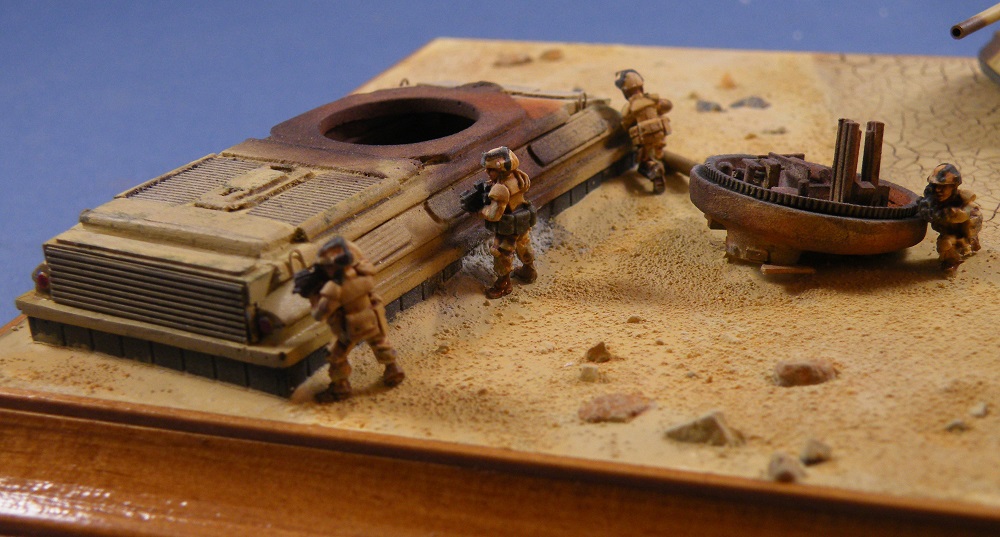
Once dried I made a wash using distilled water and Camel DA191 mixed together until it was as thin as milk. I applied the wash in various spots using a 1/2” wide brush. The base was then heavily dry brushed with Sand DA04 and some of the rocks were painted Pebble DA303 while others were painted a mixture of black and Sand. Another dry brushing of the entire base done with Sand and this finished the ground work painting.
Cracked lake bed
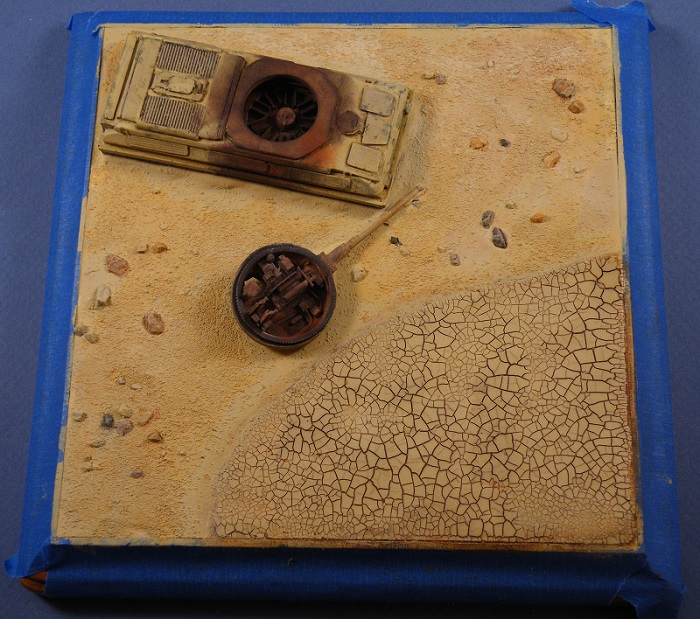
I researched this issue for quite a while trying different methods before settling on the DecoArt paint. After reading several posts on various forums I thought I would try this and the test worked out great. To create this effect you only need a brush, Americana Raw Umber DA130 paint and a paper towel dampened in water. I applied a thick coat of Deco Art One Step Crackle DS 69-3 with a brush making sure not to brush over the same area more then one or two times. The more you brush the Crackle paint the less it will crack.
I researched this issue for quite a while trying different methods before settling on the DecoArt paint. After reading several posts on various forums I thought I would try this and the test worked out great. To create this effect you only need a brush, Americana Raw Umber DA130 paint and a paper towel dampened in water. I applied a thick coat of Deco Art One Step Crackle DS 69-3 with a brush making sure not to brush over the same area more then one or two times. The more you brush the Crackle paint the less it will crack.
Once it had cured I painted over it with Raw Umber in small sections at a time wiping off the wet paint as I went along with a damp paper towel so that it would not dry on the surface. This way the Raw Umber stays in the cracks while the Sand base can be seen through the crackle giving the appearance of a cracked surface. After this had dried I dry brushed the area with Sand and sprayed a flat coat over the base.
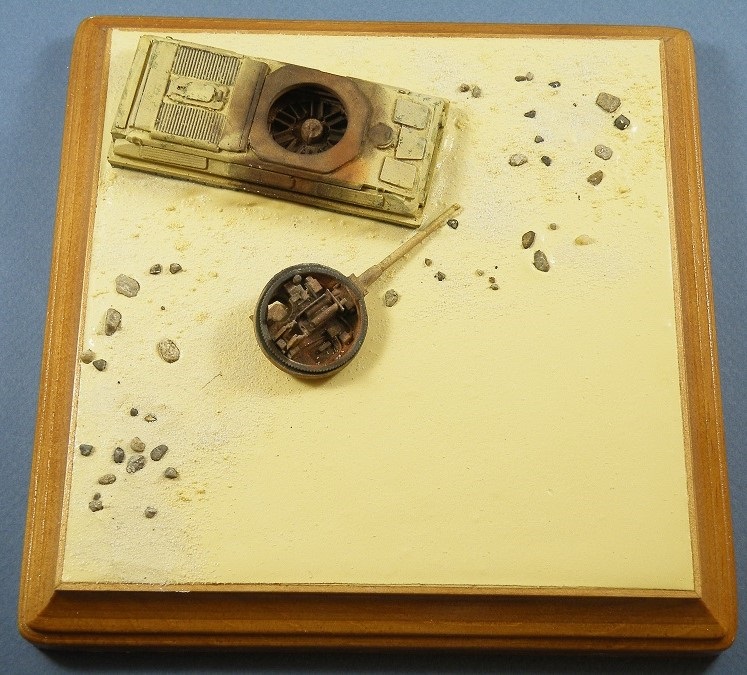
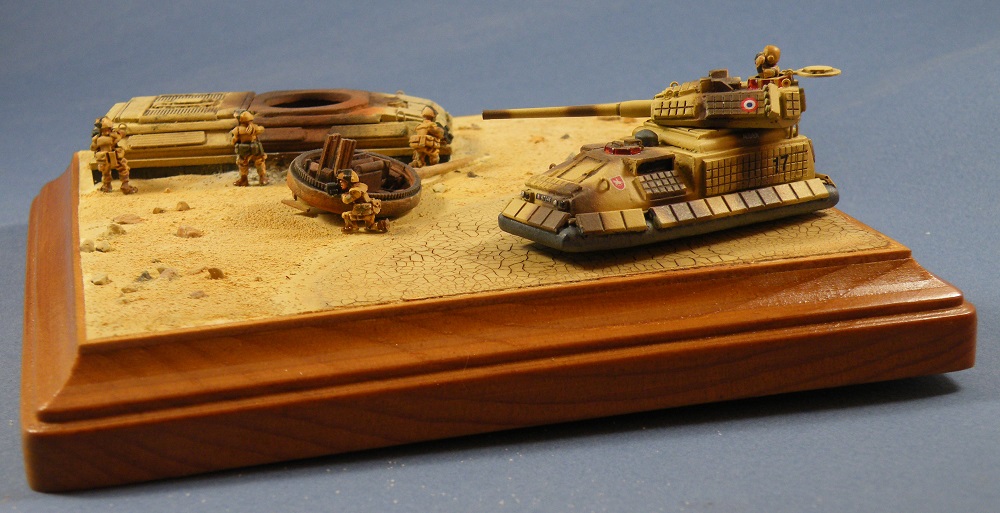
The completed base without figures.
Final thoughts
This was a lot of fun to do and it took very little time to accomplish once I had done the research on the various materials I wanted to use. In fact most of the build time centered around research so I hope this information I have written will help you out on your next diorama. I would like to thank my friends Rick Wilkes, Scott Wadyko of Combat Wombat Miniatures and Ray Mehlberger for their advice and input through out the planning and research phase of building this diorama and the models. I also want to thank my wife who has a greater command of sentence building then I do and did the editing for this poor attempt at explaining how I made this diorama.
This was a lot of fun to do and it took very little time to accomplish once I had done the research on the various materials I wanted to use. In fact most of the build time centered around research so I hope this information I have written will help you out on your next diorama. I would like to thank my friends Rick Wilkes, Scott Wadyko of Combat Wombat Miniatures and Ray Mehlberger for their advice and input through out the planning and research phase of building this diorama and the models. I also want to thank my wife who has a greater command of sentence building then I do and did the editing for this poor attempt at explaining how I made this diorama.
Resources
- Hobby Lobby
www.hobbylobby.com
- Micheal's Arts and Crafts
www.michaels.com
- Pico Armor
www.picoarmor.com
- Combat Wombat Miniatures
www.combatwombatminiatures.com
- Americana Acrylic Paints
www.decoart.com/americana/acrylics
- Durham's Water Putty
www.waterputty.com
