
Italeri 1/72nd Scale M20 Armored Utility Car Build Review
Kit No. 7038
MSRP: $14.95 in 2006
Out of production but can be found on Ebay
John Kelley
MSRP: $14.95 in 2006
Out of production but can be found on Ebay
John Kelley
History:
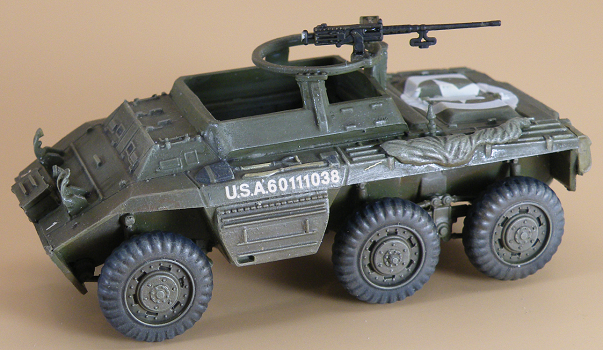
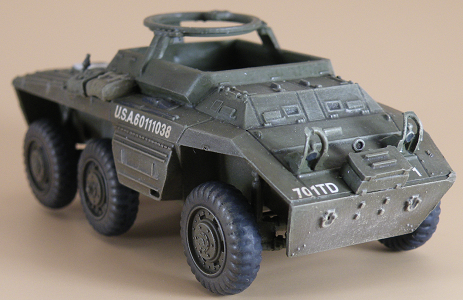
The M20 was developed from the M8 armored car series and was armed with a single M2 .050 cal. machine gun mounted above the crew compartment. It was used to escort infantry and it could also be used as a command vehicle, personnel carrier, ammunition carrier or cargo carrier.
The M20 was developed from the M8 armored car series and was armed with a single M2 .050 cal. machine gun mounted above the crew compartment. It was used to escort infantry and it could also be used as a command vehicle, personnel carrier, ammunition carrier or cargo carrier.
The box:
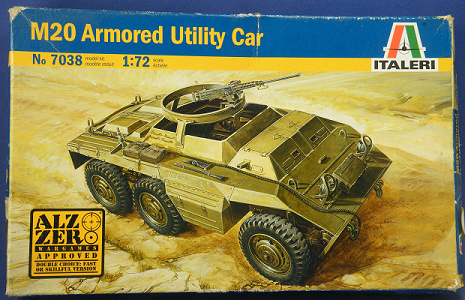
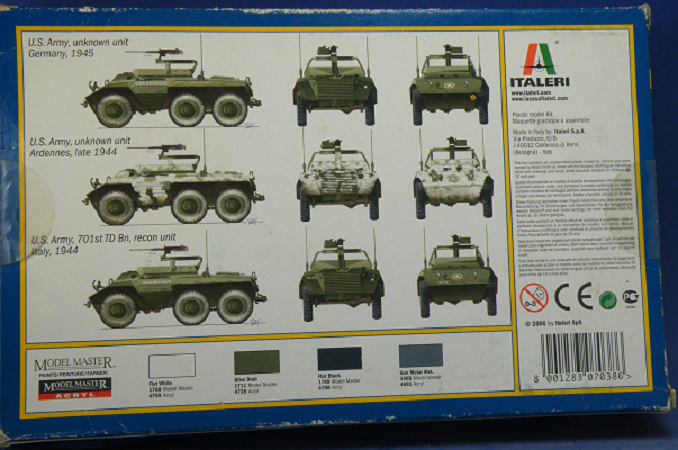
The box has a painting of the M20 on the front with a Alzo Zero Wargames Approved stamp on the lower left corner of the box. I know this was a wargame system they were promoting at the time but I have not heard of it since. The box bottom has three full color profiles of the M20 and the decal versions in the kit.
The first one is an overall olive drab M20 of the U.S. Army of an unknown unit in Germany. I believe this may be a post war version as it has a Military Load Class marking for a Class 8 vehicle weight.
The second one is an olive drab M20 with whitewash camouflage of the U.S. Army, unknown unit Ardennes, late 1944.
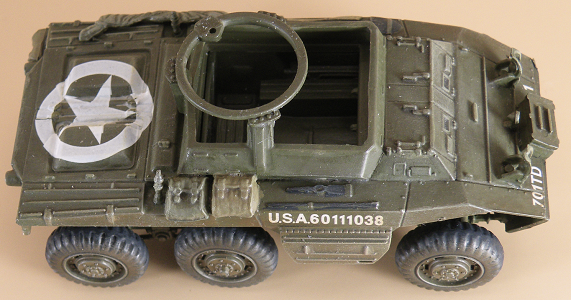
And the last one is a U.S. Army, 701st TD Bn. recon unit Italy, 1944 which is the one I chose to build.
Model Master paint color chips and numbers are suggested for finishing the model.
The box has a painting of the M20 on the front with a Alzo Zero Wargames Approved stamp on the lower left corner of the box. I know this was a wargame system they were promoting at the time but I have not heard of it since. The box bottom has three full color profiles of the M20 and the decal versions in the kit.
The first one is an overall olive drab M20 of the U.S. Army of an unknown unit in Germany. I believe this may be a post war version as it has a Military Load Class marking for a Class 8 vehicle weight.
The second one is an olive drab M20 with whitewash camouflage of the U.S. Army, unknown unit Ardennes, late 1944.
And the last one is a U.S. Army, 701st TD Bn. recon unit Italy, 1944 which is the one I chose to build.
Model Master paint color chips and numbers are suggested for finishing the model.
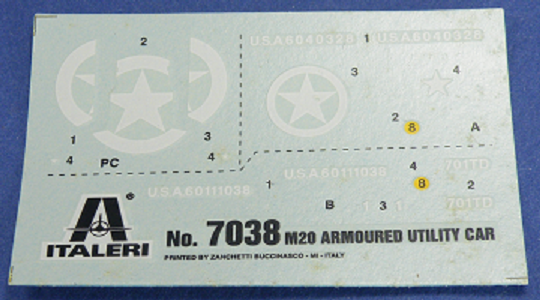
The decal sheet for the versions above.
Contents:
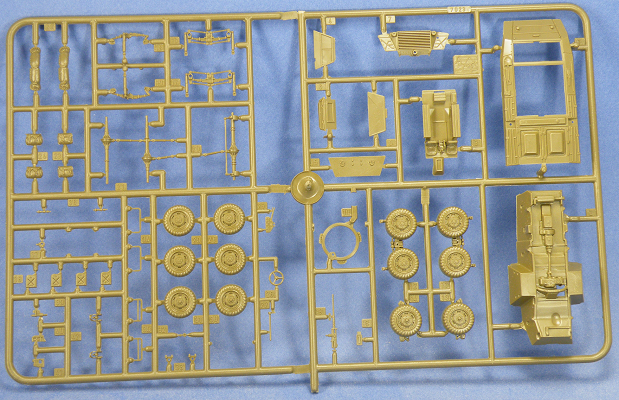
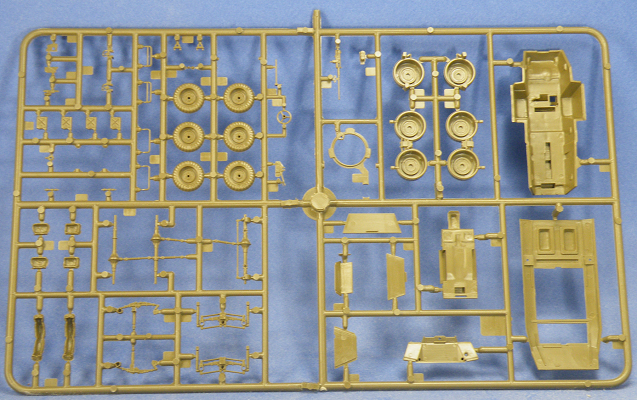
The kit contains two olive drab injection molded styrene trees, instructions for two building options and the decal sheet.
Olive drab tree A contains the upper and lower hull parts, front and rear plates, drive train, suspension, stowage, crew compartment interior parts. Exterior detail parts include headlights, fuel cans and racks(optional), tow hitch, antennas, .050 cal. machine gun including two complete sets of tires. One is used for the wargame or Fast Version and the other set for the Skillful Version ( 52 parts). There are 16 shaded out parts that are not used in the display model version.
|
|
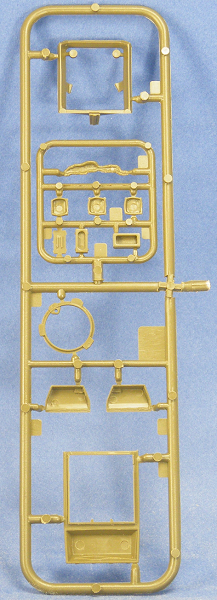
Olive drab tree B has the driver and co-driver compartment overhead hatches and the open casemate sides for the top, side stowage bins (optional), additional stowage (which is darkened to indicate it is not used), and machine gun ring (12 parts).

|
|
On page 6 of the instruction sheet you have the option of building the Operation Overlord Fast Version. For this you use the A tree parts 2A lower hull 3A interior, 5A rear wall, front plate 15A and rear plate 7A. Next the interior side wall parts 4A and 6A are added to complete Step 1.
For Step 2 the wheels, 14A,13A,11A and 12A, fit directly onto the lower hull, in the openings for the spring shackles and 1A upper hull is attached.
In Step 3 the crew compartment parts 1A and 2B are attached. And in Step 4 the machine gun ring, .050 cal. Machine gun and ammo box complete the model. Italeri says on page 6 that the model may be built in a less detailed manner to reduce build time and make a more robust model for wargames. When this model was issued there were reviews that stated that the wheels and tires were undersized and they are smaller than the real tires in the photos I have. In spite of that I still wanted to build it.
The build:
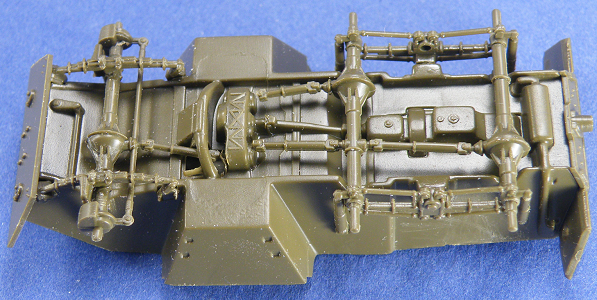
I began assembly at Step 1 adding all of the parts through to Step 3. I assembled the front and rear drive train parts without any issues but when I added the front axle the front leaf spring shackles there was very little clearance between the shackle and plate 15A which is installed in Step 1. If I built this model again I would leave off part 15A until I installed the front axle and springs. The short drive shaft that fits to the transfer case had about a .020 gap between the shaft and the case. You can add a small disc of styrene if you want to fill the gap.
I began assembly at Step 1 adding all of the parts through to Step 3. I assembled the front and rear drive train parts without any issues but when I added the front axle the front leaf spring shackles there was very little clearance between the shackle and plate 15A which is installed in Step 1. If I built this model again I would leave off part 15A until I installed the front axle and springs. The short drive shaft that fits to the transfer case had about a .020 gap between the shaft and the case. You can add a small disc of styrene if you want to fill the gap.
I skipped Step 4 so I could add the wheels after painting and finished the model through to Step 7 and leaving off the machine gun until I began photographing the model. Except for the front axle I had no assembly issues and the model fit together perfectly without any filler.
The interior was assembled next.
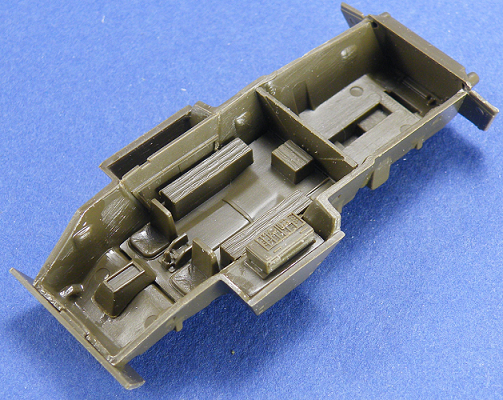
After finishing the interior I added the upper hull part 1A.
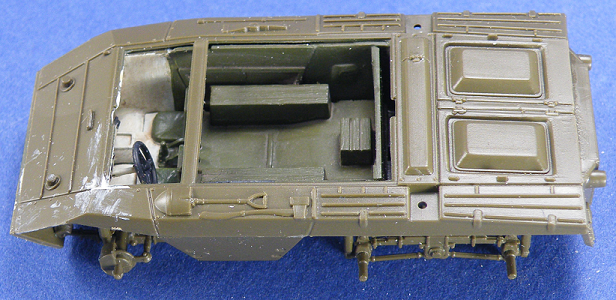
Once this was dry I added the crew compartment part 1B and the casemate armor part 2B. The machine gun ring part 5B, the stowage and stowage bins, parts 3B and 4B were added along with the glasis mounted stowage box, antennas and pintle.
Finishing:
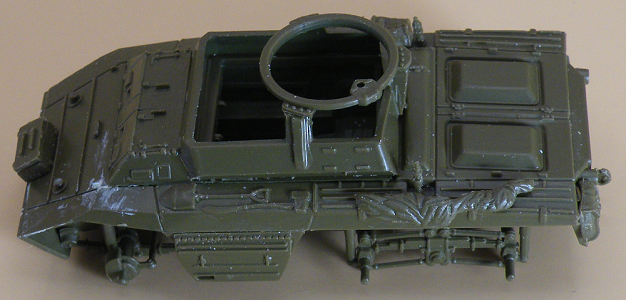
I painted the model with Vallejo Model Color paints except where mentioned. I started with brushing on Surface Primer U.S. Olive Drab 70.608 on the interior parts and later on the exterior parts as well.
I painted the model with Vallejo Model Color paints except where mentioned. I started with brushing on Surface Primer U.S. Olive Drab 70.608 on the interior parts and later on the exterior parts as well.
After this had dried I base coated the interior with Brown Violet 70.887, For the crew compartment I used Desert Yellow 70.977 as a base and then applied two coats of Ivory 70.918. The radio face was painted German Grey 70.995 and dry brushed with Ivory. The interior was finally given a coat of Citadel Agrax Earthshade to dirty it up a bit.
The rest of the model was assembled and painted with the primer and Brown Violet. The tires were primed with Black Primer 74.602 and then painted in German Grey. I added Buff 79.976 to the Brown Violet in a mix of three drops Brown Violet to Buff. The tools were painted German Grey on the steel parts and Buff on the handles.
I then added a coat of Citadel Ardcoat for the gloss. I should have thinned this out as I had brush streaks in the gloss coat. I added the worst decal first, the recognition star on the engine deck! Italeri thoughtfully cut this into three pieces which made it much easier to apply however I still needed generous coats of Micro Sol to get the decal to lay down but in the end it did. The rest of the decals went on without any issues.
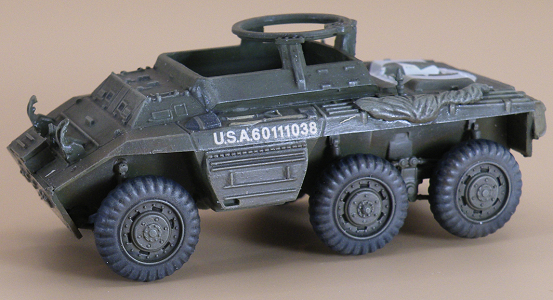
Citadel Agrax Earthshade was them washed over the entire model.
Weathering:
I began by using a makeup brush to dry brush Flat Earth 70.983 to the wheels, wheel wells and lower hull. I then applied the Buff with a makeup brush over the entire model. The wheels were attached with super glue and the model was finished.
I began by using a makeup brush to dry brush Flat Earth 70.983 to the wheels, wheel wells and lower hull. I then applied the Buff with a makeup brush over the entire model. The wheels were attached with super glue and the model was finished.
|
|
|

|
Conclusion:
The model was a joy to build and was finished in about a week. I was surprised that no filler was needed. For you sharp eyed modelers you will notice that my picture background changed from blue to a sand color. That is because my lovely wife bought me a portable photo booth for Father's Day and I used it for the fist time on this model. It was a big help and did a much better job than my homemade one! If you get a chance to buy the kit I would. The tires are a little small but in the end it still looks like a M20. I bought this around 2007 from my local hobby shop.
Recommended
