
Improving the S-Model Cruiser Tank Mk. III A13 Mk. I
Scale 1/72
Kit No. PS720010
Price $12.95
John Kelley
Kit No. PS720010
Price $12.95
John Kelley
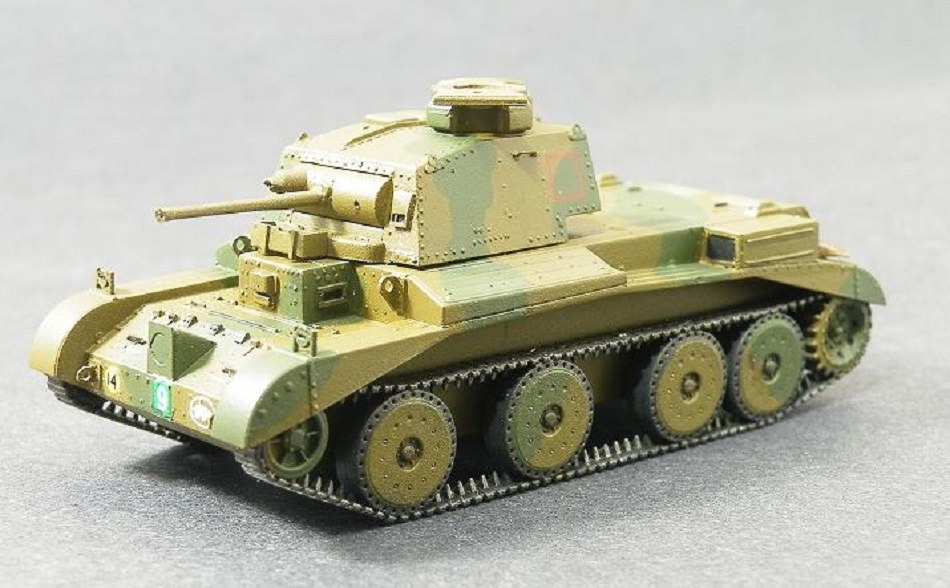
For many years I have wanted to build a British Cruiser tank Mk. III and now that S-Model have released one I finally can. As with their other kits this is a quick build model designed for the war game table but it is still well detailed and includes enough photo etch brass and decals for the two models that are in the box. The tracks and road wheels are one piece but are still well done. There is rivet detail on the upper hull but none on the turret, glasis plate, side shields or rear plate. There is also room for improvement to the hull and turret where details are simplified or non existent. The purpose of this article is to show how the kit can be improved with strip styrene and Archer Fine Transfers Surface Detail Rivets Starter Set # AR88001. At the end of the article I will give a list of sources I used to complete the model and, where possible, links to the web sites I used as well. The George Bradford book on Allied Armored Fighting Vehicles in 1:72 scale was indispensable for the plans to make the changes on the model.
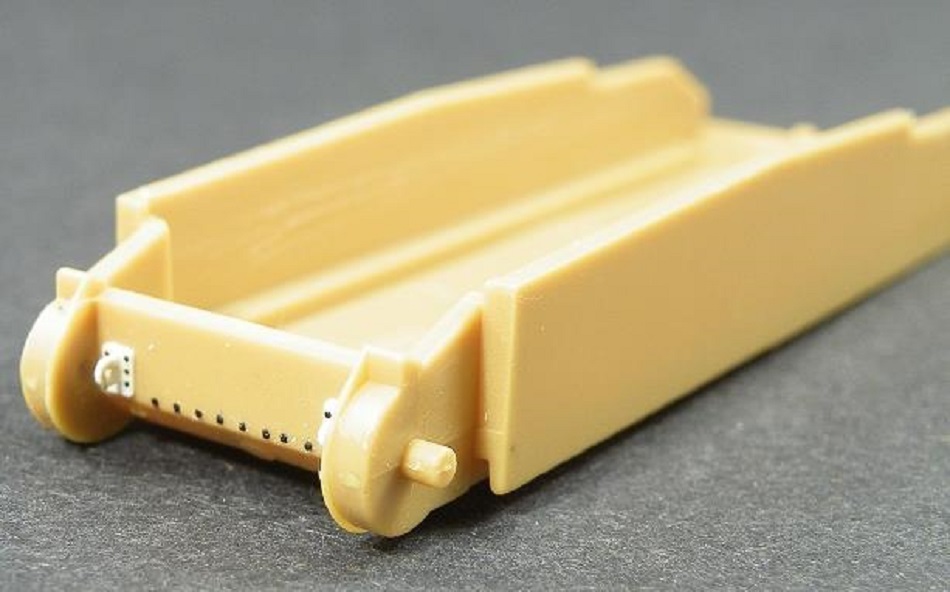
Fender Boxes
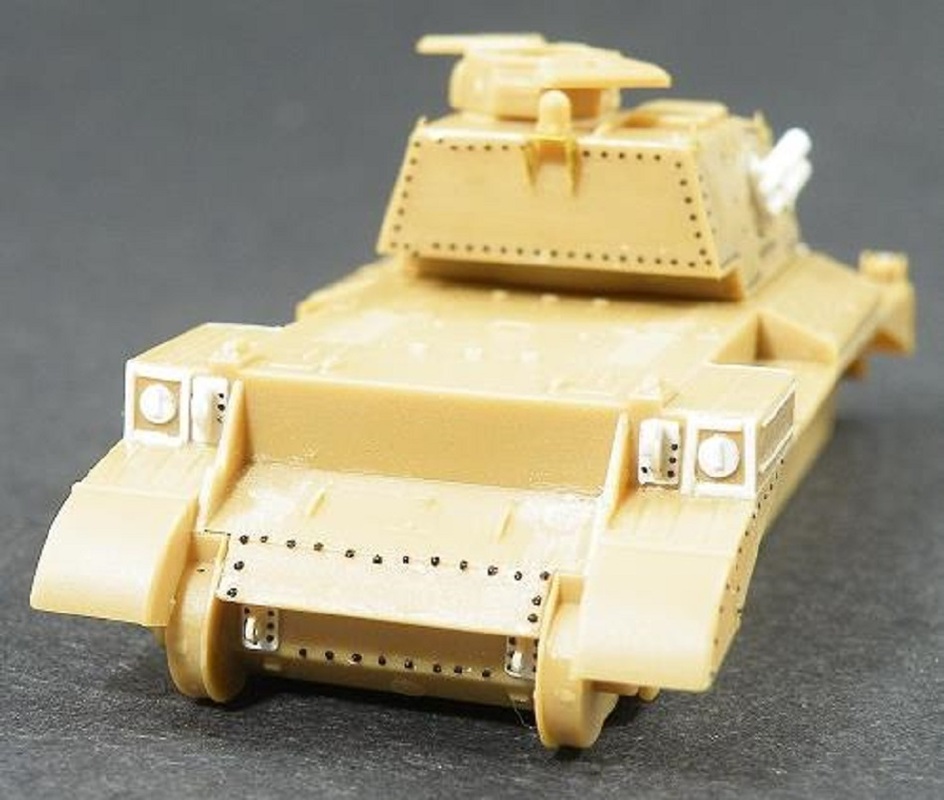
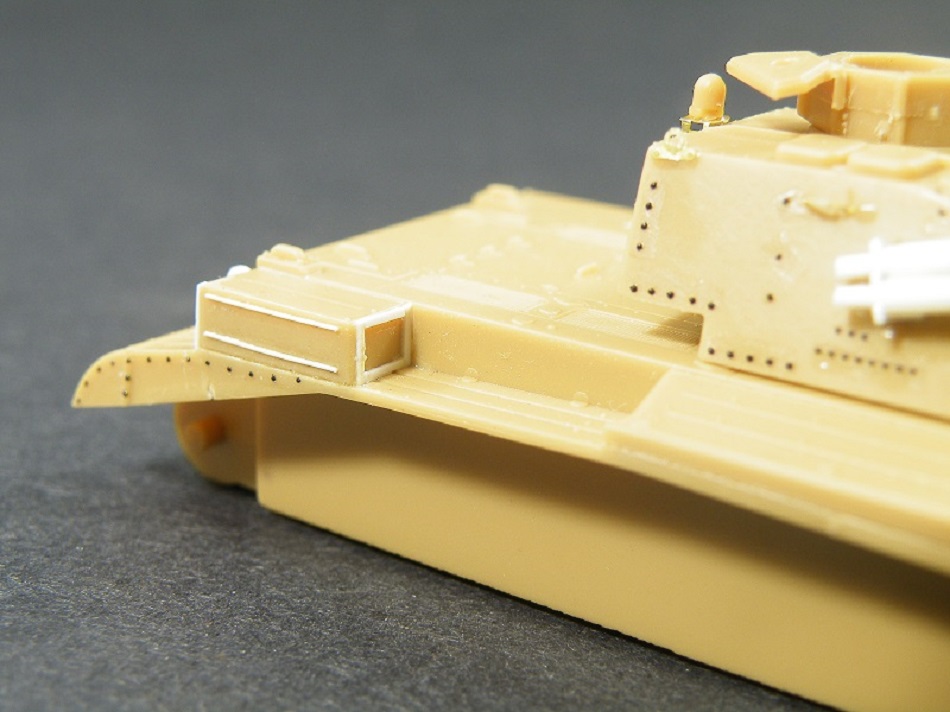
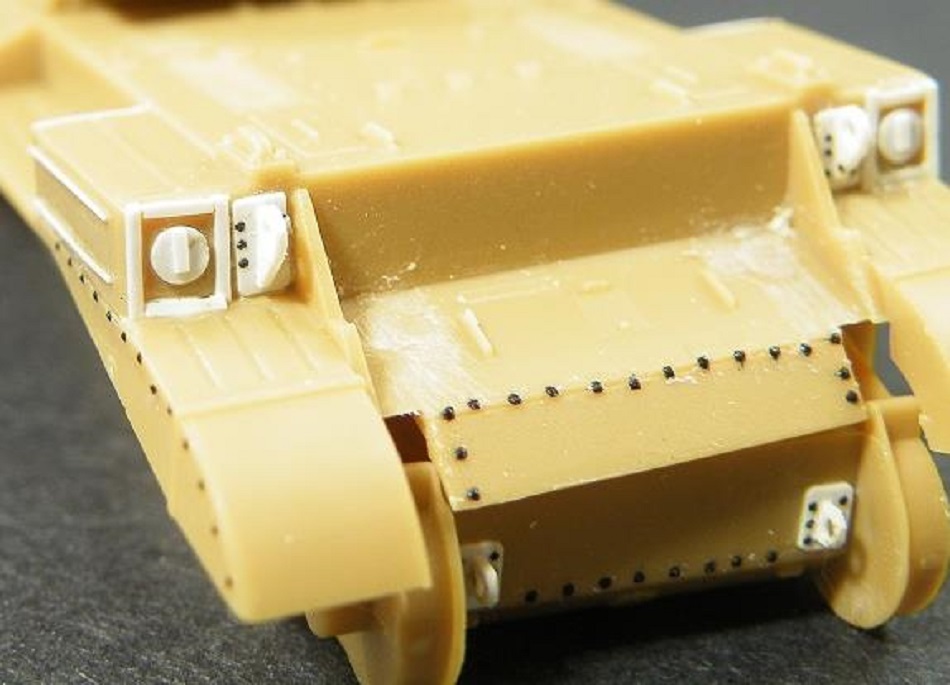
I started the detailing by first creating a separation line between the fender and the molded on boxes by carefully using a fine toothed razor saw and sawing between the boxes and the fender, just deep enough to make a recessed line. Next .010(0.3 mm) rod was used to add ribs to the rear air cleaner box sides. On the real tank these boxes are open on both ends and inside is what I believe is an air filter. To recreate these details I edged the box ends with .010 x .020(.28 x .50 mm) strip styrene and punched out a .020(0.5) disk of plastic and added a strip of .010 x .020 strip styrene to the disk. The disk was attached to the back of the boxes. While this is not 100% accurate it does reproduce detail with out a great deal of scratch building. The cover for the exhaust pipes, Part 1, had two location pins that could be seen so I removed them and glued the cover to the hull.
I started the detailing by first creating a separation line between the fender and the molded on boxes by carefully using a fine toothed razor saw and sawing between the boxes and the fender, just deep enough to make a recessed line. Next .010(0.3 mm) rod was used to add ribs to the rear air cleaner box sides. On the real tank these boxes are open on both ends and inside is what I believe is an air filter. To recreate these details I edged the box ends with .010 x .020(.28 x .50 mm) strip styrene and punched out a .020(0.5) disk of plastic and added a strip of .010 x .020 strip styrene to the disk. The disk was attached to the back of the boxes. While this is not 100% accurate it does reproduce detail with out a great deal of scratch building. The cover for the exhaust pipes, Part 1, had two location pins that could be seen so I removed them and glued the cover to the hull.
Upper Hull Lifting Hooks
There are lifting hooks that need to be added to the four corners of the upper hull. These are made from .015 x .080 (0.4 x 2.0 mm) Strip styrene. To make them I drilled a hole at the end of the strip and measured 1/8(3.2 mm) of an inch or .125 long and then cut it off. I took the strip and, using an #11 X-Acto blade, I angled the blade from one corner to the next, making sure not to cut through the hole and cut it so that I had created a triangle. I then rounded off the edges where the hole is. These were then mounted on a strip of .015 x .060(.42 x 1.5 mm) styrene, the same length as the hook with the corners rounded off, and attached it to the four corners of the upper hull.
There are lifting hooks that need to be added to the four corners of the upper hull. These are made from .015 x .080 (0.4 x 2.0 mm) Strip styrene. To make them I drilled a hole at the end of the strip and measured 1/8(3.2 mm) of an inch or .125 long and then cut it off. I took the strip and, using an #11 X-Acto blade, I angled the blade from one corner to the next, making sure not to cut through the hole and cut it so that I had created a triangle. I then rounded off the edges where the hole is. These were then mounted on a strip of .015 x .060(.42 x 1.5 mm) styrene, the same length as the hook with the corners rounded off, and attached it to the four corners of the upper hull.
Lower Hull Tow Hooks
Once again, .015 x .080 styrene was used to make the pads for the tow hooks and a hole was drilled in the end of the strip. These are 3/32nd(2.4 mm) or .093 long and are attached to the front and rear plates. These corners too are rounded off with a file and the hooks themselves are made from .015 x .060 and they are cut off 1/16th(1.6 mm) or .062 of an inch long.
Once again, .015 x .080 styrene was used to make the pads for the tow hooks and a hole was drilled in the end of the strip. These are 3/32nd(2.4 mm) or .093 long and are attached to the front and rear plates. These corners too are rounded off with a file and the hooks themselves are made from .015 x .060 and they are cut off 1/16th(1.6 mm) or .062 of an inch long.
Drivers Cab
Vision blocks are missing on both sides of the drivers cab. To replicate this, I used .015 x .030(.42 x .75 mm) strip styrene and made a simple box to replicate the missing blocks.
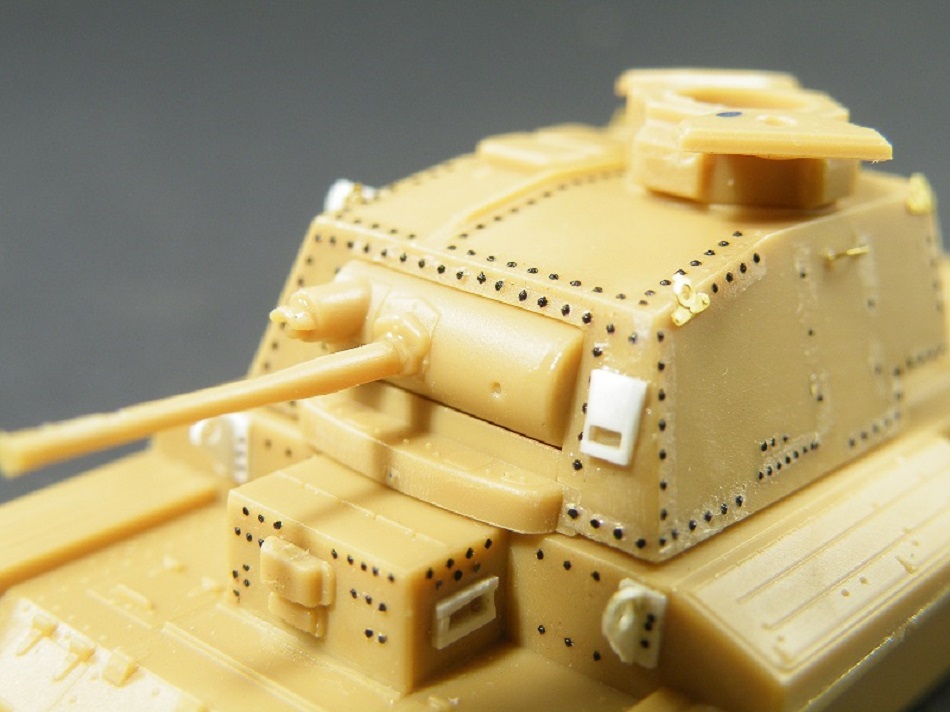
Turret
For this I made the smoke dischargers using .060(1.5 mm) plastic L bracket with two holes drilled in one side to accept the smoke dischargers. The dischargers were made of .060 rod and 3/16(4.8 mm) inches or .187 long for the front half and for the back .035(.35 mm) rod cut 3/32(2.4 mm) inches or .093 long is used. On the front of the turret is a box that is used to catch spent shell casings. This was made from .125(3.2 mm) U -shaped channel stock with plastic covering both ends and .010 x .020 strip styrene added to the front. The last item constructed was the gunners visor. This is poorly defined on the kit and to recreate it I used .020 x .060(.20 x 1.5 mm) strip styrene and this was flanked by .010 x .020 styrene with the bottom piece made from .020 x .020(.50 x.50 mm) strip styrene. This was attached to the model and sanded until smooth. With the plastic work done, all the brass that was included in the kit was added to the model.
The only thing I need to do to really finish the model is to add an antenna.
Rivets
For the rivets I used Archer Fine Transfers Surface Detail Starter Set Rivets #AR88001. Without a doubt, completing this model would not have been possible without the surface details. Woody Vondracek does an excellent tutorial on the Archer web site and I recommend watching it as he does a far better job of explaining how to apply the details than I could. I used George Bradford's book Allied Armored Fighting Vehicles in 1/72nd Scale to show me where the rivets were applied and in what pattern. For determining the details that needed to be added to the model this book was extremely helpful. After applying the rivets I sprayed a light coat of Tamiya Fine Light Grey Surface Primer to have a base coat over the plastic, seal the rivets and prime the photo etch parts.
Vision blocks are missing on both sides of the drivers cab. To replicate this, I used .015 x .030(.42 x .75 mm) strip styrene and made a simple box to replicate the missing blocks.
Turret
For this I made the smoke dischargers using .060(1.5 mm) plastic L bracket with two holes drilled in one side to accept the smoke dischargers. The dischargers were made of .060 rod and 3/16(4.8 mm) inches or .187 long for the front half and for the back .035(.35 mm) rod cut 3/32(2.4 mm) inches or .093 long is used. On the front of the turret is a box that is used to catch spent shell casings. This was made from .125(3.2 mm) U -shaped channel stock with plastic covering both ends and .010 x .020 strip styrene added to the front. The last item constructed was the gunners visor. This is poorly defined on the kit and to recreate it I used .020 x .060(.20 x 1.5 mm) strip styrene and this was flanked by .010 x .020 styrene with the bottom piece made from .020 x .020(.50 x.50 mm) strip styrene. This was attached to the model and sanded until smooth. With the plastic work done, all the brass that was included in the kit was added to the model.
The only thing I need to do to really finish the model is to add an antenna.
Rivets
For the rivets I used Archer Fine Transfers Surface Detail Starter Set Rivets #AR88001. Without a doubt, completing this model would not have been possible without the surface details. Woody Vondracek does an excellent tutorial on the Archer web site and I recommend watching it as he does a far better job of explaining how to apply the details than I could. I used George Bradford's book Allied Armored Fighting Vehicles in 1/72nd Scale to show me where the rivets were applied and in what pattern. For determining the details that needed to be added to the model this book was extremely helpful. After applying the rivets I sprayed a light coat of Tamiya Fine Light Grey Surface Primer to have a base coat over the plastic, seal the rivets and prime the photo etch parts.

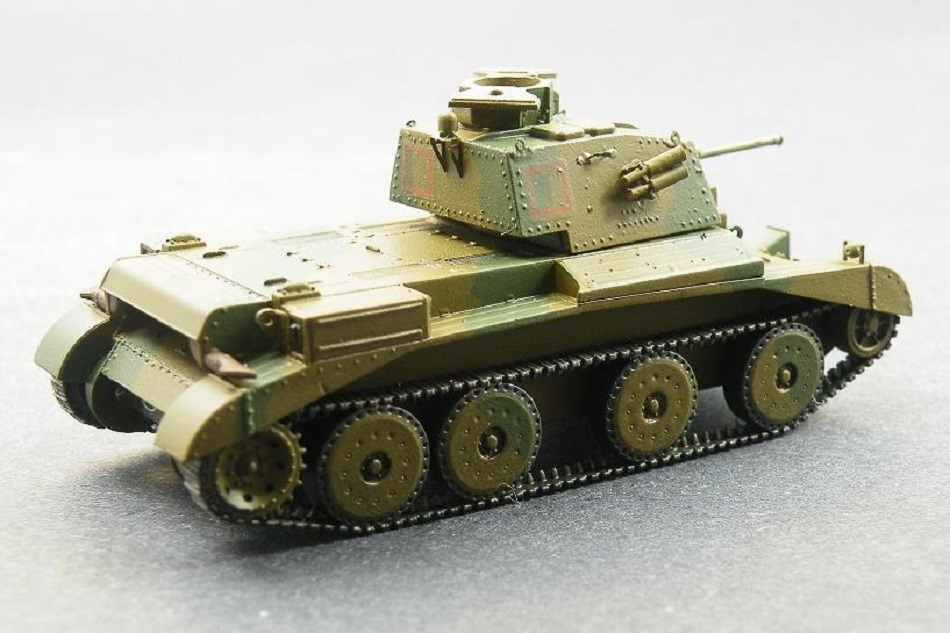
Colors
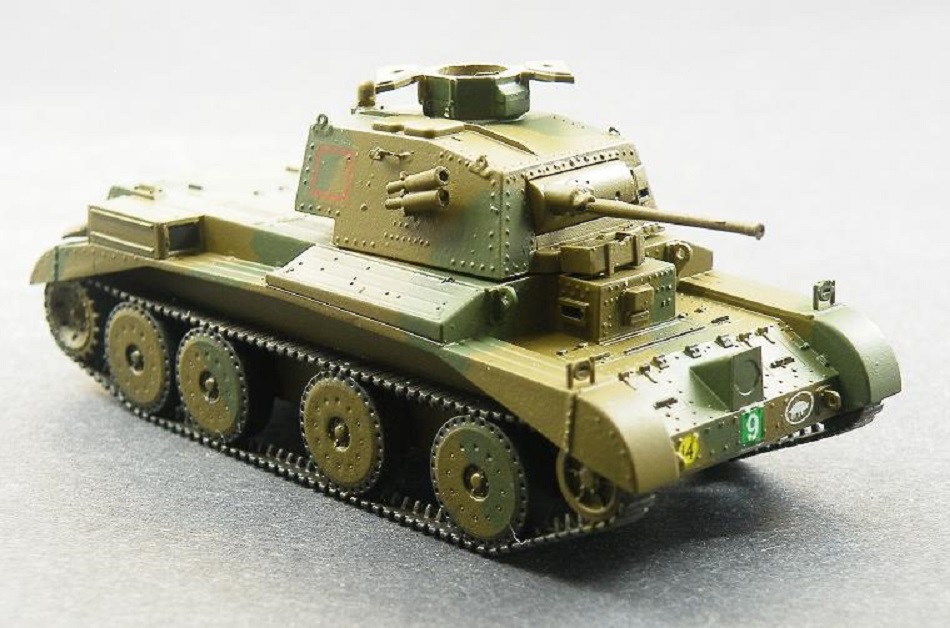
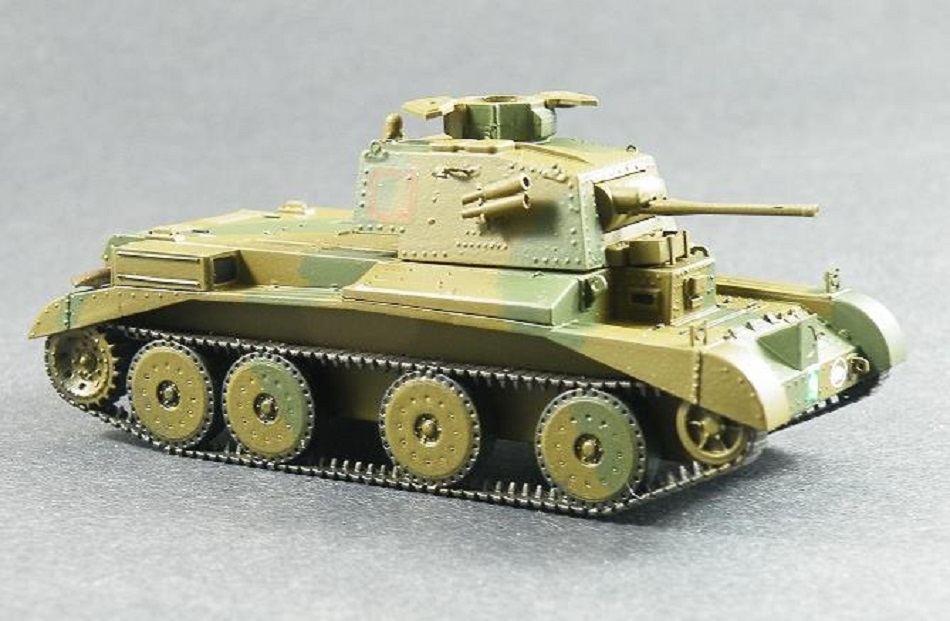
By far, this was by far the most difficult task of the model, trying to find an accurate France 1940 color match. For this I used two sources. For the Khaki Green G3 I used Mike Starmer's formula which consists of 3 parts Tamiya XF-62 plus 2 parts XF-59. For the Dark Green G4 it is 3 parts XF-61 to 2 parts XF-58. I didn't have the paints for the dark green so while looking around for options, I found the web site Shouting Into The Void which gives a Vallejo formula for Khaki Green G3 and Dark Green G4 as recommended by Mike Starmer. Since I wanted to brush paint the Dark Green, I went with the suggestion of using Model Color 70.888 #92 Olive Grey straight out of the bottle. I thinned it with two drops of water to three drops of paint and carefully applied what I think is a reasonably accurate pattern. I cannot be absolutely certain that this tank used camouflage paint or even this pattern but from my research, it is safe to say that most tanks of the British Army in France were pattern painted a two-tone green. The tracks were painted Vallejo Model Color Black Grey 70.862 #168 along with the road wheel tires. After drying, the tracks were dry brushed silver and the exhaust was painted Tamiya Red Brown XF-64. The model was then given a gloss coat. The tracks were washed with Citadel Shade Agrax Earthshade and Vallejo Wash Black Shade was used to bring depth to some of the details on the tank.
Decals
The decals went on with no problems except that the yellow squadron markings were not opaque enough so the green bled through the yellow, giving the entire decal a green tint. I then applied the red squadron markings and these went on with no base color bleeding through. Pledge Floor Wax with Future was applied to where the decals were to be placed and after they were added, more Future was applied over the decals to remove any trace of carrier film. After everything was dried, I sprayed the model with The Army Painter Anti-shine Spray Paint and this completed it.
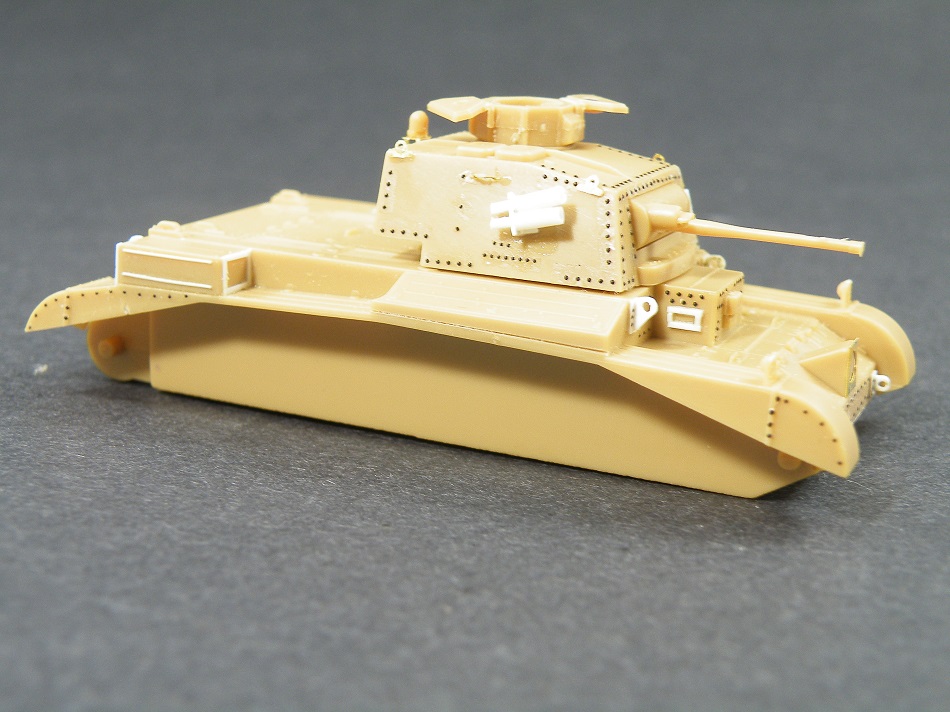
Conclusions
The S-Model Kit is a great model to build however it is lacking in some details. As you can see with a little strip styrene, rivets and patience a highly detailed model can be made. I found the Bradford book to be very useful in making the details and the Surface Details worked really well. Even with a light primer coat and two finish coats the rivets show up well. I highly recommend this kit to anyone interested in early World War II British armor. My model was purchased from Free Time Hobbies and all the supplies listed I purchased myself either online or at my local hobby shops.
By far, this was by far the most difficult task of the model, trying to find an accurate France 1940 color match. For this I used two sources. For the Khaki Green G3 I used Mike Starmer's formula which consists of 3 parts Tamiya XF-62 plus 2 parts XF-59. For the Dark Green G4 it is 3 parts XF-61 to 2 parts XF-58. I didn't have the paints for the dark green so while looking around for options, I found the web site Shouting Into The Void which gives a Vallejo formula for Khaki Green G3 and Dark Green G4 as recommended by Mike Starmer. Since I wanted to brush paint the Dark Green, I went with the suggestion of using Model Color 70.888 #92 Olive Grey straight out of the bottle. I thinned it with two drops of water to three drops of paint and carefully applied what I think is a reasonably accurate pattern. I cannot be absolutely certain that this tank used camouflage paint or even this pattern but from my research, it is safe to say that most tanks of the British Army in France were pattern painted a two-tone green. The tracks were painted Vallejo Model Color Black Grey 70.862 #168 along with the road wheel tires. After drying, the tracks were dry brushed silver and the exhaust was painted Tamiya Red Brown XF-64. The model was then given a gloss coat. The tracks were washed with Citadel Shade Agrax Earthshade and Vallejo Wash Black Shade was used to bring depth to some of the details on the tank.
Decals
The decals went on with no problems except that the yellow squadron markings were not opaque enough so the green bled through the yellow, giving the entire decal a green tint. I then applied the red squadron markings and these went on with no base color bleeding through. Pledge Floor Wax with Future was applied to where the decals were to be placed and after they were added, more Future was applied over the decals to remove any trace of carrier film. After everything was dried, I sprayed the model with The Army Painter Anti-shine Spray Paint and this completed it.
Conclusions
The S-Model Kit is a great model to build however it is lacking in some details. As you can see with a little strip styrene, rivets and patience a highly detailed model can be made. I found the Bradford book to be very useful in making the details and the Surface Details worked really well. Even with a light primer coat and two finish coats the rivets show up well. I highly recommend this kit to anyone interested in early World War II British armor. My model was purchased from Free Time Hobbies and all the supplies listed I purchased myself either online or at my local hobby shops.
Sources
Allied Armored Fighting Vehicles 1:72 Scale by George Bradford
ISBN978-08117-3570-4
Archer Fine Transfers Surface Details Rivets Starter Set AR88001
http://www.archertransfers.com/
Archer Surface Details Tutorial
http://www.youtube.com/watch?v=aptnvFeEqio
Shouting Into The Void Tuesday November 2 , 2010 by Peter Fitzpatrick
http://mojobob.blogspot.com/2010/11/khaki-green-3-in-vallejo-paints.html
Free Time Hobbies
http://www.freetimehobbies.com/
