
Matchbox 1/76 Scale Krupp Protz Kfz.69 and
3.7cm Panzerabwehrkanone Build Review
Kit no. PK-88
MSRP: around $8.00
Out of Production: except for the reissue by Revell of Germany 03218. The Revell kit can be found on online hobby sites.
John Kelley
MSRP: around $8.00
Out of Production: except for the reissue by Revell of Germany 03218. The Revell kit can be found on online hobby sites.
John Kelley
HISTORY:
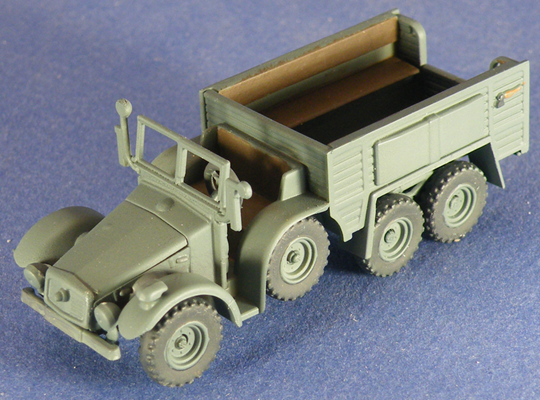
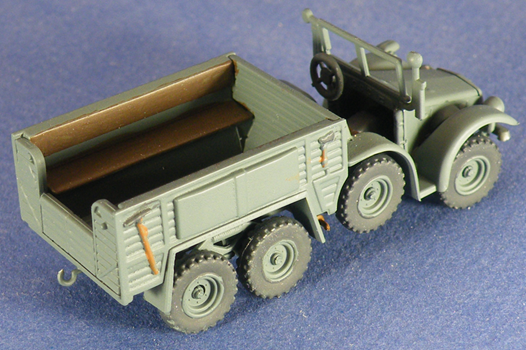
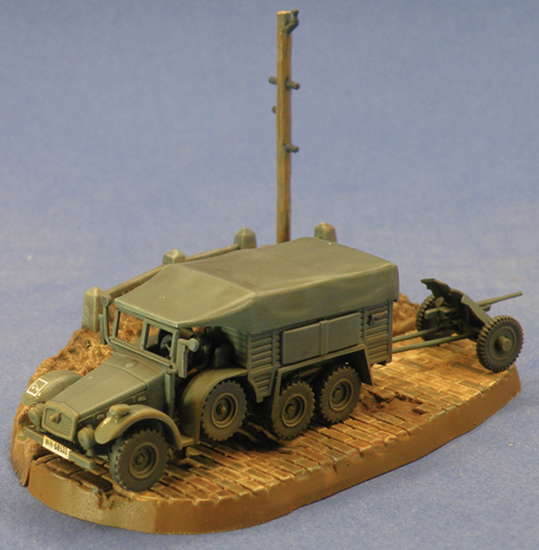
Krupp Protze:
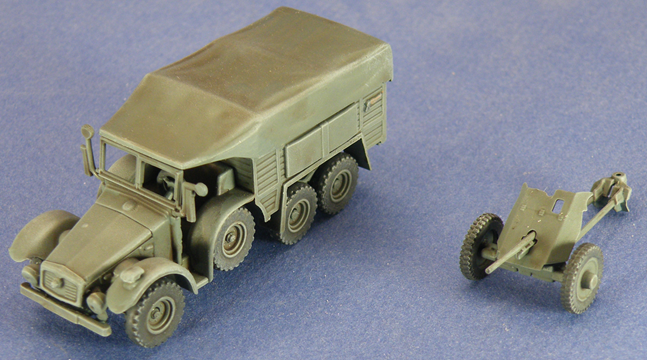
The Krupp Protze was produced between 1934 and 1941 and was a 6 wheeled 6×4 truck and artillery tractor used extensively in World War II in France, Sicily, North Africa and the Eastern Front.
With a 4 cylinder 55 hp Krupp M 304 engine the Kfz. 69 was used to tow artillery including the 3.7cm Pak 36 Anti-tank Gun.
Krupp Protze:
The Krupp Protze was produced between 1934 and 1941 and was a 6 wheeled 6×4 truck and artillery tractor used extensively in World War II in France, Sicily, North Africa and the Eastern Front.
With a 4 cylinder 55 hp Krupp M 304 engine the Kfz. 69 was used to tow artillery including the 3.7cm Pak 36 Anti-tank Gun.
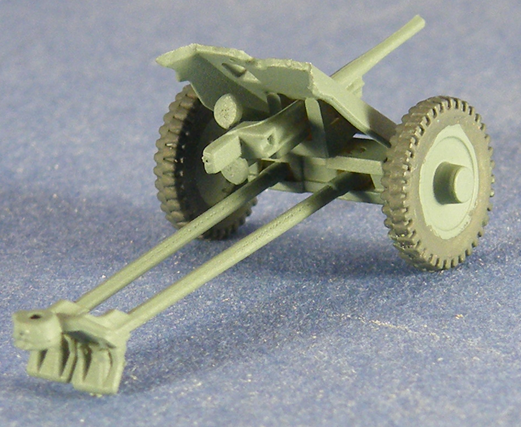
The 3.7cm Pak 36 Anti-tank gun:
In 1933 Rheinmetall developed the 3.7cm Anti-tank gun which was a viable weapon until 1941 when it was found to be unable to penetrate the armor of the T-34 and KV series of tanks.
It was first used in the Spanish Civil War in 1936. It was eventually replaced by the 5cm Anti-tank gun but many were used on the Sd. Kfz. 251/10 Half-tracks as Platoon Leaders vehicles. The 3.7cm Anti-tank gun served until the end of the war.
THE MODEL:
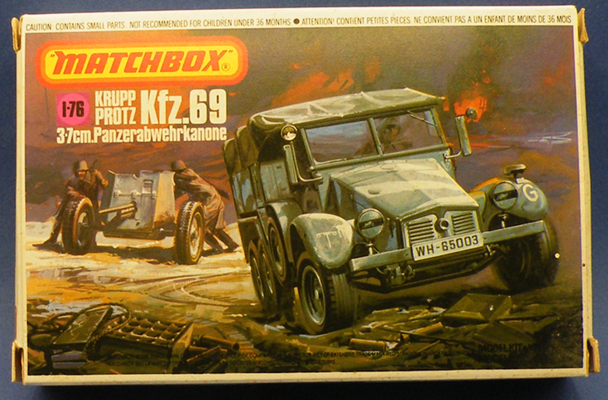
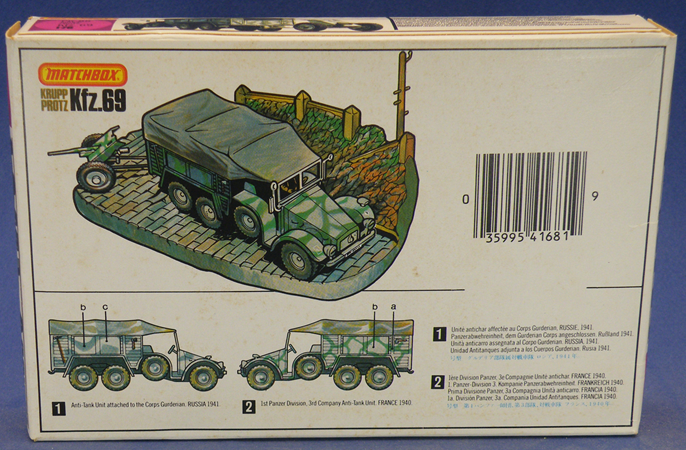
The box comes with end opening flaps with artwork on the back showing the optional color schemes and with the model on the diorama base.
For some reason the “E” in Protze is not on the box art or instruction sheet.
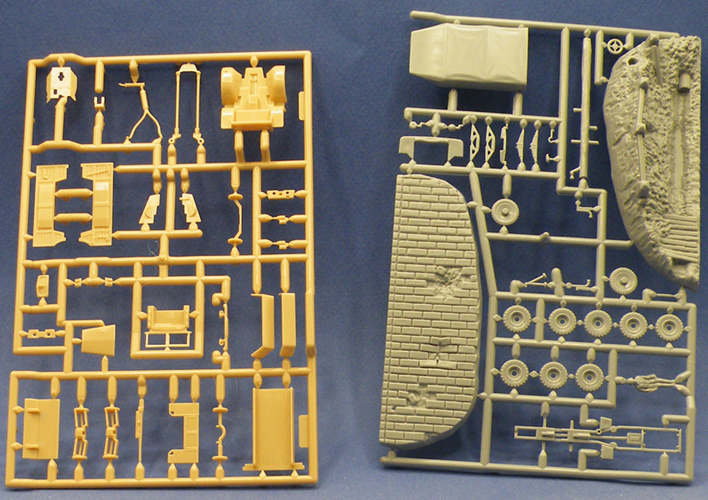
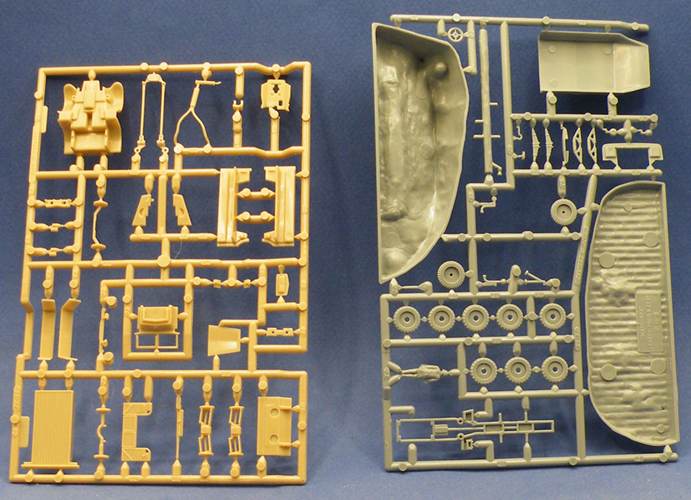
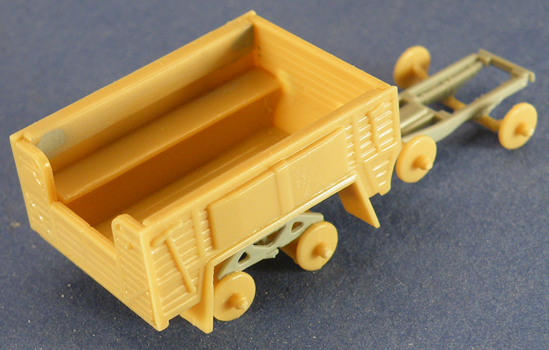
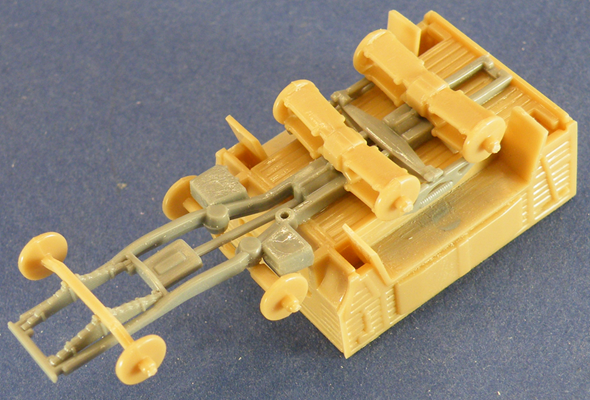
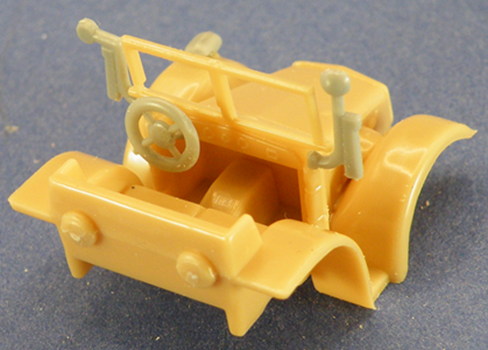
There are 2 parts trees with one that has 29 parts molded in dark yellow and a medium-gray tree with 31 parts for a total of 60 parts. No clear parts are included in the kit.
The box comes with end opening flaps with artwork on the back showing the optional color schemes and with the model on the diorama base.
For some reason the “E” in Protze is not on the box art or instruction sheet.
There are 2 parts trees with one that has 29 parts molded in dark yellow and a medium-gray tree with 31 parts for a total of 60 parts. No clear parts are included in the kit.
|
|
A decal sheet for two options is included with two options.
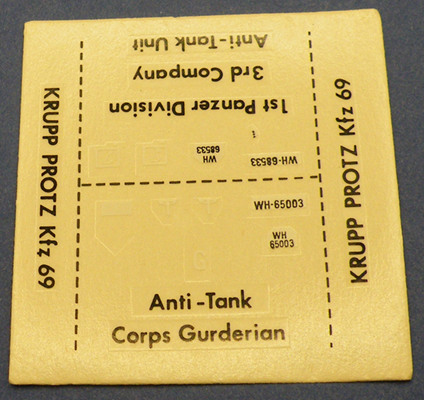
One is for an Anti-tank Unit attached to the Corps Guderian, Russia 1941 and a 1st Panzer Division, 3rd Company Anti-tank Unit France 1940.
The one in Russia is camouflaged in Panzer Grey and Winter White and the one in France is in Panzer Grey and Dark Green.
The back of the box has Humbrol paints are recommendations for the finish.
The one in Russia is camouflaged in Panzer Grey and Winter White and the one in France is in Panzer Grey and Dark Green.
The back of the box has Humbrol paints are recommendations for the finish.
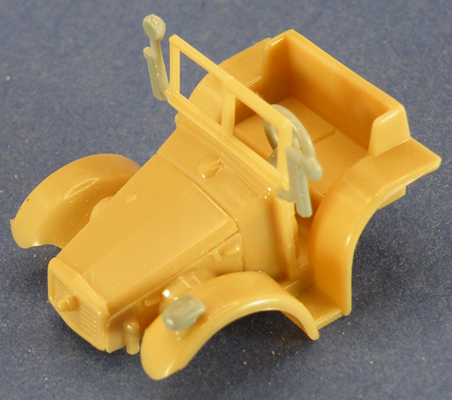
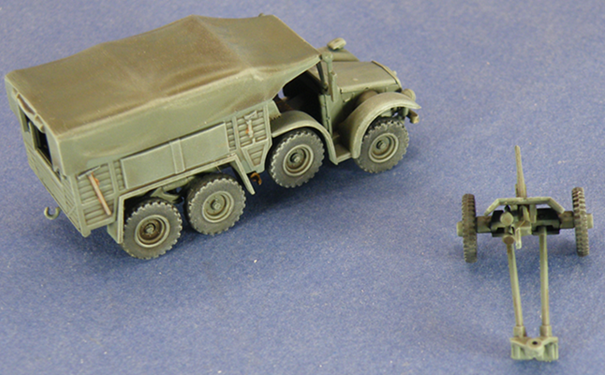
BUILDING THE KRUPP PROTZE:
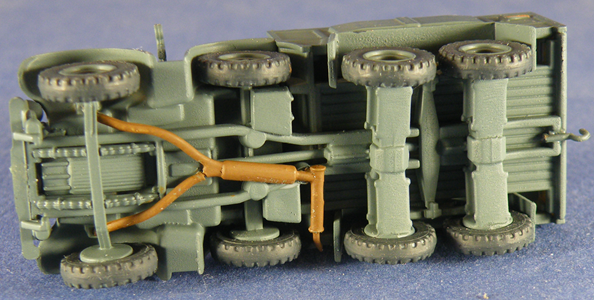
The model was very easy to assemble and mostly required scraping off mold lines and filling ejector pin marks on the interior of the cargo compartment and the underside of the mud guards parts 25.
The model was very easy to assemble and mostly required scraping off mold lines and filling ejector pin marks on the interior of the cargo compartment and the underside of the mud guards parts 25.
|
|
I assembled the model but I left off the wheels for easier painting as well as the smaller details that might break off.
After building the tarp, parts 1 and 4, there was a small gap between the parts that was filled and sanded. This was set aside to dry while I worked on the Anti-tank gun.
After building the tarp, parts 1 and 4, there was a small gap between the parts that was filled and sanded. This was set aside to dry while I worked on the Anti-tank gun.
|
|
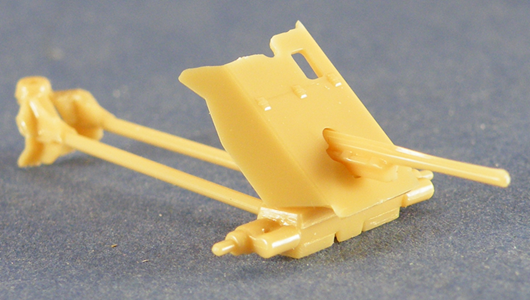
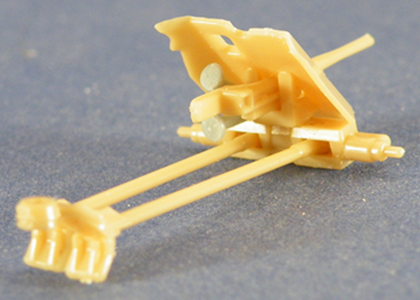
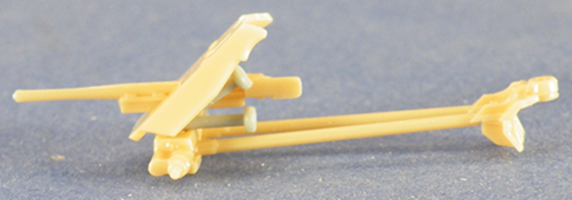
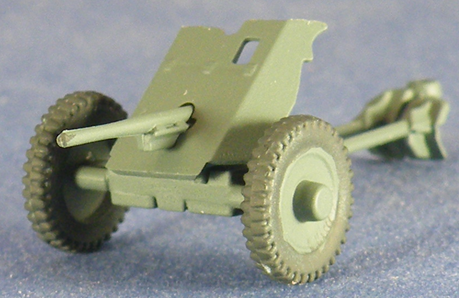
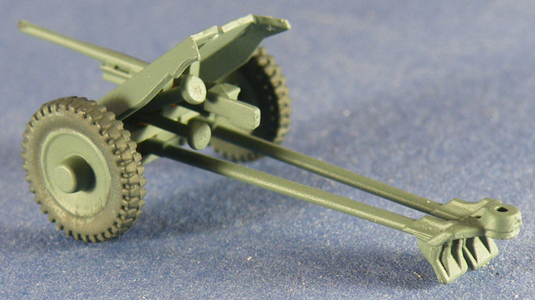
BUILDING THE ANTI-TANK GUN:
Again this was a straight forward build with no issues encountered or any filler needed but I left off the wheels until after painting.
While the model is easy to build it lacks the gunner’s sight and the trunnion for the 3.7cm gun is very simplified.
I did have to open up the towing eye on the gun trail to allow it to fit onto the tow hook so the wheels would touch the diorama base.
|
|
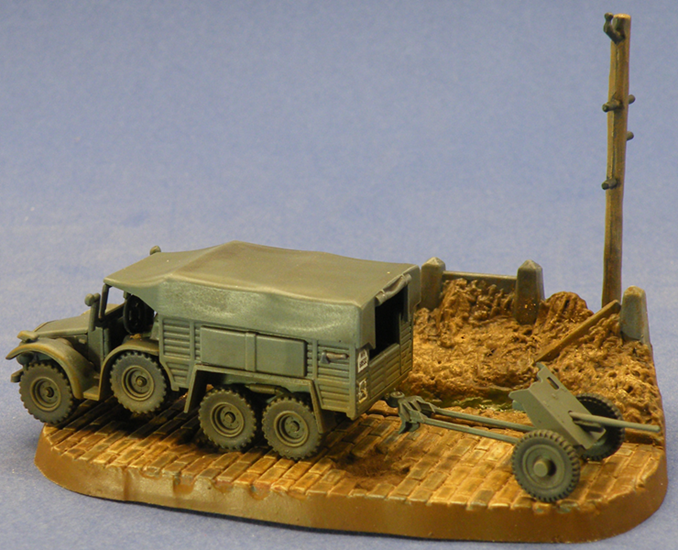
DIORAMA BASE:
The base is molded into two parts to fit inside the box.
The inside edges of the base are molded at an angle which creates a gap on the base surface and little gluing surface all around.
To eliminate the gap you can remove the inner sides of the base or add some.020-.030 styrene at the top to make a better gluing surface.
I chose the latter however there is a gap at the top from the additional plastic.
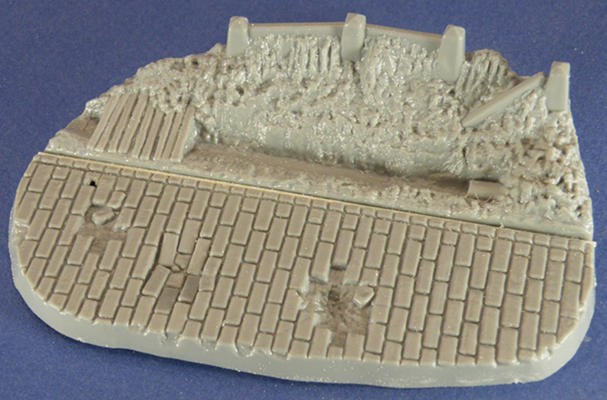
I simply painted it black and blended it in with the rest of the base. Finally the light pole had the mold seams scraped off and was added to the base.
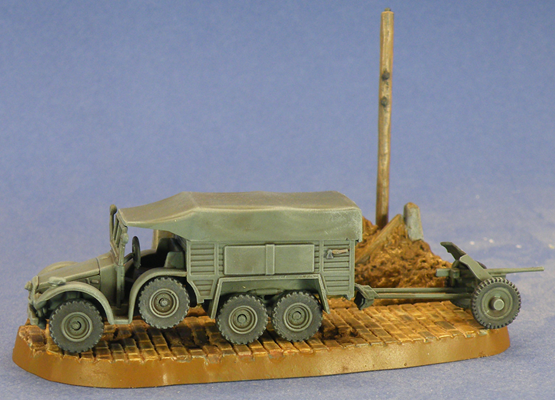
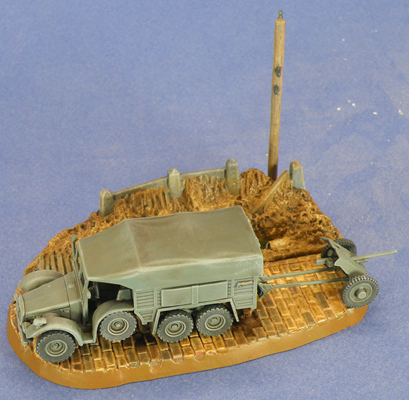
PAINTING THE PROTZE AND ANTI-TANK GUN:
I sprayed everything with a coat of Citadel Mechanicus Standard Grey which I always thought looked very close to Panzer Grey from a Games Workshop Leman Russ tank I had built and painted previously.
I sprayed everything with a coat of Citadel Mechanicus Standard Grey which I always thought looked very close to Panzer Grey from a Games Workshop Leman Russ tank I had built and painted previously.
|
|
|
|
I used Vallejo Model Color paints from here on except where noted.
The wheels were painted with Black Grey 70.862 and the seats with Chocolate Brown 70.872. The tools had the wooden parts painted Beige Brown 70.875 and the metal parts painted Black Grey.
The model was dry brushed with Citadel Paints Dawnstone and given a wash of the Army Painter Soft Tone, Strong Tone and water mixed in equal parts and both models were washed overall with this mixture.
I painted an acrylic gloss coat on the fenders, bumper, license plate and the wooden area beneath the license plate and applied the decals. The models were then sprayed with Testors Matt Finish.
|
|
PAINTING THE DIORAMA BASE:
The primed base was painted in Flat Earth 70.983 on the hill and pole, Brown Violet 70.887 in the culvert stream, Sky Grey 70.989 was used for the concrete culvert parts and used to dry brush the small walk way.
Neutral Grey 70.992 was used to paint the fence and post and dry brushed Sky Grey. Portions of the cobblestones were painted Sky Grey, Chocolate Brown, Neutral Grey and the rest left in the primer coat.
A Black Wash was applied to the street to darken the recesses and Citadel Agrax Earthshade was applied to the Flat Earth parts.
Vallejo Pigments Set No. 2 Mud and Sand were individually mixed with water to create a thin slurry and each color was applied to various sections of the street.
When dry the excess was removed with a dampened makeup sponge. Earth colored pastels were added to the hill area and the light pole was dry brushed with Sky Grey.
The edges of the base were painted Flat Earth and the base was given a coat of Testors Flat Coat and the culvert had acrylic gloss added to give the impression of water.
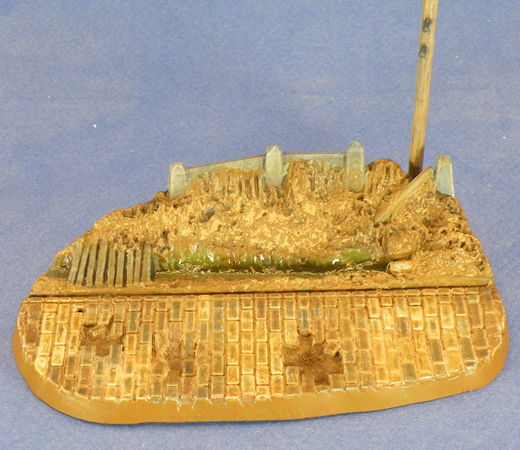
FIGURE:
The figure was primed and the trousers painted Citadel Mechanicus Standard Grey from the pot and the flesh with Citadel Kislev Flesh.
The jacket and helmet were painted German Field Grey WWII 70.830.
This was given a wash of Citadel Agrax Earthshade and dry brushed with Panzer Aces 334 German Tker. I (Feldgrau). The boots were painted Black Grey.
CONCLUSIONS:
The kit was fun to build and very simple however if you are looking for a more detailed model the ICM or Dragon kits are superior.
If, like me, you are looking for an easy build to try new painting techniques on I suggest this kit or the Revell of Germany reissue of the same model but with different decals.
The driver figure had soft detail and the arms could not be position on the steering wheel even though the instructions show the figure behind the wheel. I did do some research on the color schemes and finishing of the base and two YouTube channels were very helpful to me:
1.Sonic Sledgehammer Studios
Panzer Grey Made Interesting [How I Paint Things]
2. vallejocolors channel
How to paint cobblestone road painted by Jose Brito
Panzer Grey Made Interesting [How I Paint Things]
2. vallejocolors channel
How to paint cobblestone road painted by Jose Brito
Recommended.
|
|
|
|
