

Ace 1/72 BRDM-2 Build Review
Kit no. 72102
MSRP: Not available
Copyright 1998
Out of production
John Kelley
MSRP: Not available
Copyright 1998
Out of production
John Kelley
HISTORY:
The BRDM-2 is an iconic reconnaissance vehicle of the post war Soviet Army as well as in client states of the Soviet Union and now Russia. It is an all wheeled , steel welded vehicle with a 12.7mm KPVT main armament and a 7.62mm PKT machine gun mounted co-axially to the main armament. It is still in use today with Russia and Ukraine but in updated versions.
The BRDM-2 is an iconic reconnaissance vehicle of the post war Soviet Army as well as in client states of the Soviet Union and now Russia. It is an all wheeled , steel welded vehicle with a 12.7mm KPVT main armament and a 7.62mm PKT machine gun mounted co-axially to the main armament. It is still in use today with Russia and Ukraine but in updated versions.
THE KIT:
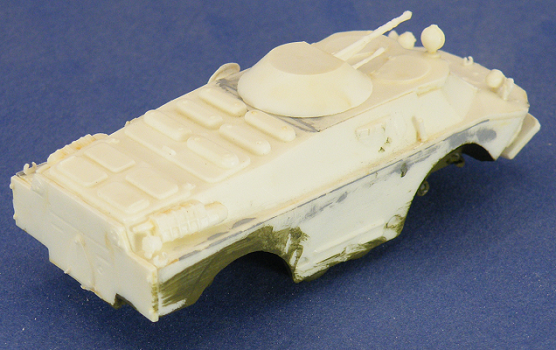
I purchased this kit well over 20 years ago from an online retailer. Ace was one of the very few companies to produce modern Soviet armored vehicle models in 1/72nd scale and I bought several over the years. Ace models are a limited run production line of kits. Because they are not molded with steel molds the fit is a bit challenging and my best friends in building this kit was a file and sanding stick. Frequent filing and test fitting will ensure a good fit with minimal filling and sanding. If you look close at the photos you will see where I missed filling in a few spots. The model consist of 69 white plastic parts on three trees. The detail ranges from sharp and well defined to soft such as molded on hatches and ports. The instructions are well done with clear line drawings in each assembly section. While not included in the kit the instructions show where to add hand rails from wire on the models’ hull and turret and there is a history of the BRDM-2 as well. The decal sheet has options for 4 versions:
1. BRDM-2 of the Soviet Naval Infantry
2. BRDM-2 of the Soviet Guard
3. BRDM-2 of the Czechoslovakian or East German Armies.
THE BUILD:
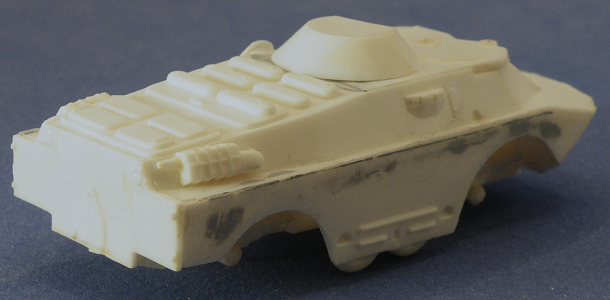
I began with assembling the upper hull leaving off the smaller parts such as tow hooks and lights until I was ready to begin painting. Part 14, the hatch on the upper hull left side, was lost over the years so I scratch built a new one.
I began with assembling the upper hull leaving off the smaller parts such as tow hooks and lights until I was ready to begin painting. Part 14, the hatch on the upper hull left side, was lost over the years so I scratch built a new one.

I then assembled the lower hull but I forgot to add parts 13 until I had already added the belly wheel sets! One thing I would recommend is to paint the interior of the hull parts black before joining them together, because there is a slot on the lower hull for the belly wheels clearance and this can be seen if the model is turned over. I had no problems with the drive train assembly as I mostly scraped off mold lines.
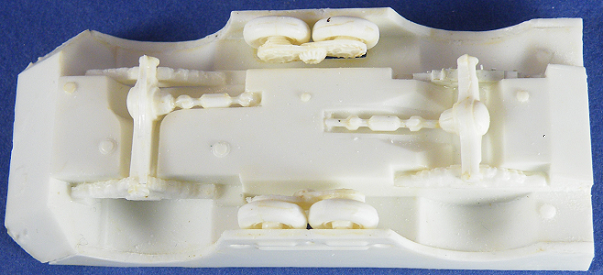
I then began attaching the side parts (37 and 38) removing any flash and sanding the mating surfaces flat on the parts and model to reduce any gaps. I still needed to add a little plastic strip and putty to fill the gaps between the bow and side plates. I tested fitted the rear plate (part 15) and sanded the rear of the model flat until there was little or no gaps. I added the trim vane mounts (parts 31) to the indentations on the bow and let it set overnight. The next day I sanded the angled part flat to make a strong glue joint to the trim vane. After building the model I would suggest painting this area as well as the back of the vane before mounting as it is difficult to paint once it is in place. I could have opened up the half moon shaped cut outs in the hull, but I left them filled and simply painted them black.
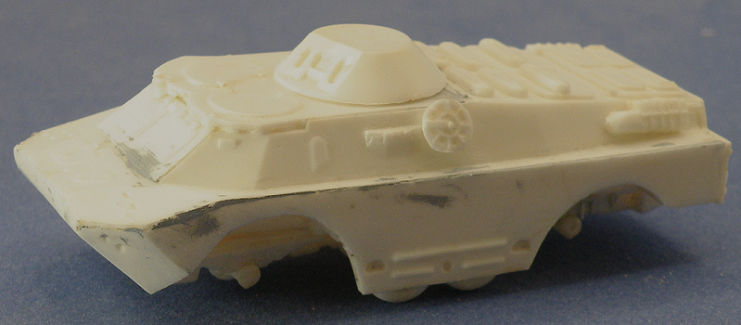
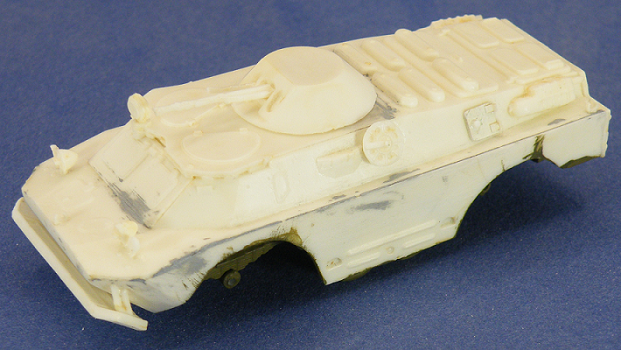
Finally I built the turret and added the main machine gun and drilled a hole for the coaxial machine gun and added it. I did not add part 39 which is used to hold the turret in place and center it as I found that the turret plug on part 35 fit quite snug without it but check the fit of your model before adding the upper hull to the lower hull. Even with careful sanding I still added filler to the hull mating edges and the sides ( parts 37 and 38) and the rear plate (part 15).
After assembling the wheels I drilled holes in the wheel backs (parts 4) and the axles (parts 20 and 22) and inserted brass rod into the holes in the wheels to strengthen the bond between them. After painting I super glued the wheels and brass rod to the axles. With the assembly complete I added the detail parts such as the tow hooks, headlights and other parts.
PAINTING:
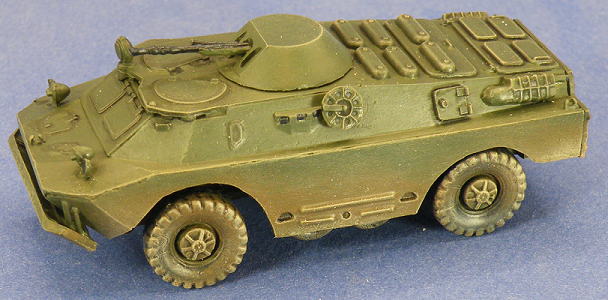
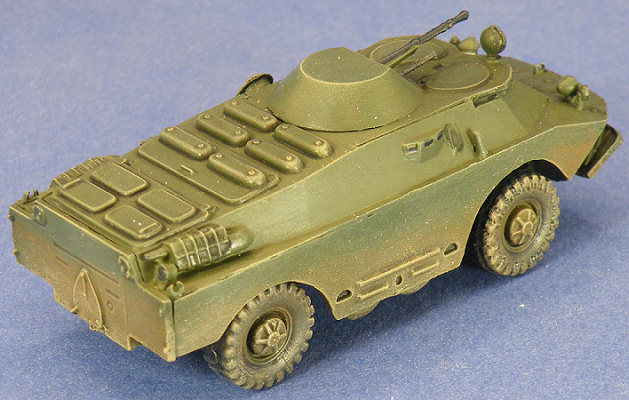
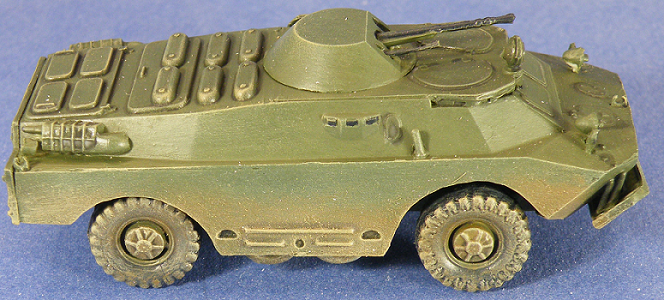
I brush painted the model with Vallejo Paints starting with Model Air Russian Green Primer 70.609 and the tires with Black Primer 73.602.
I brush painted the model with Vallejo Paints starting with Model Air Russian Green Primer 70.609 and the tires with Black Primer 73.602.
For the base coats I used Model Colors starting with Olive Grey 70.888 using 3 drops of paint to one or two drops of distilled water to thin the paint. After this base coat dried I added the Olive Grey and Buff 70.976 in a 2-1 mix. I applied this with a makeup brush and dry brushed it onto the model for a faded appearance. Vallejo Game Color Black Wash 73.201 was applied to the details using a small brush. For the wheels, the hubs were painted the same as the body and the tires and weapons were finish coated with Black Grey 70.862 and dry brushed with Neutral Grey 70.992. Weathering consisted of a heavy dry brush of Flat Earth 70.983 and a overall dry brush of Buff applied heavily on the lower portions of the hull. I did not apply any decals as not all Soviet BRDM-2s had any numbers or unit markings. I have used Ace decals in the past and they were always of high quality and easy to use.
|

|
CONCLUSIONS:
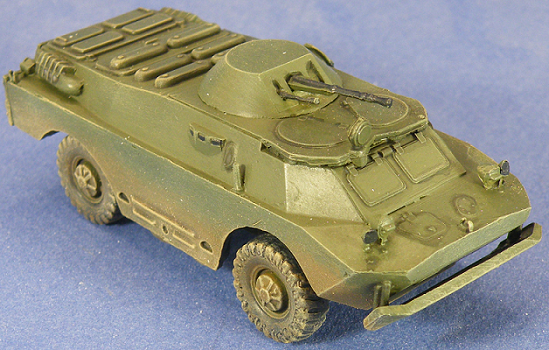
While this kit posed a few challenges, in the end I thoroughly enjoyed the build. I think that is because I did need to put in extra work such as test fitting every part and sanding, filing and filling any gaps. Visually, the finished model looks exactly like the full size BRDM-2 and it had a lot more detail than I had expected. Ace produces many unique and interesting models that many more well know manufacturers will not produce. Many of these kits include photo etch parts for details and even photo etch tracks. The moldings of these later kits are much finer and assembly and detail is better. If you have a few kits you have built and are looking for a unique model to add to your collection I highly recommend Ace models and especially this kit. All in all it was a fun build and in the end that is what matters.
Now, should I start the Ace T-55 or the BMP-1?
|
|
