
M4A3 Conversion to an M51 Degum Gimel
Part 2
by Rick Wilkes
I apologize for the tardiness of this this section. I have several good excuses but no good reasons.
On with the rear hull and engine deck changes, I’ll continue using the same format, following the construction steps in the Tasca instructions detailing the changes, use of Tamiya parts and any modifications needed.
In the previous installment I called what should have been Step 4, Step 3. At any rate I
asked you to remove the hinges from the rear hull plate (part O6), fill the hole for the right side exhaust and reserve parts O1 & O8 for later use.
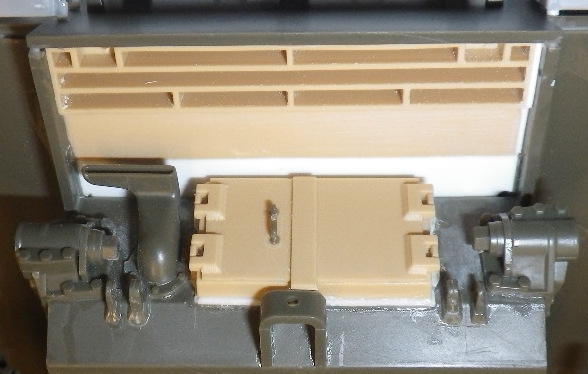
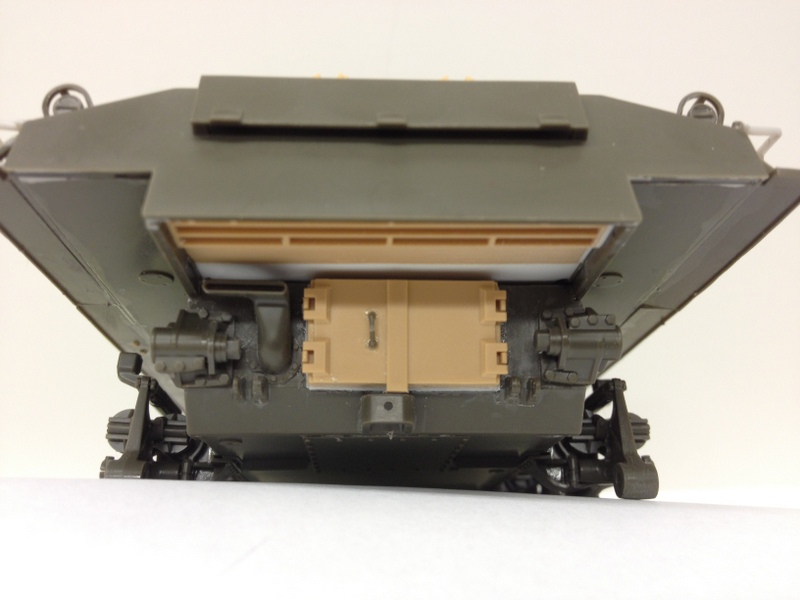
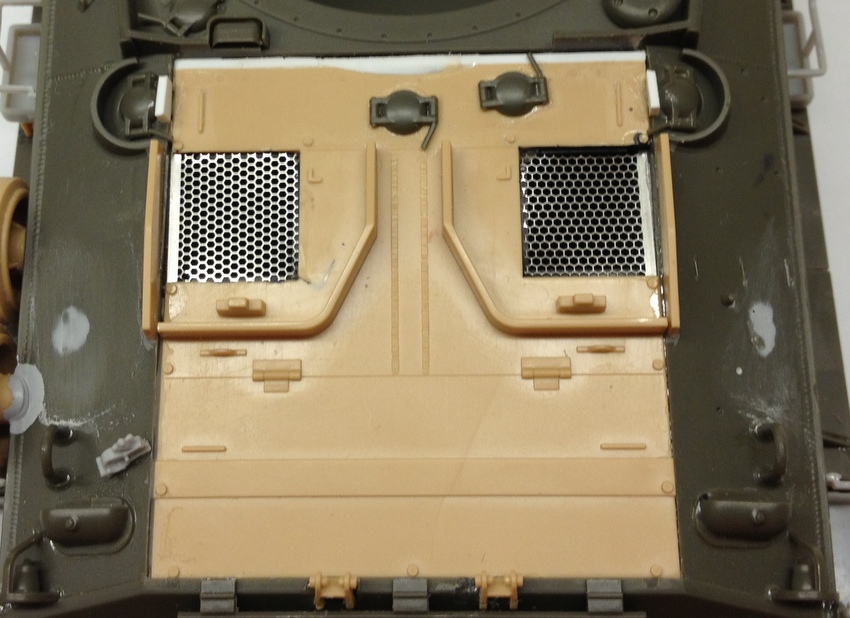
Later has arrived. From Step 2 in the Tamiya M51 instructions you will need parts F19, F23 & F26. From part F26 remove the raised engine door box and attach it to Tasca part O6, so that it covers the engine compartment opening. Remove the solid handle from the left door on part F19 and replace with Tasca part O1, then attach it to the engine door box as shown in the Tamiya instructions. You can attach Tasca part O8, the left exhaust now or later as you wish. Before, during or after the above, attach Tamiya part F23 to the rear upper hull. It require an extension and shimming so that everything mates up correctly.
The two pictures below illustrate how this all goes together. The Tasca parts are in OD and the Tamiya in sand.
On with the rear hull and engine deck changes, I’ll continue using the same format, following the construction steps in the Tasca instructions detailing the changes, use of Tamiya parts and any modifications needed.
In the previous installment I called what should have been Step 4, Step 3. At any rate I
asked you to remove the hinges from the rear hull plate (part O6), fill the hole for the right side exhaust and reserve parts O1 & O8 for later use.
Later has arrived. From Step 2 in the Tamiya M51 instructions you will need parts F19, F23 & F26. From part F26 remove the raised engine door box and attach it to Tasca part O6, so that it covers the engine compartment opening. Remove the solid handle from the left door on part F19 and replace with Tasca part O1, then attach it to the engine door box as shown in the Tamiya instructions. You can attach Tasca part O8, the left exhaust now or later as you wish. Before, during or after the above, attach Tamiya part F23 to the rear upper hull. It require an extension and shimming so that everything mates up correctly.
The two pictures below illustrate how this all goes together. The Tasca parts are in OD and the Tamiya in sand.
That completes the changes needed to the rear hull.
On to mating the Tamiya M51 engine deck to the Tasca hull.
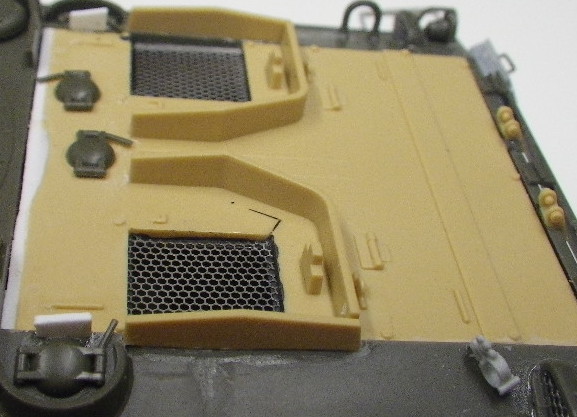
In Tasca step 11 substitute Tamiya part F22 for Tasca part O5.The picture below shows the basic installation. As you can see it will require shimming at the front, and I believe I thinned the underside of the edges to get a flush fit on top. I also cut away the molded on filler caps, which I replaced with spare Tasca parts. I added screen over the intake openings, but that’s optional and really unnecessary.
In Tasca step 11 substitute Tamiya part F22 for Tasca part O5.The picture below shows the basic installation. As you can see it will require shimming at the front, and I believe I thinned the underside of the edges to get a flush fit on top. I also cut away the molded on filler caps, which I replaced with spare Tasca parts. I added screen over the intake openings, but that’s optional and really unnecessary.
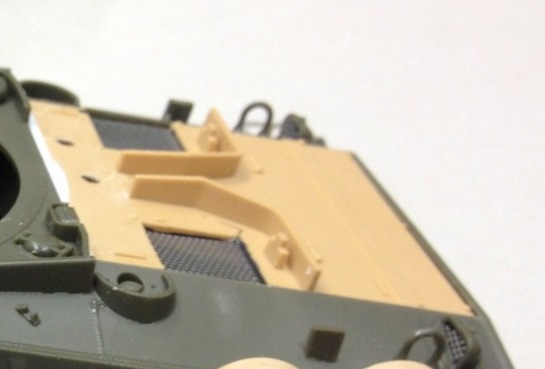
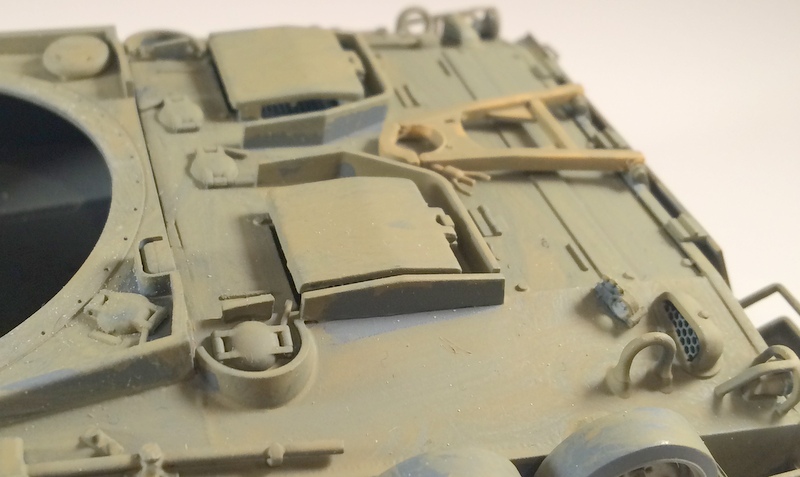
The “major” part of the installation was adding the outboard bullet splash plates. Tamiya molded them as part of the upper hull as you can see below. You will need to make your own.
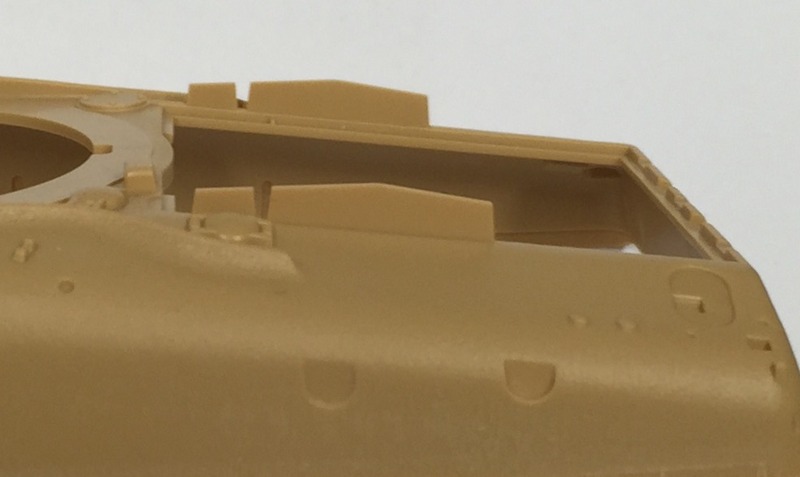
My solution was to cut them from an excess hull, it’s amazing how quickly building Shermans will bury you in extra parts. In the end, I used the long plates from the Tamiya hull and fabricated the short pieces from sheet stock.
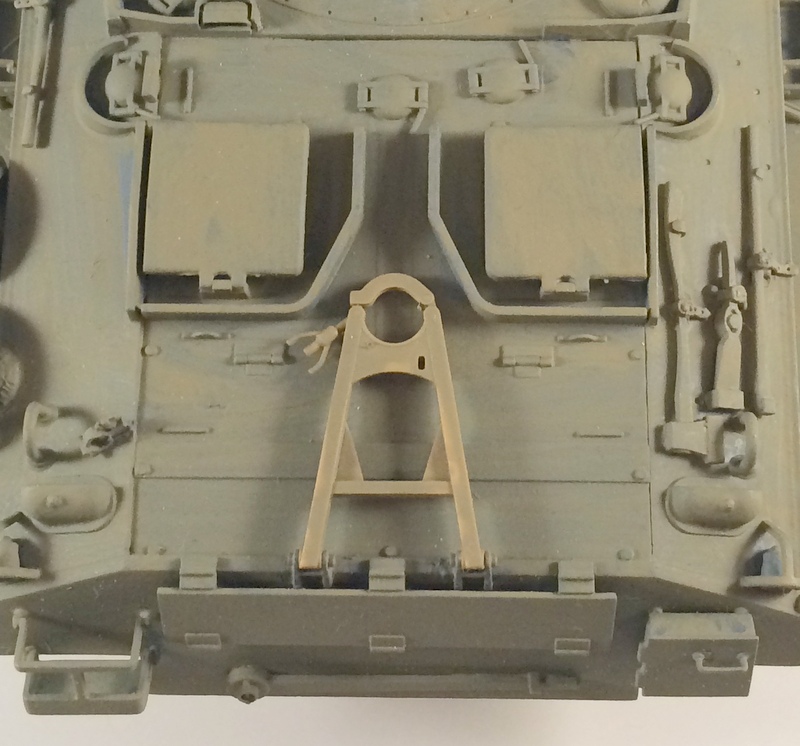
Finally add the hinges for the gun travel lock, Tamiya parts F4 to the rear edge of the upper hull. There is no need replace the grab handles on the Tamiya deck, as they drop down through the hatch plates to lie flush. The rest of the engine deck is assembled per the Tamiya instructions. Tool placement, etc., per your references.
Below you will see the engine deck completed, primed and a skim coat of IDF Sand Grey brushed on in preparation for final painting.
A teaser for the final installment.
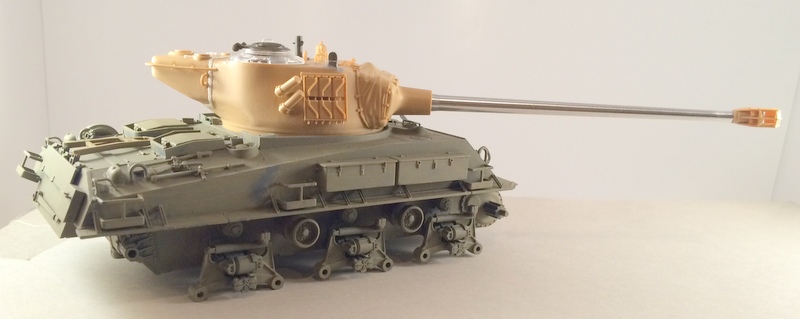
It will follow shortly, I promise.
So long for now.
Rick
So long for now.
Rick
