
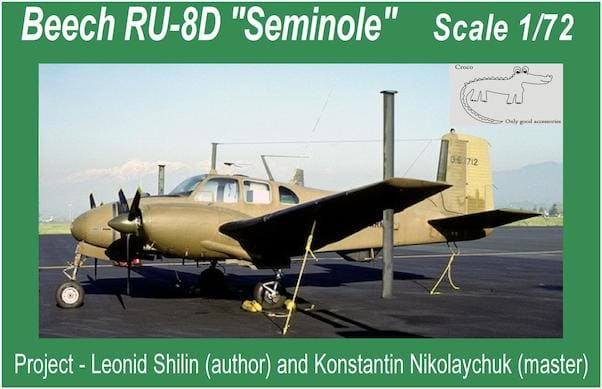
In Box Review of Croco 1/72nd Scale
Beech RU-8D "Seminole"
Project-Leonid Shilin (author)
& Konstantin Nikolaychuk (master)
Kit no. CMD7201
Copyright of the kit is 2018
By Ray Mehlberger
Copyright of the kit is 2018
By Ray Mehlberger
HISTORY:
The first L-23As entered service in 1953 and the type served the US Army for almost forty years, the last U-8Fs being retired in 1992. When US military aircraft designations were revised in 1962.
The remaining L-23D, RL-23D, L-23E and L-23F aircraft became U-8Ds, RU-8Ds, U-8Es and U-8Fs.
The RU-8D was a U.S. Army spy plane festuned with antennas, that included big and long ones above and below the wings as shown on the box art photo.
A further 47 Model 65s were ordered in 1962 and 1963 as U-8Fs; one of these was delivered to the Pakistan Army, the only delivery outside the US military (although other nations bought Queen Airs as military aircraft).
These were the final new-build aircraft in the series, however the unique Beechcraft Model 87 turboprop proof-of-concept aircraft used in developing the King Air was delivered to the Army as the NU-8F in 1964 (this was later re-designated the YU-21) and a few used Queen Airs were also taken by the Army.
Many U-8Fs were modified during their service lives to a similar standard as civilian Excalibur Queen Airs. The most obvious modifications are more powerful Lycoming IO-720 eight-cylinder engines in place of the factory-fitted six-cylinder engines; and bulged main landing gear doors that fully enclose the wheels when the gear is retracted instead of the wheels partially protruding through the doors.
Many L-23Ds/U-8Ds and U-8Fs have been registered as civilian aircraft since retirement from military service.
SPECIFICATIONS:
Crew: 1-2 pilots
Capacity: 5 passengers
Length: 31 ft 6 in (9.61 m)
Wingspan: 45 ft 3 in (13.78 m)
Height: 11 ft 6 in (3.51 m)
Wing area: 277 ft² (25.7 m²)
Empty weight: 5,010 lb (2,270 kg)
Max. takeoff weight: 7000 lb (3175 kg)
Powerplant: 2 × Lycoming GSO-480-A1A6 (Military designation O-480-1), 340 hp (253 kW) each
Maximum speed: 270 mph (235 knots, 432 km/h)
Range: 1,000 mi (870 nm, 1,600 km)
Service ceiling: 30,000 ft (9144 m)
Rate of climb: 1,614 ft/min (8.2 m/s)
THE KIT:
Croco is a model company based in Riga, Latvia. They make various armor and aircraft subjects in Resin, with PE and vacu-formed parts. Some Vietnam era U.S. river boats are planned for future releases.
This kit came in a generic brown tray and lid type box that has a hinged lid with locking tabs on it. However, the box is blousey. It is 2" to long and nearly 4" too wide, creating a letter "L" void around the parts.
The box art is a color photo of an actual "Seminole" sitting on a runway. It is overall olive-drab with a black serial no. on the rudder of 063712. It has red spinners and a dark leading edge to the rudder. It has the black lettering UNITED STATES ARMY down the sides of the fuselage. This is mostly obscured by the wing in the box art photo.
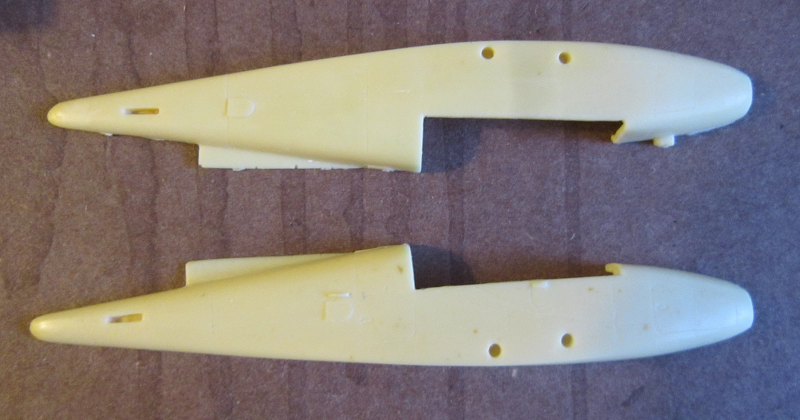
This is very much your standard garage kit. There are no air bubbles or pockets, though you do have to drill out the holes for mounting the flight surfaces. Not a big deal and standard stuff for modelers who build these sorts of kits.
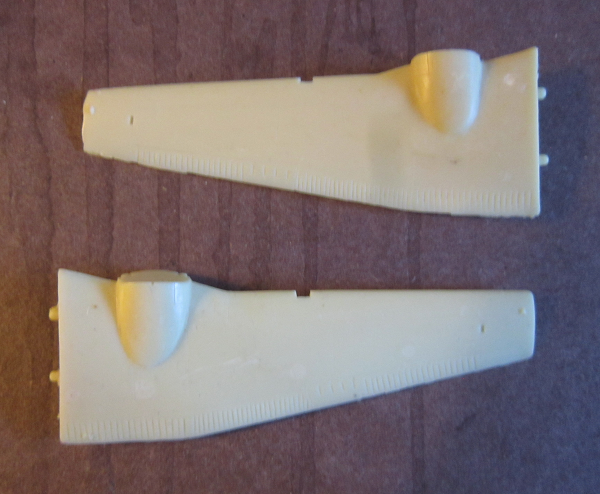
I dry-fitted the fuselage halves and wings onto the fuselage. They were a very good, tight fit. Only a little putty will ever be needed.
Croco is a model company based in Riga, Latvia. They make various armor and aircraft subjects in Resin, with PE and vacu-formed parts. Some Vietnam era U.S. river boats are planned for future releases.
This kit came in a generic brown tray and lid type box that has a hinged lid with locking tabs on it. However, the box is blousey. It is 2" to long and nearly 4" too wide, creating a letter "L" void around the parts.
The box art is a color photo of an actual "Seminole" sitting on a runway. It is overall olive-drab with a black serial no. on the rudder of 063712. It has red spinners and a dark leading edge to the rudder. It has the black lettering UNITED STATES ARMY down the sides of the fuselage. This is mostly obscured by the wing in the box art photo.
This is very much your standard garage kit. There are no air bubbles or pockets, though you do have to drill out the holes for mounting the flight surfaces. Not a big deal and standard stuff for modelers who build these sorts of kits.
I dry-fitted the fuselage halves and wings onto the fuselage. They were a very good, tight fit. Only a little putty will ever be needed.
WHAT'S IN THE BOX:
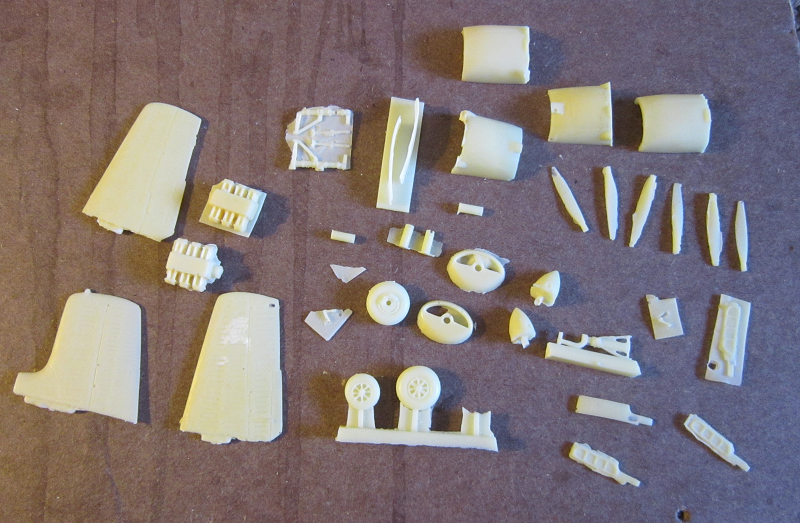
The kit is molded in light tan resin parts. The fuselage halves and the wings are loose and the rest of the parts are in various sizes of zip-locked cello bags. The small brass PE fret and decal sheet are also in their own bags.
The kit is molded in light tan resin parts. The fuselage halves and the wings are loose and the rest of the parts are in various sizes of zip-locked cello bags. The small brass PE fret and decal sheet are also in their own bags.
The cockpit interior consists of a floor onto which the front seats are attached. Behind this is a bank of radios and a seat for the radio operator.
A small shelf is also included. This will fit into the left fuselage half where there are ridges to accept it.
A small shelf is also included. This will fit into the left fuselage half where there are ridges to accept it.
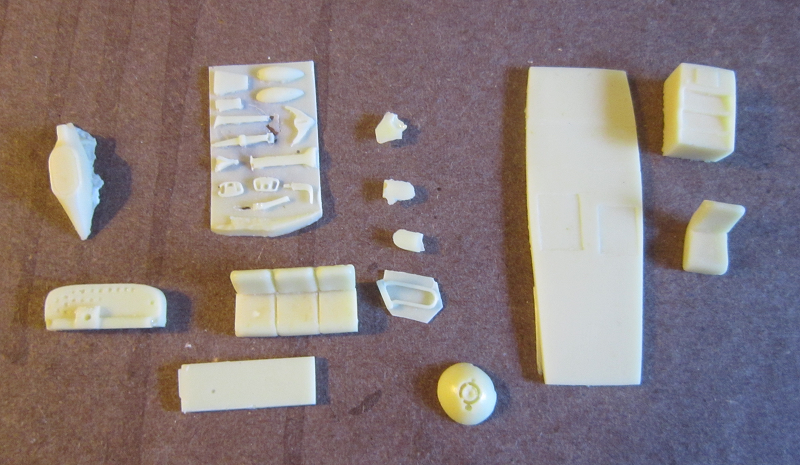
To keep this kit from being tail-heavy you will need some nose weight. You will need to fit it into every available space forward of the main gear. There is a good size cavity above the nose gear well for this.
Once the fuselage halves are joined, you can attach the various flight surfaces. The instrument panel with the control wheels is then glued in place followed by the cockpit/cabin clear piece.
Once the fuselage halves are joined, you can attach the various flight surfaces. The instrument panel with the control wheels is then glued in place followed by the cockpit/cabin clear piece.
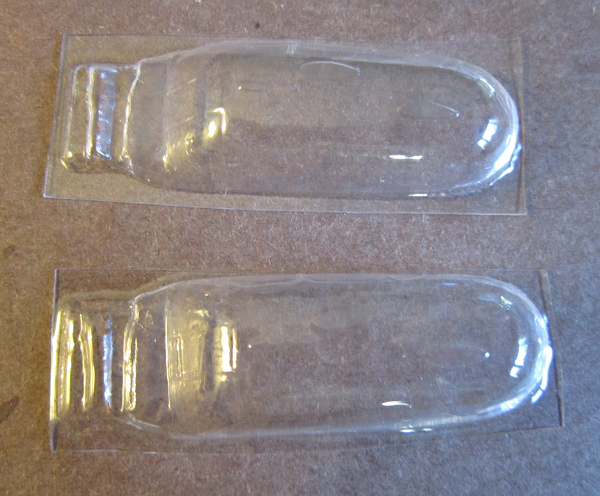
This is a large vacu-formed part that has the windows and the surrounding fuselage. Two of these are provided in case you need a second one.
Both the nose and main gear have a goodly number of parts with each having separate oleo scissors and retraction struts.
The main gear cants forward a bit, which is why it is important to put in as much nose weight as you can.
Engine nacelles are an upper and a lower half which are joined together.
A full engine is provided which attaches to the cowling front piece and is then inserted into the cowling. The cowling is joined to the wing.
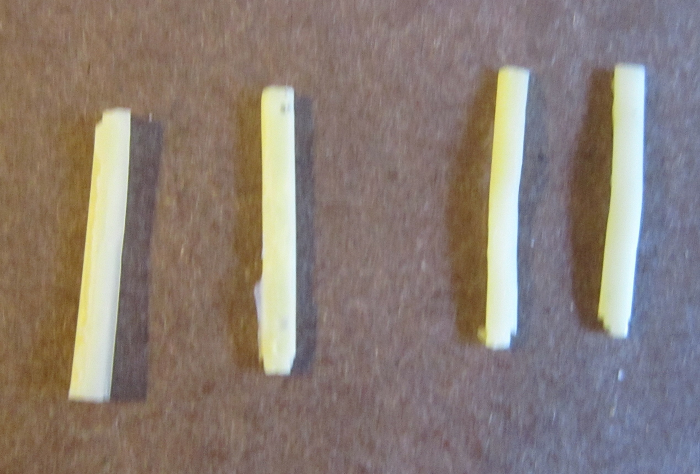
The last steps are adding the many antennas and vents that were standard on the ELINT version. This also includes building up the props from separate blades and a spinner and attaching the vacuformed landing light cover.
The main gear cants forward a bit, which is why it is important to put in as much nose weight as you can.
Engine nacelles are an upper and a lower half which are joined together.
A full engine is provided which attaches to the cowling front piece and is then inserted into the cowling. The cowling is joined to the wing.
The last steps are adding the many antennas and vents that were standard on the ELINT version. This also includes building up the props from separate blades and a spinner and attaching the vacuformed landing light cover.
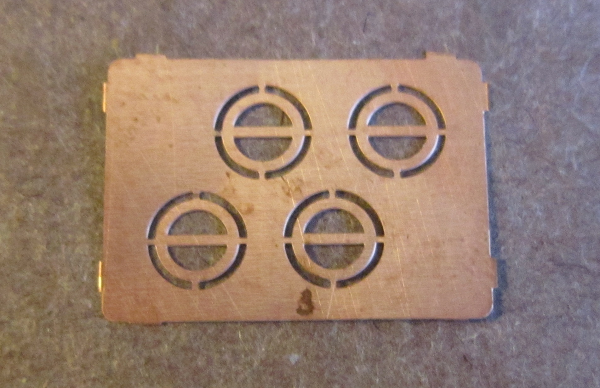
The brass PE fret holds four circles with a bar across them. However, as much as I searched the assembly steps, I could not find these parts anyplace. Then I discovered that they are, in fact, the ends of the large dipole antennas sticking out above and below the wings.
The instructions consist of a single-sheet printed on both sides in 8 1/4" x 11 1/2"page format. that is folded twice to fit the box and has 14 assembly steps.
Basically, the outside is olive drab with the interior in dark grey.
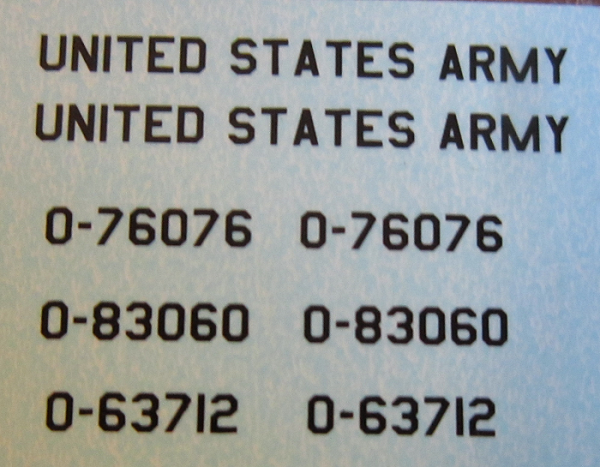
These aircraft were minimally marked and you are provided serial numbers for three planes on the small sheet.
Basically, the outside is olive drab with the interior in dark grey.
These aircraft were minimally marked and you are provided serial numbers for three planes on the small sheet.
The only way to get interesting kits like this is with resin as the major kits makers won't touch them.
With all the antennas this aircraft has, the last steps will probably prove to be rather fiddly, but anyone with experience in building resin kits will not have any problems.
There are no crew figures included. Detail is nicely engraved type.
This kit is not for the novice modeler and definitely not a weekend project.
Highly recommended to modelers with advanced building skills. Assembly is by using superglue. When sanding resin, don't breath the dust.
I want to thank Leonid Shilin, President of Croco Models for this review sample.
Contact the owner at [email protected] for more information on getting yours.
