
Alan 1/35 'Gepard' Flakpanzer 38(t)
Kit No. 018
MSRP: $29.95 originally
Price: $33.88 to $35.00 depending on where you shop. Kit now out of production by Alan, but around by ARK.
By Ray Mehlberger
Alan was a model company based in St. Petersburg, Russia that went out of business. Their molds went to the ARK company (also I believe based in Russia)
History:
At the beginning of WWII, German ground forces were in the advantageous position of Luftwaffe air supremacy. As the war went on, the strength of the Allied air forces was increasing and the balance began to change. Already, in 1943, the main attack forces of the Wehrmacht – its tank units – was being attacked at an alarming rate by the Allied air forces.
Although fighter-bomber aircraft did not possess the armor penetrating capabilities of the other anti-tank weapons, they were often quite successful because they usually attacked the thinner upper armor of the tanks. The Panzer divisions had fairly strong anti-aircraft units on their rosters since the beginning of the war, but their towed guns could not be emplaced quickly enough to help tanks operating in open terrain.
A feasable solution was an anti-aircraft tank, or flakpanzer, capable of opening fire several minutes after an air raid warning. The light tank (ex-Czech) Pz.Kpfw. 38(t), famous for its excellent riding qualities and dependability, was one of the leading candidates for the flakpanzer program. The original order for a flakpanzer 38(t), armed with a single-barrel 2cm flak 38, was for 150 vehicles, but only 140 were ever made.
The last of these were built in January - February 1944. Their single-barrel 2cm gun could not provide sufficient fire saturation against aircraft, even when the vehicles were used in groups. Eventually, the chassis of the Pz.Kpfw. IV was used as a carrier of multi-barreled or larger anti-aircraft guns.
THE KIT:
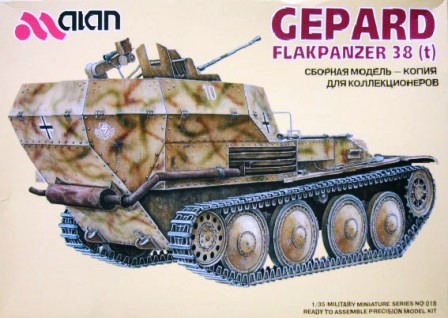
The kit came in a shrink wrapped tray and lid type box. The box art shows a Gepard, at an angle, exposing the rear and the right side. It carries the markings of the 12th SS "Hitlerjugende" Panzer Division (one of the alternatives offered on the kit's decal sheet).
WHAT''S IN THE BOX:
Parts trees are packaged in two cello bags. One cello holds three trees of medium gray colored parts trees. The second cello holds four smaller trees of light cream colored parts.
The decal sheet, one small brass PE part,a turned aluminum gun barrel and the instructions complete the kit's contents.
The instructions consist of six pages that are 8.5" x 11" in size format and six pages long.
The first page gives the vehicle's history in Russian, Japanese, English, and German. This is then followed with 14 assembly step drawings. The last page gives a 3 view line drawing for painting and decal applications. This is followed by international assembly symbol explanations.
There are three marking options offered by the decal sheet. They are:
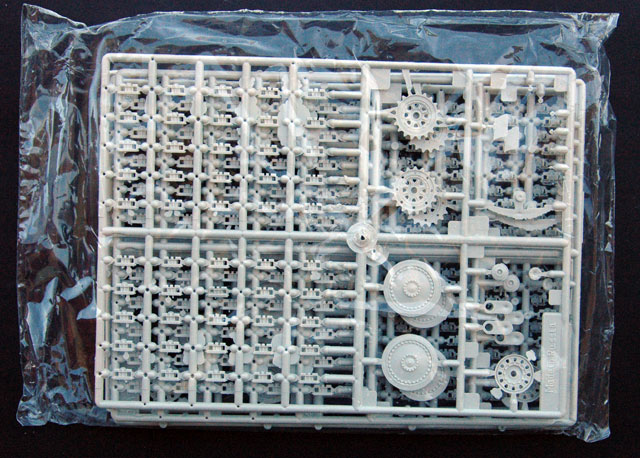
There are four identical, letter "A", cream colored parts trees. They hold: individual tread links, road wheels, drive sprockets, idler wheels, leaf springs, suspension arms, etc. (66 parts each). Unfortunately, the instructions do not indicate how many links you need to make a run. I also assume there are more than enough for that, plus some others that have to be mounted in two places as spares.
At the beginning of WWII, German ground forces were in the advantageous position of Luftwaffe air supremacy. As the war went on, the strength of the Allied air forces was increasing and the balance began to change. Already, in 1943, the main attack forces of the Wehrmacht – its tank units – was being attacked at an alarming rate by the Allied air forces.
Although fighter-bomber aircraft did not possess the armor penetrating capabilities of the other anti-tank weapons, they were often quite successful because they usually attacked the thinner upper armor of the tanks. The Panzer divisions had fairly strong anti-aircraft units on their rosters since the beginning of the war, but their towed guns could not be emplaced quickly enough to help tanks operating in open terrain.
A feasable solution was an anti-aircraft tank, or flakpanzer, capable of opening fire several minutes after an air raid warning. The light tank (ex-Czech) Pz.Kpfw. 38(t), famous for its excellent riding qualities and dependability, was one of the leading candidates for the flakpanzer program. The original order for a flakpanzer 38(t), armed with a single-barrel 2cm flak 38, was for 150 vehicles, but only 140 were ever made.
The last of these were built in January - February 1944. Their single-barrel 2cm gun could not provide sufficient fire saturation against aircraft, even when the vehicles were used in groups. Eventually, the chassis of the Pz.Kpfw. IV was used as a carrier of multi-barreled or larger anti-aircraft guns.
THE KIT:
The kit came in a shrink wrapped tray and lid type box. The box art shows a Gepard, at an angle, exposing the rear and the right side. It carries the markings of the 12th SS "Hitlerjugende" Panzer Division (one of the alternatives offered on the kit's decal sheet).
WHAT''S IN THE BOX:
Parts trees are packaged in two cello bags. One cello holds three trees of medium gray colored parts trees. The second cello holds four smaller trees of light cream colored parts.
The decal sheet, one small brass PE part,a turned aluminum gun barrel and the instructions complete the kit's contents.
The instructions consist of six pages that are 8.5" x 11" in size format and six pages long.
The first page gives the vehicle's history in Russian, Japanese, English, and German. This is then followed with 14 assembly step drawings. The last page gives a 3 view line drawing for painting and decal applications. This is followed by international assembly symbol explanations.
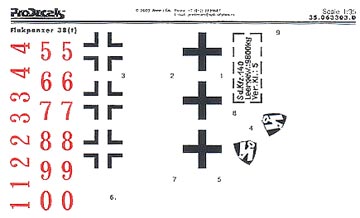
There are three marking options offered by the decal sheet. They are:
- 9th SS "Hohenstaufen" Panzer Division, Eastern Front 1945
- 10th SS "Frundsberg" Panzer Division, Eastern Front 1945
- 12th SS "Hitlerjugend" Panzer Division, Eastern Front 1945.
There are four identical, letter "A", cream colored parts trees. They hold: individual tread links, road wheels, drive sprockets, idler wheels, leaf springs, suspension arms, etc. (66 parts each). Unfortunately, the instructions do not indicate how many links you need to make a run. I also assume there are more than enough for that, plus some others that have to be mounted in two places as spares.
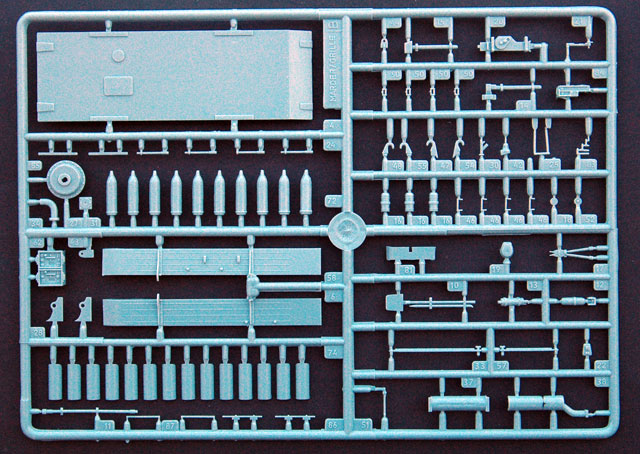
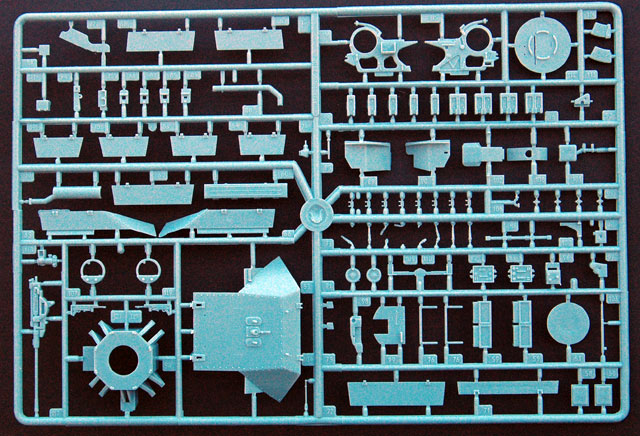
Parts tree, letter "B" is one of the larger medium gray colored parts trees. It holds10 ammo rounds that are probably not used for this kit as they are way too big to be 2cm flak38 ones plus the half cylinder holders for these, the hull bottom, muffler and exhaust pipe, tools, tow hooks, radio, etc. (84 parts).
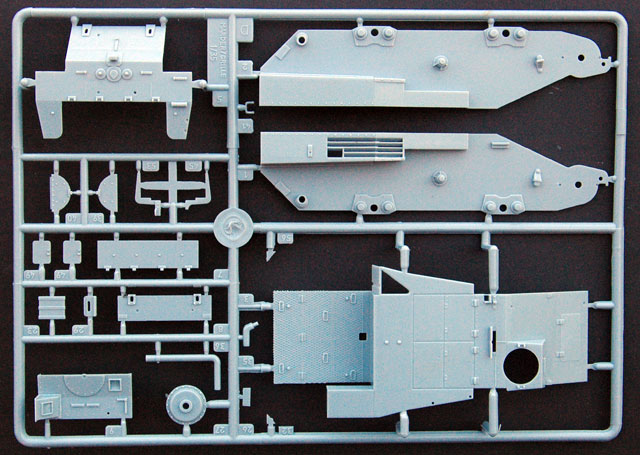
Lettering now jumps to the "D" medium gray tree. It holds the vehicle's left and right sides, the top piece, front piece, fold-down shield pieces, split hatch covers, etc. (21 parts).
The final parts tree is letter "F" (also medium gray). It is the largest parts tree. It holds the 2cm pak38 parts and it’s shields, 2cm ammo boxes, the vehicle's rear hull piece, the gun's pedestal parts, more radios, and numerous small fittings (96 parts).
There are no crew figures provided.
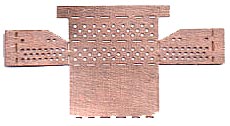
The single brass PE part is made to be folded into a perforated tool box, which the instructions show the jack is stowed into and which mounts on one of the fenders.
The single brass PE part is made to be folded into a perforated tool box, which the instructions show the jack is stowed into and which mounts on one of the fenders.
Kit decals
Conclusion
Parts are crisply molded and flash free. Highly recommended. By skim-reading the instructions, I noticed that some of the placement of a few parts was not too clear. Also, the fold-down parts of the vehicle's shields can be positioned either closed or open.
My kit came as a trade with my net friend in Wales.
This kit’s mold is under the ARK brand now, as Alan has gone out of business.
This is a neat vehicle and will be welcome to most WWII armor modelers
THE BUILD:
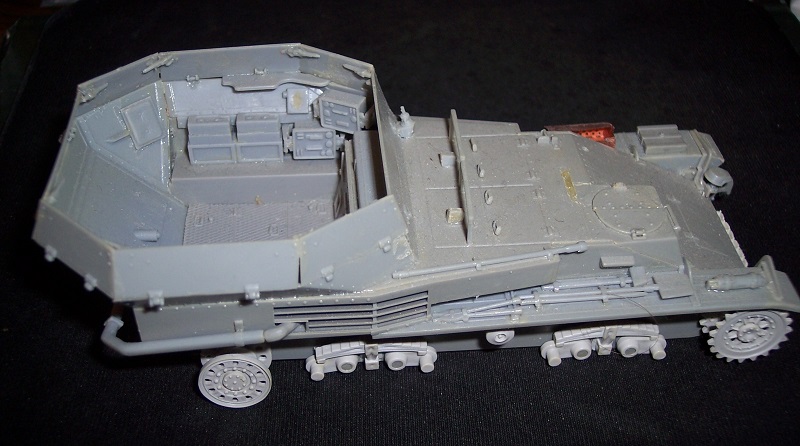
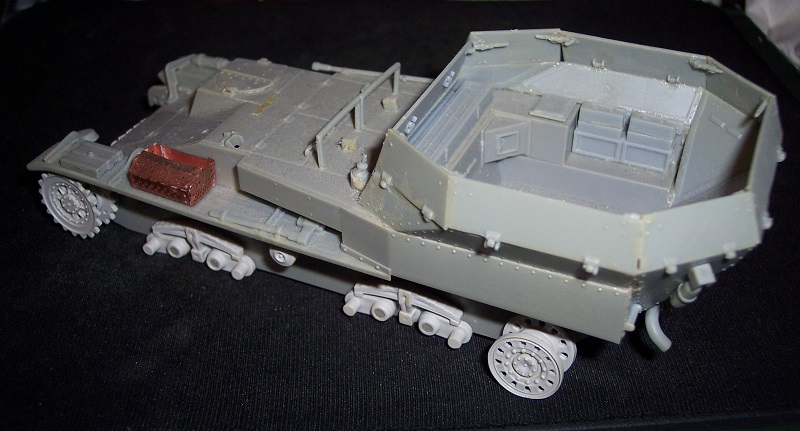
Assembly naturally began with the first step. Here you put the floor, sides, front and rear walls together into the chassis. A seat cushion is added to the rear wall, the leaf springs and suspension arms added to the sides. The final transfer housings (D27 & B27) glued to the sides and the drive sprockets added to them with axle pins A35 carefully glued through them so they are left to turn. The idler wheels were also left to turn with other A35’s to hold them so they turn. I did not attach the gas mask canister to the rear wall inside because it is terribly detailed and has no rib pattern on it. So, I will add some from my spares box that are DML origin later after I paint them field gray.
In step no. 2, I added the split hatches over the driver’s compartment, tow hooks to the bow, fender braces, the wood jack block, the notek lamp, an axe and fire extinguisher to the to of the fenders and two brackets for the spare link rack on the nose. These two parts have their part numbers reversed on the drawings. I did not add the spare links now to the brackets, so I can paint them first before attaching them. I bent the PE perforated storage bin in the kit with my Hold N Fold tool and superglued it to the fender. I assembled the jack, but left this off for now too for painting.
Step 3 is assembly of the fold down armor plates around the top of the fighting compartment. These can be positioned up or down. I glued mine up. A large storage box is positioned to the front of the fighting compartment and a cable cutter, sledge hammer, shovel and gun cleaning rod added to the fender top. Tow hooks and the muffler were added to the rear.
Step 4 adds some inverted “U” shaped braces to the doors over the driver’s compartment and the radio aerial base.
Steps 5 and 6 add parts to the fighting compartment: shelves, ammo boxes, radios and a storage box. The storage box (part no. F78) had a nasty sink on it’s face to fix. Two MP-40’s in racks are to be added to the fighting compartment walls now, but I left them off for now to be painted first. Two ammo boxes (parts no. F65) had to have the pins on their bottoms sanded down so they would fit into part F59.
Parts are crisply molded and flash free. Highly recommended. By skim-reading the instructions, I noticed that some of the placement of a few parts was not too clear. Also, the fold-down parts of the vehicle's shields can be positioned either closed or open.
My kit came as a trade with my net friend in Wales.
This kit’s mold is under the ARK brand now, as Alan has gone out of business.
This is a neat vehicle and will be welcome to most WWII armor modelers
THE BUILD:
Assembly naturally began with the first step. Here you put the floor, sides, front and rear walls together into the chassis. A seat cushion is added to the rear wall, the leaf springs and suspension arms added to the sides. The final transfer housings (D27 & B27) glued to the sides and the drive sprockets added to them with axle pins A35 carefully glued through them so they are left to turn. The idler wheels were also left to turn with other A35’s to hold them so they turn. I did not attach the gas mask canister to the rear wall inside because it is terribly detailed and has no rib pattern on it. So, I will add some from my spares box that are DML origin later after I paint them field gray.
In step no. 2, I added the split hatches over the driver’s compartment, tow hooks to the bow, fender braces, the wood jack block, the notek lamp, an axe and fire extinguisher to the to of the fenders and two brackets for the spare link rack on the nose. These two parts have their part numbers reversed on the drawings. I did not add the spare links now to the brackets, so I can paint them first before attaching them. I bent the PE perforated storage bin in the kit with my Hold N Fold tool and superglued it to the fender. I assembled the jack, but left this off for now too for painting.
Step 3 is assembly of the fold down armor plates around the top of the fighting compartment. These can be positioned up or down. I glued mine up. A large storage box is positioned to the front of the fighting compartment and a cable cutter, sledge hammer, shovel and gun cleaning rod added to the fender top. Tow hooks and the muffler were added to the rear.
Step 4 adds some inverted “U” shaped braces to the doors over the driver’s compartment and the radio aerial base.
Steps 5 and 6 add parts to the fighting compartment: shelves, ammo boxes, radios and a storage box. The storage box (part no. F78) had a nasty sink on it’s face to fix. Two MP-40’s in racks are to be added to the fighting compartment walls now, but I left them off for now to be painted first. Two ammo boxes (parts no. F65) had to have the pins on their bottoms sanded down so they would fit into part F59.
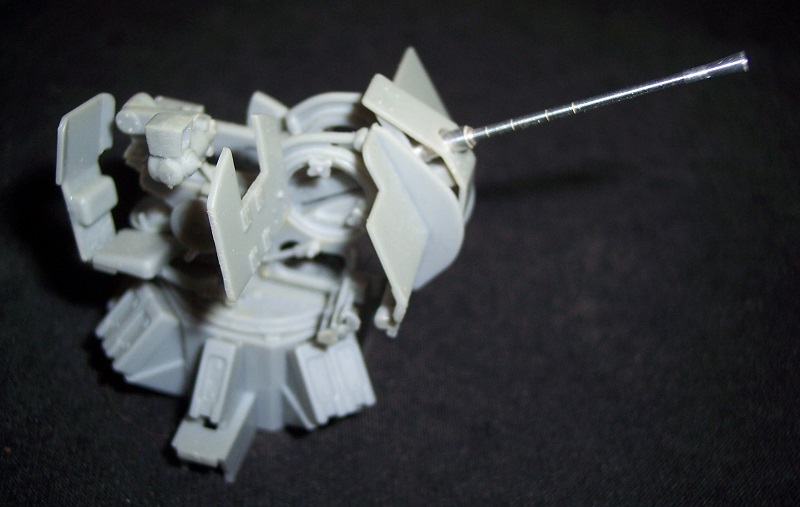
Steps 7 to 11 is the assembly of the Flak 38. This all went well and care should be done following the instructions closely as there are a lot of parts. I had to drill two location holes in part no. F116 so that a piston arm (part no. F104) would fit it’s two pins. I purchased a Gordi Rubio turned aluminum barrel for adding to this kit. It is a great addition to it.
Step 12 is the assembly of the front shield of the FLAK 38 and it’s support bar.
Steps 13 & 14 is the assembly of the gunner’s seat to the Flak 38 and the Flak’s base and the ammo boxes surrounding the base. I had to remove the 5 posts molded into the inside of par F54 or the circular part F61 that should fit into the bottom of it would have been impossible to fit otherwise.
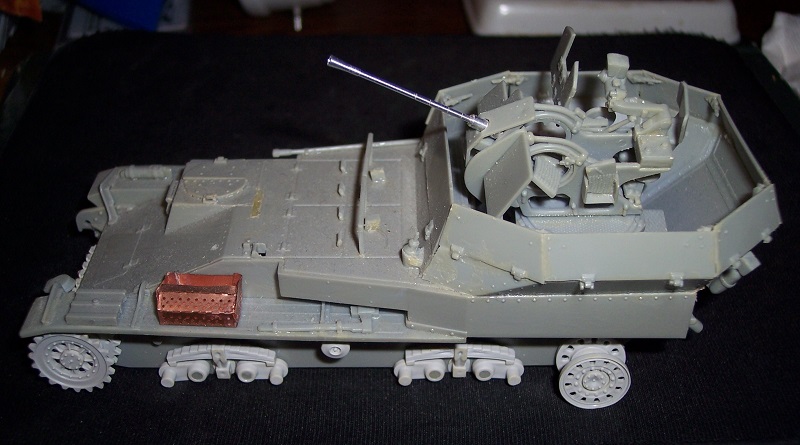
The Flak is now to be added to the chassis. Only a line drawing shows it in place. Not really as a assembly step.
TriStar brand has since done a kit of this same vehicle as kit no. 35035, that is readily available. It is far more detailed than the Alan one was with a engine, transmission, drivers seat and drivers compartment details. However, all that will be kind of invisible under the fighting compartment floor. Italeri also has a kit of this vehicle as kit no. 6461. ARK brand got the old Alan molds now and offers this kit as no. 35010 in their boxing. However, I cannot speak for the quality of that one, as I don’t have it in my stash.So, pay your money and make your pick.
