
Review of Hat 1:72 WW1 German Field Wagon
Kit 8260
MSRP $15.18
John Kelley
MSRP $15.18
John Kelley
Some history
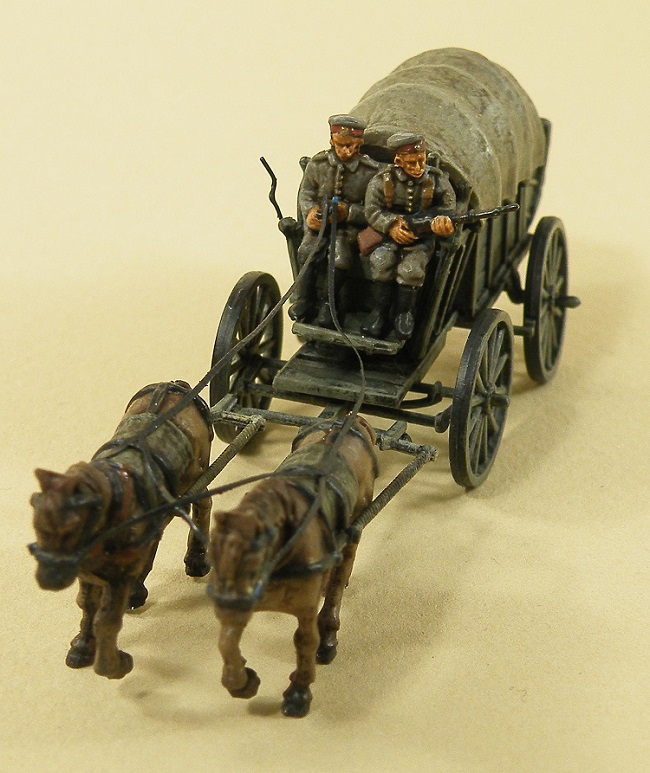
From what information I could obtain in print and on the internet I believe this is a Light Provisions Wagon 05 which was used in WW1 as well as WW2. From what photos I could find It appears that the front wheel axle could be placed a little more forward and under the drivers feet but that seems to be the only issue I noticed apart from the simplified brake system. While two horses could pull the wagon on good roads it is likely that using four horses was a common practice and sometimes even six if the load was heavy enough.
Kit contents
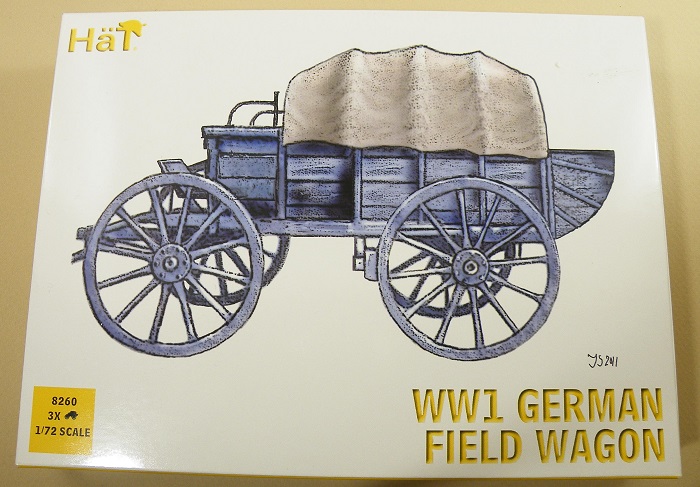
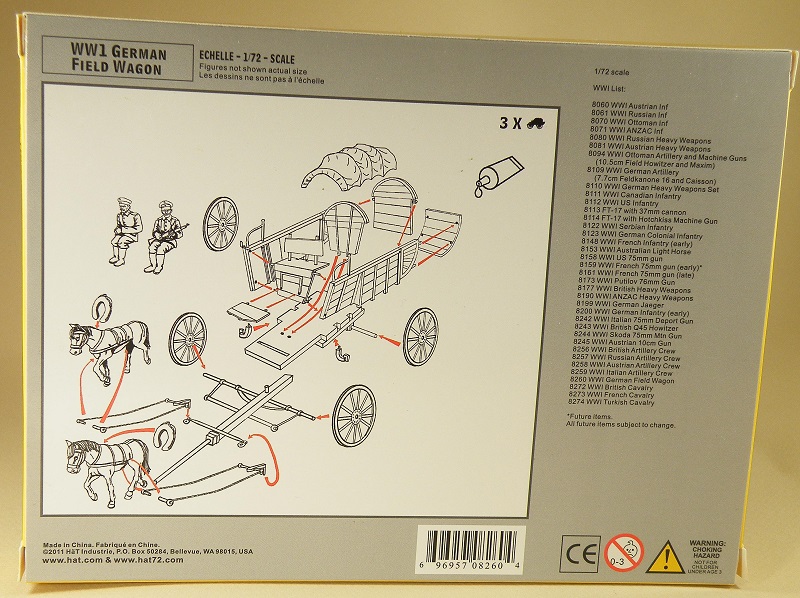
The model comes in a end opening box with a color painting on the front that can be used for a painting guide along with the kit number, scale and number of kits in the box. The back of the box contains a drawing of the assembly instructions as well as a listing
From what information I could obtain in print and on the internet I believe this is a Light Provisions Wagon 05 which was used in WW1 as well as WW2. From what photos I could find It appears that the front wheel axle could be placed a little more forward and under the drivers feet but that seems to be the only issue I noticed apart from the simplified brake system. While two horses could pull the wagon on good roads it is likely that using four horses was a common practice and sometimes even six if the load was heavy enough.
Kit contents
The model comes in a end opening box with a color painting on the front that can be used for a painting guide along with the kit number, scale and number of kits in the box. The back of the box contains a drawing of the assembly instructions as well as a listing
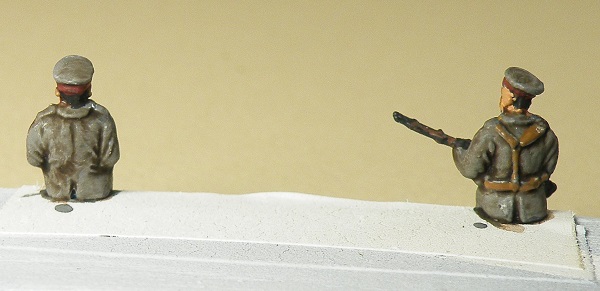
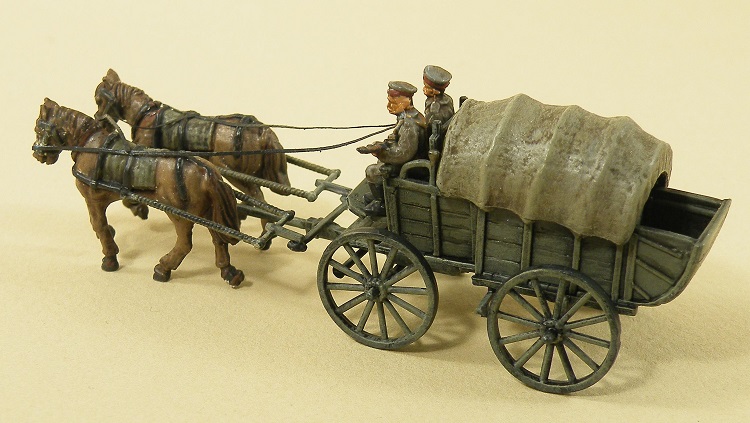
Inside the box are three hard plastic trees each containing one complete model. The parts are molded in a flash free light gray plastic with two horses and two figures as well as the wagon. The horses are well sculpted and have a blanket and rigging molded on to them and there is a separate harness that attaches to the sides of the horses and onto the shaft. The reins are not included and must be scratched from paper or tape if you want them. One nice addition is the horse collars which can be left on or off. The figures are well sculpted but the faces are a little odd looking and are not well defined. I am not certain about the use of the web gear on the rider but considering he is armed with a rifle this may be correct. The folds and uniform details are well defined and made painting and shading easier. I much prefer the hard plastic over the soft plastic for clean up as well as better defined details. I hope the Hat will continue using the hard plastic in future releases.
While the model is designed to be assembled without glue you can use regular cement for plastic models which is what I did. While the outside of the wagon is nicely scribed showing the wooden boards the inside is bare. This is not a real problem since a tarp with molded in bows is provided to hide this lack of detail. If the cover is left off then some kind of load needs to be added or the inside boards scribed into the plastic. The entire wagon is well molded and it certainly looks the part.
While the model is designed to be assembled without glue you can use regular cement for plastic models which is what I did. While the outside of the wagon is nicely scribed showing the wooden boards the inside is bare. This is not a real problem since a tarp with molded in bows is provided to hide this lack of detail. If the cover is left off then some kind of load needs to be added or the inside boards scribed into the plastic. The entire wagon is well molded and it certainly looks the part.


Construction
Assembly was quite easy and took about ten minutes to complete. I did need to enlarge the wheel openings so they would fit onto the axles easily. There are location holes on the side boards and the end piece that need to be filled and sanded. There are also location holes on the bottom of the wagon but I did not bother filling them. After assembly was complete I added the rear wheel brakes. Now I have to confess that I really could not find a good picture of how the brakes were mounted to the wagon so I took a guess simply added some .020x.020(.051x.051mm) strip styrene to the bottom of the wagon and added another .020x.020 strip across the wagon in line with the wagon wheels. With this completed I added a vertical strip of the same styrene to the horizontal piece in front of each wheel to replicate the brake pad. I made a brake handle out of wire and attached it to the side boards and ran it to the brake. It looks like the photo but you really do not want look to close. After I was satisfied with this I added the reins. These were made of painters masking tape but after making them I would recommend using Tamiya masking tape instead.
Assembly was quite easy and took about ten minutes to complete. I did need to enlarge the wheel openings so they would fit onto the axles easily. There are location holes on the side boards and the end piece that need to be filled and sanded. There are also location holes on the bottom of the wagon but I did not bother filling them. After assembly was complete I added the rear wheel brakes. Now I have to confess that I really could not find a good picture of how the brakes were mounted to the wagon so I took a guess simply added some .020x.020(.051x.051mm) strip styrene to the bottom of the wagon and added another .020x.020 strip across the wagon in line with the wagon wheels. With this completed I added a vertical strip of the same styrene to the horizontal piece in front of each wheel to replicate the brake pad. I made a brake handle out of wire and attached it to the side boards and ran it to the brake. It looks like the photo but you really do not want look to close. After I was satisfied with this I added the reins. These were made of painters masking tape but after making them I would recommend using Tamiya masking tape instead.
Finishing
The wagon and horses were primed with The Army Painter Matt Black Undercoat CP3001 while the figures were primed with Matt White Undercoat CP3002. Vallejo Model Color Paints were used almost exclusively starting with dry brushing the wagon Grey Green 70.886 and allowing the Black show through just a little. WW1 Field Grey is an elusive shade and I wanted to show a worn paint color and the Grey Green seemed to work to me. However, other colors and shades are possible but I believe the wagons were all painted some color to prevent deterioration due to weather. The steel tires for the wheels were painted Black Grey70.862 and the tarp was base coated with Khaki 70.988. The uniforms were painted with a mix of 10 parts White Grey 70.993 to 1 part Black Grey with a Red band painted on the caps using Citadel Paints Khorne Red. Black Grey was used for the boots and Mahogany 71.036 for the rifle stock and web gear while the faces were painted with Flat Flesh 70.995. The horses were base coated with Mahogany with the hooves and rigging painted Black Grey. After everything had dried I washed the entire mode with Citadel Paints Agrax Earthshade wash. I dry brushed the wagon with the Grey Green and the tarp with Khaki lightened with Pale Sand 70.837. The horses were dry brushed with Beige Brown 70.875 and the uniforms with a lightened shade of the base color.
The wagon and horses were primed with The Army Painter Matt Black Undercoat CP3001 while the figures were primed with Matt White Undercoat CP3002. Vallejo Model Color Paints were used almost exclusively starting with dry brushing the wagon Grey Green 70.886 and allowing the Black show through just a little. WW1 Field Grey is an elusive shade and I wanted to show a worn paint color and the Grey Green seemed to work to me. However, other colors and shades are possible but I believe the wagons were all painted some color to prevent deterioration due to weather. The steel tires for the wheels were painted Black Grey70.862 and the tarp was base coated with Khaki 70.988. The uniforms were painted with a mix of 10 parts White Grey 70.993 to 1 part Black Grey with a Red band painted on the caps using Citadel Paints Khorne Red. Black Grey was used for the boots and Mahogany 71.036 for the rifle stock and web gear while the faces were painted with Flat Flesh 70.995. The horses were base coated with Mahogany with the hooves and rigging painted Black Grey. After everything had dried I washed the entire mode with Citadel Paints Agrax Earthshade wash. I dry brushed the wagon with the Grey Green and the tarp with Khaki lightened with Pale Sand 70.837. The horses were dry brushed with Beige Brown 70.875 and the uniforms with a lightened shade of the base color.

A fun build
There are no doubts that this was a fun build which allowed me to concentrate on finishing rather then construction. I think that Hat has captured the look of the real wagon pretty well and the detailing is well done overall. I highly recommend this kit to anyone interested in WW1 equipment.
Resources
1. Waffen Arsenal-153-Deutsche Infanteriekarren 1900-1945 Band 153 Wolfgang Fleischer 1995 ISBN 3-7909-0538-0
2. www.landships.info
This is the premier web site for all matters concerning the First World War and I encourage you to visit it and become a member of the forum.
I would like to thank my friend PDA for his help in the history of the supply wagon model. He supplied me with information that I was not aware of such as the use of the wagon in World War 2 and what the correct nomenclature was for the wagon. His insight on the model was very helpful.
