
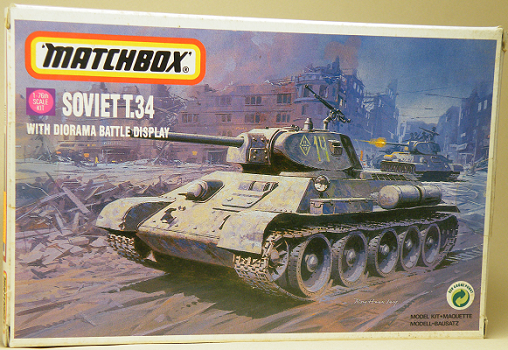
Matchbox 1/76th Scale T.34/76 Build Review
Kit Number 40082 (original issue number)
The model has been reissued by Revell of Germany and is currently available at Amazon, 1001 Hobbies, Hobbylinc and other online retailers.
MSRP: $11.39- $16.99
John Kelley
The model has been reissued by Revell of Germany and is currently available at Amazon, 1001 Hobbies, Hobbylinc and other online retailers.
MSRP: $11.39- $16.99
John Kelley
I purchased this kit many years ago, somewhere around the 1990s, so I cannot remember the price. My original issue came molded in blue and white plastic as was a practice of Matchbox to mold models in bright colors. The armor kit range from Matchbox entered production in 1974 and they introduced 10 kits including the Soviet T34 #40082. I decided at the outset to build this straight out of the box as much as possible. I had planned to change the decals to a Beutepanzer for a Model 1941 but during my research I learned this kit was a Model 1942 T-34/76.
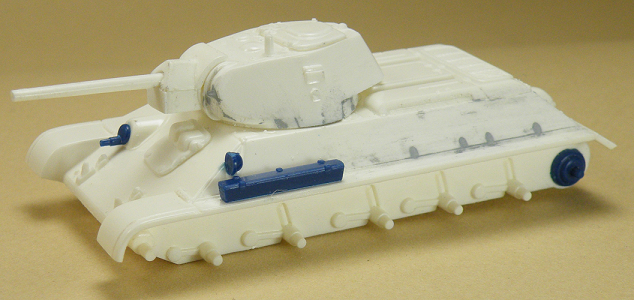
The hull:
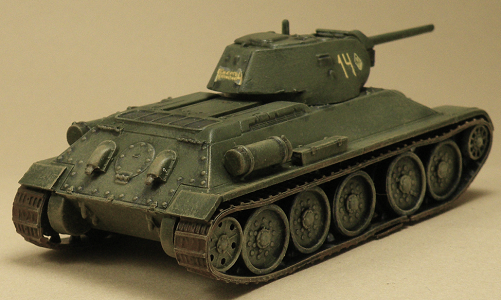
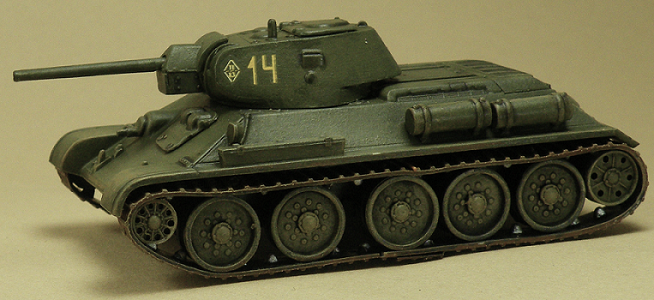
I began by adding the sides, parts 5 and 6, to the bottom, part 4. These parts glued together easily with the only gap between parts 5 and 6 and the upper hull, part 21. This can be filled with putty and sanded. I did notice ejector pin marks on the sides of parts 5 and 6 prior to assembly but these were easily removed by scraping them with a knife and sanding the areas smooth. I assembled the road wheels and these are noticeably thin on the rubber tire area. I did drill the holes on the idler deeper to give them a more realistic appearance. I added the upper hull, toolboxes, fuel tanks, bow machine gun, and exhaust to the model and this finished the hull assembly.I had originally intended not to use the fuel barrels because I thought this was a Model 1941 so I filled the location holes. Later I found that the kit is a Model 1942 and the fuel barrels could be seen on these tanks. I added the hubs to the road wheels instead of attaching the road wheels first to the axles then the hubs as per the instructions. This resulted in the hubs being too close to the road wheels so do not make my mistake but instead follow the directions on the instructions.
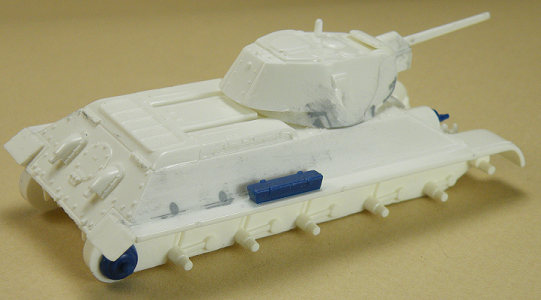
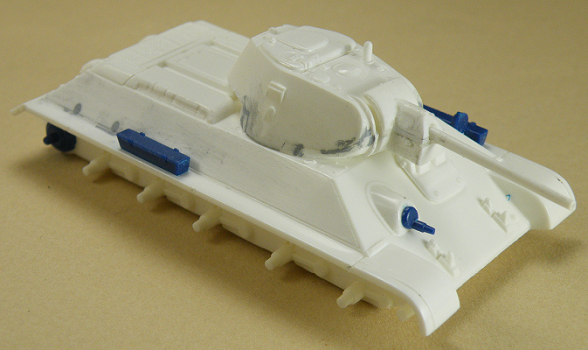
The Turret:
The turret assembly started with the main gun and armored shield which is an unusual assembly as the cannon and left armored shield are molded together and the right armored shield, part 1 and cover, part 3, are separate! Part 1 needed the sides cleaned up as there was excess plastic on it. The cover was short molded on one side so I added .020 strip styrene under it and sanded it smooth. There were gaps in the armored shield so I filled these with putty and sanded them smooth. I also cleaned up the molding seam on the main gun and drilled out the end of the barrel. There were minor gaps when adding the bottom turret parts 15 and 16 and these too were filled and sanded. The kit provides a 12.7mm DShK. machine gun but I have not seen this on any T-34/76 so I filled in the location hole in the turret and added the part to my collection. I left off the spare tracks as well since I did not see them either on the Model 1942 early in the war.
I began by adding the sides, parts 5 and 6, to the bottom, part 4. These parts glued together easily with the only gap between parts 5 and 6 and the upper hull, part 21. This can be filled with putty and sanded. I did notice ejector pin marks on the sides of parts 5 and 6 prior to assembly but these were easily removed by scraping them with a knife and sanding the areas smooth. I assembled the road wheels and these are noticeably thin on the rubber tire area. I did drill the holes on the idler deeper to give them a more realistic appearance. I added the upper hull, toolboxes, fuel tanks, bow machine gun, and exhaust to the model and this finished the hull assembly.I had originally intended not to use the fuel barrels because I thought this was a Model 1941 so I filled the location holes. Later I found that the kit is a Model 1942 and the fuel barrels could be seen on these tanks. I added the hubs to the road wheels instead of attaching the road wheels first to the axles then the hubs as per the instructions. This resulted in the hubs being too close to the road wheels so do not make my mistake but instead follow the directions on the instructions.
The Turret:
The turret assembly started with the main gun and armored shield which is an unusual assembly as the cannon and left armored shield are molded together and the right armored shield, part 1 and cover, part 3, are separate! Part 1 needed the sides cleaned up as there was excess plastic on it. The cover was short molded on one side so I added .020 strip styrene under it and sanded it smooth. There were gaps in the armored shield so I filled these with putty and sanded them smooth. I also cleaned up the molding seam on the main gun and drilled out the end of the barrel. There were minor gaps when adding the bottom turret parts 15 and 16 and these too were filled and sanded. The kit provides a 12.7mm DShK. machine gun but I have not seen this on any T-34/76 so I filled in the location hole in the turret and added the part to my collection. I left off the spare tracks as well since I did not see them either on the Model 1942 early in the war.
|
|
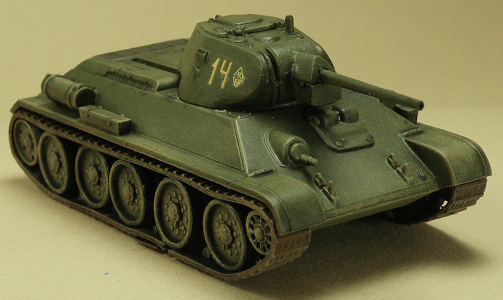
Painting:
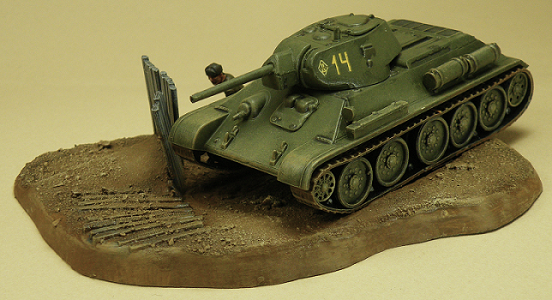
I primed the model, base and figure with Tamiya Light Grey Spray Primer. I left the running gear on the parts tree to make painting easier. For the base coat I brush painted the model with Vallejo Model Color 70.894 Cam. Olive Green and the road wheel tires 70.995 German Grey. Once the base coat dried I added 70.847 Dark Sand to the Cam. Olive Green, about 2 parts green to 1 part sand, and dry brushed the model with a makeup brush. I kept adding more and more sand until I had the shade I wanted. Since the tracks were vinyl I coated them with Mod Podge then painted them 70.950 Black and finished the outside with 70.983 Flat Earth. Citadel Runefang Steel was used for the areas where there was metal to metal contact on the tracks. Finally a pin wash using Vallejo 73.201 Black Wash was used for the various details, exhaust stains and the engine grill. Vallejo 73.200 Sepia Wash was used on the fuel tanks for stains. The turret was given a gloss coat and the decals were applied. These went on the model smoothly even after 30 years! The model was then sprayed with Mr. Hobby Flat Clear. Finally the tracks were added. I tried to pin down the tracks but I eventually just super glued them to the road wheels.
I primed the model, base and figure with Tamiya Light Grey Spray Primer. I left the running gear on the parts tree to make painting easier. For the base coat I brush painted the model with Vallejo Model Color 70.894 Cam. Olive Green and the road wheel tires 70.995 German Grey. Once the base coat dried I added 70.847 Dark Sand to the Cam. Olive Green, about 2 parts green to 1 part sand, and dry brushed the model with a makeup brush. I kept adding more and more sand until I had the shade I wanted. Since the tracks were vinyl I coated them with Mod Podge then painted them 70.950 Black and finished the outside with 70.983 Flat Earth. Citadel Runefang Steel was used for the areas where there was metal to metal contact on the tracks. Finally a pin wash using Vallejo 73.201 Black Wash was used for the various details, exhaust stains and the engine grill. Vallejo 73.200 Sepia Wash was used on the fuel tanks for stains. The turret was given a gloss coat and the decals were applied. These went on the model smoothly even after 30 years! The model was then sprayed with Mr. Hobby Flat Clear. Finally the tracks were added. I tried to pin down the tracks but I eventually just super glued them to the road wheels.
|
|
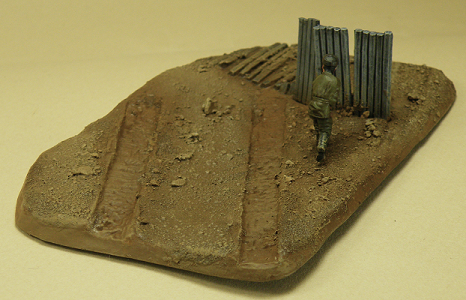
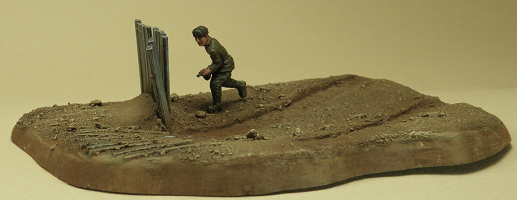
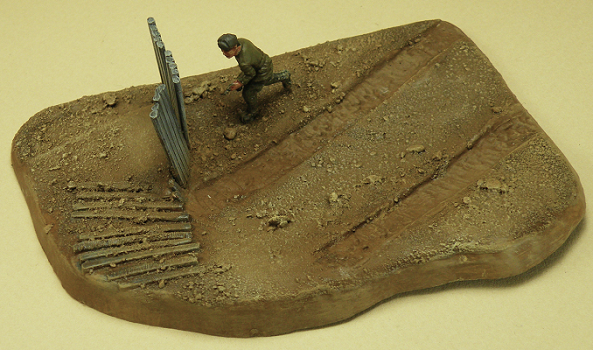
Diorama Base
One of the nice things about Matchbox armor models was that they included a base to display the finished model. After I assembled and primed it and the figure I painted the base Flat Earth and the fence German Grey. I dry brushed the fence with light grays and ivory to give it a weathered look. I added a coat of Mod Podge to the base and applied dirt from my yard to it. After drying I applied a watered down coat of the Mod Podge and let it dry 24 hours. More Flat earth was applied with successive dry brush coats of the Flat Earth and Dark Sand mixed together to make lighter and lighter coats. I applied this paint mix to the tank running gear and lower hull too. The figure was painted Model Color 70.924 Russian Uniform WWII on the tunic and U.S. Olive Drab 70.887 for the pants. The boots, cap and machine gun were painted German Grey 70.995 and all of this was given a Citadel Agrax Earthshade wash and dry brushed with the base colors. The skin was painted Citadel Cadian Flesh Tone then highlighted with Kislev Flesh and washed with Reikland Fleshshade. Finally the model was glued to the base.
One of the nice things about Matchbox armor models was that they included a base to display the finished model. After I assembled and primed it and the figure I painted the base Flat Earth and the fence German Grey. I dry brushed the fence with light grays and ivory to give it a weathered look. I added a coat of Mod Podge to the base and applied dirt from my yard to it. After drying I applied a watered down coat of the Mod Podge and let it dry 24 hours. More Flat earth was applied with successive dry brush coats of the Flat Earth and Dark Sand mixed together to make lighter and lighter coats. I applied this paint mix to the tank running gear and lower hull too. The figure was painted Model Color 70.924 Russian Uniform WWII on the tunic and U.S. Olive Drab 70.887 for the pants. The boots, cap and machine gun were painted German Grey 70.995 and all of this was given a Citadel Agrax Earthshade wash and dry brushed with the base colors. The skin was painted Citadel Cadian Flesh Tone then highlighted with Kislev Flesh and washed with Reikland Fleshshade. Finally the model was glued to the base.
|
|
This was a fun build and although the kit is not as accurate as models made today it is still a kit that has parts that, for the most part, fit together well. The detail is soft in some places and very good in other areas. The fuel tanks lack the ends being recessed like the prototype fuel cans but the vinyl tracks are easy to put together with an interlocking tab and fit on the model easily with some slack in them. The instructions call for a winter scheme of white but I went with a green base coat figuring at one time it had it.
Recommended.
Recommended.
|

|
