Build Review of Italeri 1/35th Scale
T-34/76 M-1943
Soviet Medium Tank WWII
Kit no.282
By Ray Mehlberger
MSRP: OOP by Italeri (sold under Bilek label by overseas shop for $53.67 + postage)
Italeri is a prolific model company based in Italy. They make all manner of model subjects in the popular scales.
By Ray Mehlberger
MSRP: OOP by Italeri (sold under Bilek label by overseas shop for $53.67 + postage)
Italeri is a prolific model company based in Italy. They make all manner of model subjects in the popular scales.
HISTORY:
The summer of 1941 saw the first T-34’son the battle fields. The Germans had to gradually substitute their Pz. III’s and Pz. IV’s which proved to be inadequate for the Eastern Theatre. The T-34 combined characteristics of speed, armor and fire power which were unique for that period. Aside from the 8.9 cm gun, the Germans were not able to match the T-34.
Furthermore, the T-34 was equipped with large diameter wheels and wide tracks which were perfect solutions for the extreme Russian weather conditions which proved disasterous for the German vehicles. The tank was armed with a 76 mm gun which could destroy practically every prototype of the German war machine.
THE KIT:
This kit came in a shrink-wrapped tray and lid type box.
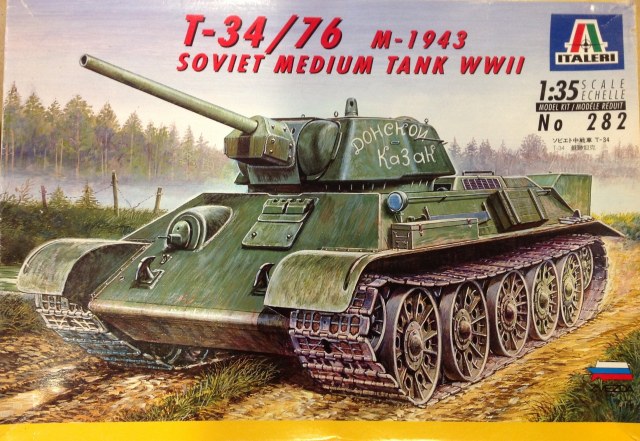
The box art shows a T-34/76 moving down a dirt road, with a forest in the background and a barbed wire emplacement along the road. It is in an overall dark green scheme with a white cursic written Russian slogan on the side of the turret. Unfortunely, I cannot read Russian, so don’t know what it says.
The instructions label this tank as being with the Soviet 25th Guard Tank Regiment, July 1943. This mark is included on the decal sheet.
One side panel has the history of the T-34 in 8 languages. Each paragraph is marked with a color illustration of the flags that speak those languages. English is included.
The other side panel has the one paragraph history three more times marked with flags. This is followed by a list of Model Master brand paint color numbers, but no mention of what those colors are.
It is said the kit is not suitable for children under 36 months due to small parts in multiple languages, including English. The copyright date of the kit is 1995. The kit is intended for modeler over the age of 10. Parts were made in Italy and Russia and packed in Italy by Italeri. Italeri’s steet address in Italy is given.
The summer of 1941 saw the first T-34’son the battle fields. The Germans had to gradually substitute their Pz. III’s and Pz. IV’s which proved to be inadequate for the Eastern Theatre. The T-34 combined characteristics of speed, armor and fire power which were unique for that period. Aside from the 8.9 cm gun, the Germans were not able to match the T-34.
Furthermore, the T-34 was equipped with large diameter wheels and wide tracks which were perfect solutions for the extreme Russian weather conditions which proved disasterous for the German vehicles. The tank was armed with a 76 mm gun which could destroy practically every prototype of the German war machine.
THE KIT:
This kit came in a shrink-wrapped tray and lid type box.
The box art shows a T-34/76 moving down a dirt road, with a forest in the background and a barbed wire emplacement along the road. It is in an overall dark green scheme with a white cursic written Russian slogan on the side of the turret. Unfortunely, I cannot read Russian, so don’t know what it says.
The instructions label this tank as being with the Soviet 25th Guard Tank Regiment, July 1943. This mark is included on the decal sheet.
One side panel has the history of the T-34 in 8 languages. Each paragraph is marked with a color illustration of the flags that speak those languages. English is included.
The other side panel has the one paragraph history three more times marked with flags. This is followed by a list of Model Master brand paint color numbers, but no mention of what those colors are.
It is said the kit is not suitable for children under 36 months due to small parts in multiple languages, including English. The copyright date of the kit is 1995. The kit is intended for modeler over the age of 10. Parts were made in Italy and Russia and packed in Italy by Italeri. Italeri’s steet address in Italy is given.
WHAT’S IN THE BOX:
The kit contains 5 dark green parts trees, a 4 lengths steel colored vinyl rubber band type tracks, the decal sheet and the instructions.
The instructions consist of a single sheet that accordion folds out into 8 pages in 6 ½” x 9 ¼” page format.
Page 1 of the instructions has Italeri’s street address in Italy at the top (again), followed by one paragraph history of the T-34 in 9 languages, including English.
Page 2 begins with ATTENTION-USEFUL ADVICE about the kit, in 10 languages, including English, followed by READ BEFORE ASSEMBLY instructions in English and a listing of Model Master brand hobby paints suggested to use to finish the model.
Page 3 is the parts trees illustrations. It says at the bottom of the page that the plastic parts were made in Russia and packed in Italy by Italeri S.P.A. A international assembly symbol is shown that means to hot rivet parts. This is obviously intended to mean to do that to the vinyl tracks to form loops with the runs.
Pages 4 to 7 give a grand total of 8 assembly steps.
Page 8 is the marking and painting instructions. The first scheme is shown as a 4-view illustration. It is a T-34/76 with the Soviet 30th Guard Tank Brigade, October 1943. It is in a base of dark green with winter white-wash blotches . On the sides of the turret is a small red star, the Guards emblem and a white Russian slogan.
I sure wish I could read Russian and find out what these slogans say.
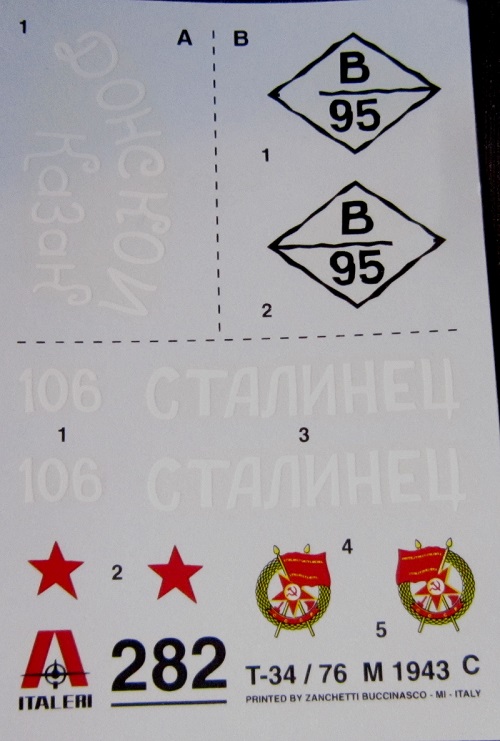
The second scheme is illustrated with just the turret shown. It is a T-34 with the Soviet 25th Guard Tank Regiment, July 1943. It is overall dark green with yet another white Russian slogan in cursive lettering on the sides.
The third scheme is also illustrated with just the turret shown. It is a T-45/76 with the Soviet 6th Tank Corp, February 1943. It has a black triangle divided with a horizontal line. Above the line is a black letter B and below the line is a black 95.
Three Model Master colors are called out and the bottom of the page has the decal application instructions in 8 languages, including English.
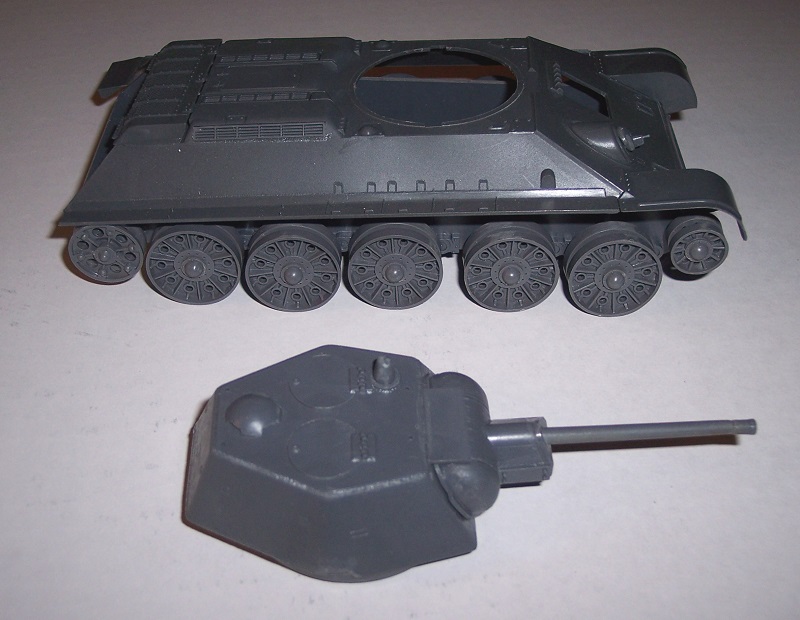
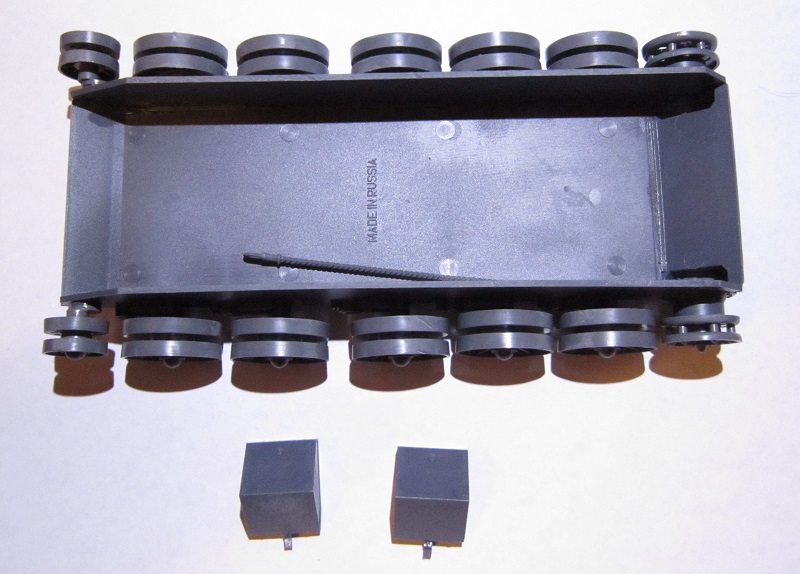
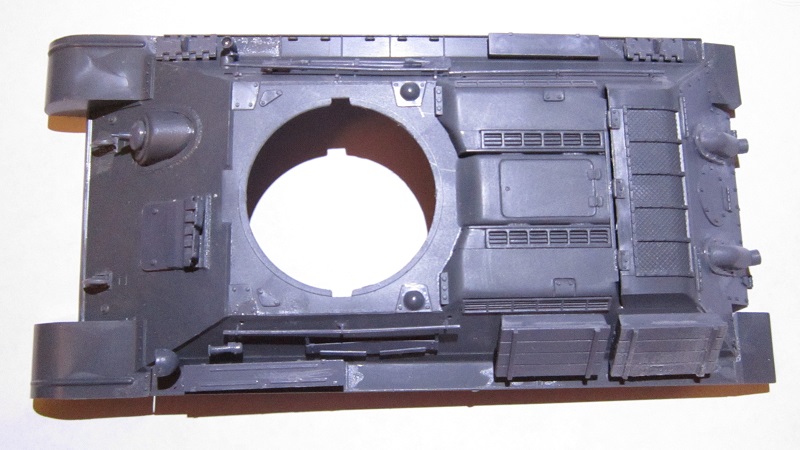
In step one I sanded off the raised lettering on the bottom of the hull floor part that said ZVEZDA. Zvezda was the origin of this model mold back in 1993. I then glued together the floor, sides and nose panel of the hull.
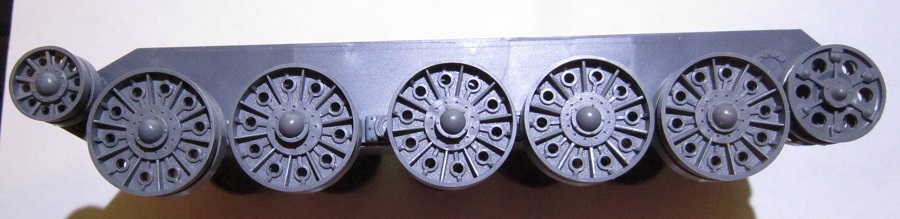
In step two and three I assembled the drive wheels, idler wheels and road wheels allowing them to turn.
The third scheme is also illustrated with just the turret shown. It is a T-45/76 with the Soviet 6th Tank Corp, February 1943. It has a black triangle divided with a horizontal line. Above the line is a black letter B and below the line is a black 95.
Three Model Master colors are called out and the bottom of the page has the decal application instructions in 8 languages, including English.
In step one I sanded off the raised lettering on the bottom of the hull floor part that said ZVEZDA. Zvezda was the origin of this model mold back in 1993. I then glued together the floor, sides and nose panel of the hull.
In step two and three I assembled the drive wheels, idler wheels and road wheels allowing them to turn.
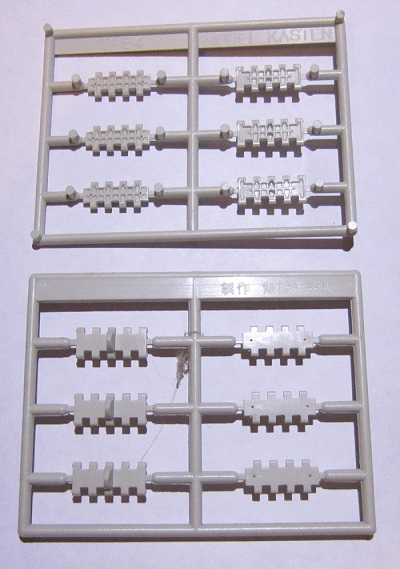
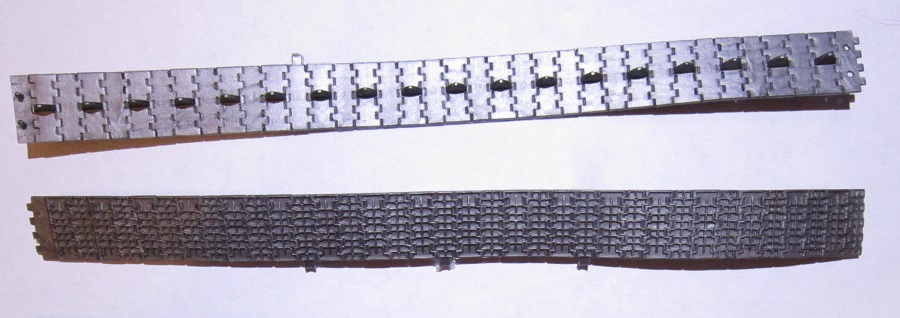
Step 4 is the assembly step to hot rivet the vinyl tracks into a loop and put them on the running gear. The front tow hooks are added here also. I am not using the vinyl tracks. I have a separate set of Model Kasten brand individual links that will go on this kit. That set cost $30.00 according to the price tag on it.
In step 5 and 6 I assembled the main gun, it’s muzzle and mantle parts. It does not include breech details and after placing into the turret can elevate. Also in this step I assembled the turret top and bottom and added the gun assembly to the front, 3 lift rings, a periscope, a ventilator and the two hatch doors. I glued the doors solid as there is no turret interior details to see.
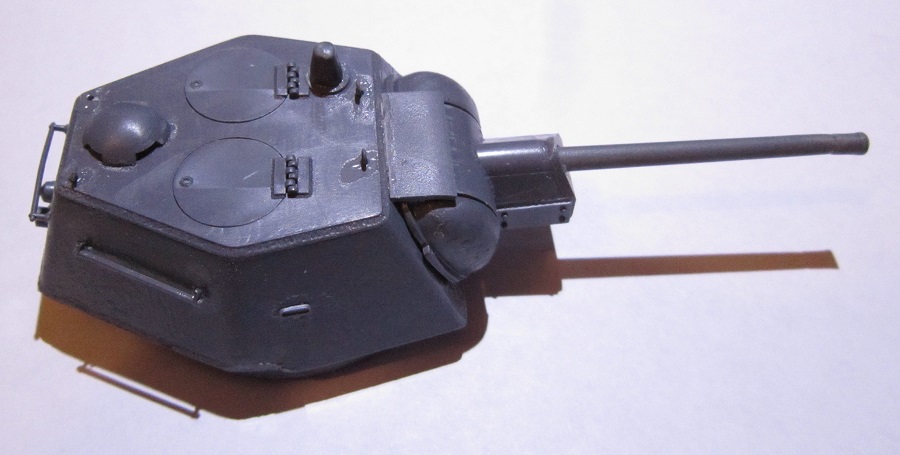
Next in this step was the bow machine gun assembly, the hatch door over the driver, which has 2 separate periscopes to add. They can be posed up or folded. Tow hooks were added to the front of the hull, a siren, 2 man saw in a storage box, a head light and a couple of long grab bars added to the fenders and sides.
In step 7 I added the rear hull wall and mufflers and exhaust pipes, the large engine air intake grill panel, a storage box to the fender, two more long grab bars and a spare individual track link to the fender. I did not use a couple lift handles (part 18 D) to the top of the engine deck as there are no location holes for placing them there as shown in the assembly step. Plus they are not pictured in the scheme drawings.
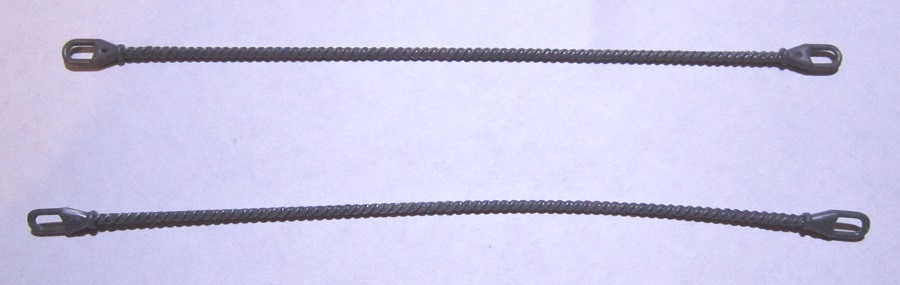
In step 8 you add external rear box shaped fuel tanks, a wood box, tow cables and tools and an extra track link to the fenders. I assembled the 5 parts constructing each of the two external fuel tanks, but have left them off for the time being until the kit is painted. A small illustration shows stretching sprue over a candle to fabricate a radio antenna.
Dark green letter A parts tree held: the hull floor, sides, front and rear walls, tools, 2 man saw and its storage box, driver’s hatch door parts etc. (17 parts)
In step 7 I added the rear hull wall and mufflers and exhaust pipes, the large engine air intake grill panel, a storage box to the fender, two more long grab bars and a spare individual track link to the fender. I did not use a couple lift handles (part 18 D) to the top of the engine deck as there are no location holes for placing them there as shown in the assembly step. Plus they are not pictured in the scheme drawings.
In step 8 you add external rear box shaped fuel tanks, a wood box, tow cables and tools and an extra track link to the fenders. I assembled the 5 parts constructing each of the two external fuel tanks, but have left them off for the time being until the kit is painted. A small illustration shows stretching sprue over a candle to fabricate a radio antenna.
Dark green letter A parts tree held: the hull floor, sides, front and rear walls, tools, 2 man saw and its storage box, driver’s hatch door parts etc. (17 parts)
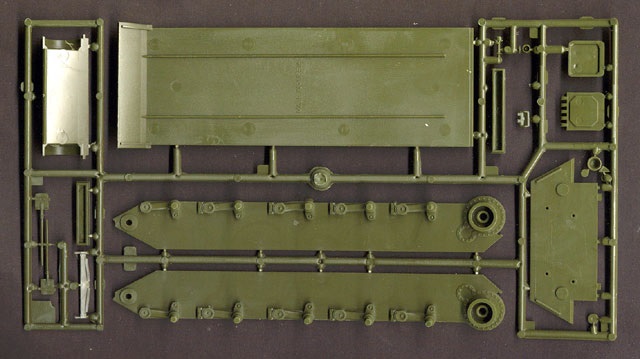
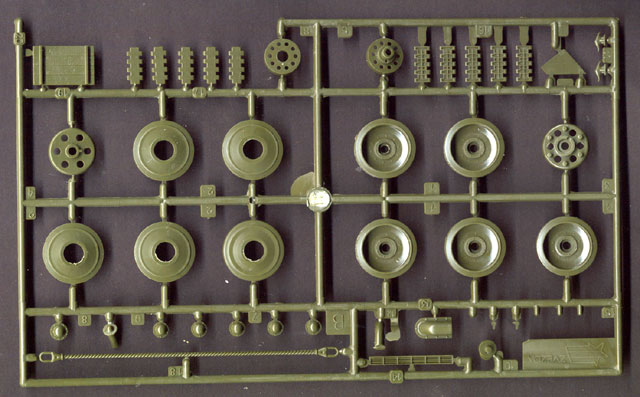
There are two identical dark green letter B parts trees. They each hold: road wheels, drive wheels, idler wheels, hub caps, muffler/exhaust parts, tow cables, side air intake screens, spare track links etc. (38 parts)
Dark green letter B parts tree holds: the hull top, bow machine gun ball mounting and the large air intake grill door (3 parts)
Dark green letter C parts tree holds: the turret top and bottom, long and short grab bars, turret mantle and hatch doors, external fuel tank parts etc. (43 parts)
These parts trees are all loose and not in cello bags in the kit.
This kit is an original Zvezda brand mold (out of Russia). It debuted by them in 1993 as kit no. 3525 and later that same year reboxed as kit no. 3535. Zvezda again re-issued it reboxed again twice with the same kit numbers in the early 2000’s. In 2007 Revell got the mold and reboxed it as kit no 03064. In 2011 Bilek brand got the molds and re-boxed it as kit no. 894 only the decal sheet was changed. Bilet released it again in 2014 as kit no. 895 again changing the decal sheet. Other than that Italeri and Revell only changed the box arts. The contents remained the same.
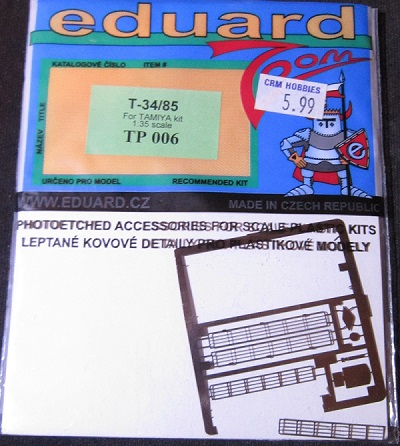
I also have the Eduard brand brass PE set of engine air intake screens designed to go on this kit or on a T-34/85 version. This set has a sales tag on it of $5.99. Unfortunately, I got it missing the largest air intake screen.
This kit is an original Zvezda brand mold (out of Russia). It debuted by them in 1993 as kit no. 3525 and later that same year reboxed as kit no. 3535. Zvezda again re-issued it reboxed again twice with the same kit numbers in the early 2000’s. In 2007 Revell got the mold and reboxed it as kit no 03064. In 2011 Bilek brand got the molds and re-boxed it as kit no. 894 only the decal sheet was changed. Bilet released it again in 2014 as kit no. 895 again changing the decal sheet. Other than that Italeri and Revell only changed the box arts. The contents remained the same.
I also have the Eduard brand brass PE set of engine air intake screens designed to go on this kit or on a T-34/85 version. This set has a sales tag on it of $5.99. Unfortunately, I got it missing the largest air intake screen.
This kit and the after-market stuff in it were willed to me by a modeler friend who died of cancer years ago. He left me all his AFV kits and his AFV accessory parts company. I sorely miss him.