

In Box Review of TOMY 1/32nd Scale
Japanese Ki-84 Hayate (Frank) Fighter
Kit no. HP-2-1100
OUT OF PRODUCTION
Ray Mehlberger
OUT OF PRODUCTION
Ray Mehlberger
HISTORY:
Design of the Ki-84 commenced in early 1942 to meet an Imperial Japanese Army Air Service requirement for a replacement to Nakajima's own, earlier Ki-43 Oscar fighter, then just entering service. The specification recognized the need to combine the maneuverability of the Ki-43 with performance to match the best western fighters and heavy firepower.[4] The Ki-84 first flew in March 1943.[5][6] Deliveries from Nakajima's Ota factory commenced in April 1943 [7] Although the design itself was solid, the shortage of fuel and construction materials, poor production quality, and lack of skilled pilots prevented the fighter from reaching its potential.
The Ki-84 addressed the most common complaints about the popular and highly maneuverable Ki-43: insufficient firepower, poor defensive armor, and lack of climbing speed. The Ki-84 was a cantilever low-wing monoplane of all-metal construction, except for the fabric-covered control surfaces. It had retractable tailwheel landing gear. Armament comprised two fuselage-mounted, synchronized 12.7 mm (.50 in) machine guns and two wing-mounted 20 mm cannon, a considerable improvement over the two 12.7 mm (.50 in) machine guns used in the Hayabusa. Defensive armor offered Hayate pilots better protection than the unsealed wing tanks and light-alloy airframe of the Ki-43. In addition, the Ki-84 used a 65 mm (2.56 in) armor-glass canopy, 13 mm (.51 in) of head and back armor, and multiple bulkheads in the fuselage, which protected both the methanol-water tank (used to increase the effectiveness of the supercharger) and the centrally located fuel tank.
It was the Nakajima firm's own-designed 35.8 litre displacement, Ha-45 Homare (Praise or Honor) air-cooled eighteen-cylinder radial engine, first accepted for military use in 1941, that gave the Hayate its high speed and prowess in combat. Derived from the Nakajima Homare engines common to many Japanese aircraft, the Hayate used theHomare 21 direct-injection version of the engine, using water injection to aid the supercharger in giving the Ki-84 a rated 1,491 kW (2,000 hp) at takeoff. This combination theoretically gave it a climb rate and top speed roughly competitive with the top Allied fighters. Initial Hayate testing at Tachikawa in early summer 1943 saw test pilotLieutenant Funabashi reach a maximum level airspeed of 624 km/h (387 mph) in the second prototype. After the war a captured late-production example was tested in the US and achieved a speed of 680 km/h (422 mph)[9] using 92 octane AvGas, plus methanol injection.
The complicated direct-injection engine, partly from its already basically compact design (no more than 3 cm/1¼ inches larger in diameter than the A6M Zero's 14-cylinderNakajima Sakae radial) required a great deal of care in construction and maintenance and, as the Allies advanced toward the Japanese homeland, it became increasingly difficult to support the type's designed performance. Compounding reliability problems were the Allied submarine blockade which prevented delivery of crucial components, such as the landing gear. Many further landing gear units were compromised by the poor-quality heat treatment of late-war Japanese steel. Many Hayates consequently suffered strut collapses on landing. Further damage was caused by inadequately trained late war pilots, who sometimes found it difficult to transition to the relatively "hot" Ki-84 from the comparatively docile Ki-43 Hayabusa, which had a significantly lower landing speed.
The first major operational involvement was during the battle of Leyte at the end of 1944, and from that moment until the end of the Pacific war the Ki-84 was deployed wherever the action was intense.[8] The 22nd Sentai re-equipped with production Hayates. Though it lacked sufficient high-altitude performance, it performed well at medium and low levels. Seeing action against the USAAF 14th Air Force, it quickly gained a reputation as a fighter to be reckoned with. Fighter-bomber models also entered service. On April 15, 1945, 11 Hayates attacked US airfields on Okinawa, destroying many aircraft on the ground.
The IJAAF's Ki-84, Kawasaki Heavy Industries' Ki-100, and the Kawanishi Aircraft Company's N1K2-J IJNAF naval fighter were the three Japanese fighters best suited to combat the newer Allied fighters.
The IJAAF's Ki-84, Kawasaki Heavy Industries' Ki-100, and the Kawanishi Aircraft Company's N1K2-J IJNAF naval fighter were the three Japanese fighters best suited to combat the newer Allied fighters.
TOMY was a model company based in Japan. I believe they went out of business. While still around they did a series of 1/32nd scale aircraft kits. I don’t remember anything else they did.
THE KIT:
The kit comes in a shrink wrapped tray and lid type box. The box art shows a “Frank” of the 343rd Kokutai downing a Hellcat. It is camouflaged in dark green above gray with the white code 343-15 on the rudder with the letter A above that, all in white. There are 5 white kill marks below the rear of the cockpit transparency on the side and a diagonal fuselage band in yellow, white, yellow.
One side panel shows this same aircraft in profile, with various tabs pointing at things on it with Japanese captions. I haven’t a clue what it’s telling us here.
The other side panel has color illustrations of 3 aircraft: an Oscar, a P-51D and a type 21 Zero. Below these is more Japanese and 1/32nd. I assume that these are illustrations of other kits that TOMY markets in 1/32nd scale? No kit numbers are given.
WHAT’S IN THE BOX:
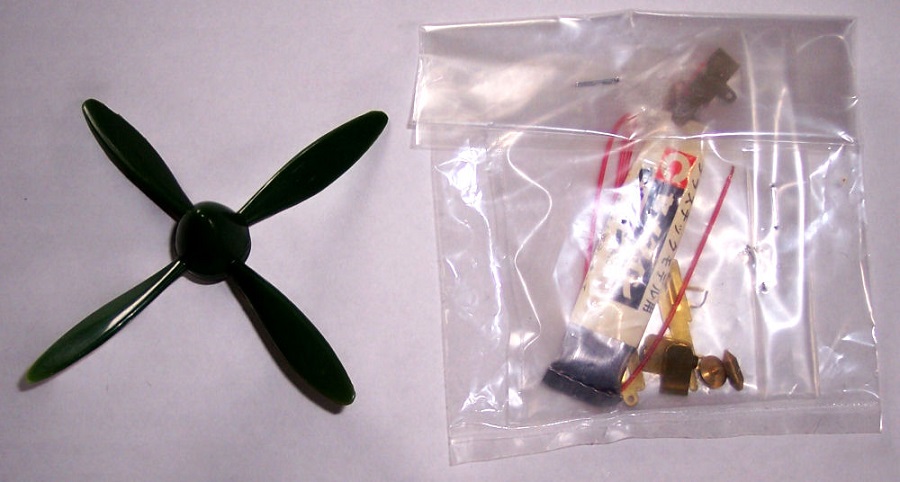
Inside the box are 2 dark green trees of parts, loose dark green wing halves and fuselage halves, a dark green alternate propeller and the cowling. There is a tree of clear parts and a tube of glue, some wire and some brass parts. These are all pretty much individually cello bagged in unsealed cellos. TOMY marketed this kit as a motorized one. The brass parts are parts for circuitry and switches. My kit however is the static model kit with no motor. The decal sheet, instructions, a sheet of full color marking instructions complete the kit’s contents.
The instructions consist of a stapled booklet of 8 pages in 13 ¾” x 7 ½” format.
Page one has the history of the George in Japanese only, with a black and white repeat of the box art.
Pages two through six give a total of 10 assembly steps. These are all accompanied by Japanese text only.
Page seven is the parts trees illustrations.
Page eight has what I think is a listing of the names of all the parts in the kit and the individual amounts of each part. (again, in Japanese). This is followed by TOMY’s address and phone number in Japan.
As mentioned, TOMY also markets this kit as a motorized one. This means that assembly steps 3 and 4 show how to mount the electric motor, battery box, wires and brass switches. Since this is the static version of the kit that they market, switch holes will have to be filled with putty that are in the lower wing section and motorization parts discarded. Because the battery box goes below the cockpit, the cockpit part has been abbreviated. The floor of it sits very high and there is a pilot figure molded from just his chest on up to mount to the seat. Some extra scratch building is needed to better detail this area for sure and lower things. There are 2 alternate 4-bladed propellers in the kit. One is for the aircraft if it is motorized and the other is for a static model. However, with the wording on the assembly step that shows this being in Japanese, I only have a slight clue which is which to use…sigh. I believe it is the propeller on the parts tree and it’s nose and back parts. Not the one that’s all one piece.
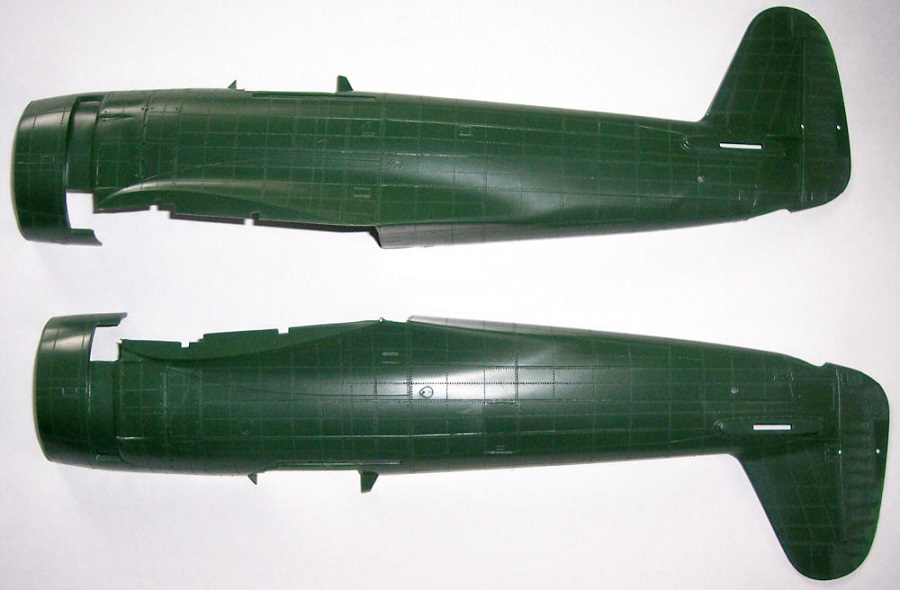
The good news is that this model has engraved panel lines and rivet detail. Very petite and well done.
The parts on the trees and also the parts tree drawings are not alphabetized, but they are numbered. So extra care will have to be taken to get the right parts for each assembly step.
The first tree illustrated on the parts tree drawings holds the two fuselage halves.
THE KIT:
The kit comes in a shrink wrapped tray and lid type box. The box art shows a “Frank” of the 343rd Kokutai downing a Hellcat. It is camouflaged in dark green above gray with the white code 343-15 on the rudder with the letter A above that, all in white. There are 5 white kill marks below the rear of the cockpit transparency on the side and a diagonal fuselage band in yellow, white, yellow.
One side panel shows this same aircraft in profile, with various tabs pointing at things on it with Japanese captions. I haven’t a clue what it’s telling us here.
The other side panel has color illustrations of 3 aircraft: an Oscar, a P-51D and a type 21 Zero. Below these is more Japanese and 1/32nd. I assume that these are illustrations of other kits that TOMY markets in 1/32nd scale? No kit numbers are given.
WHAT’S IN THE BOX:
Inside the box are 2 dark green trees of parts, loose dark green wing halves and fuselage halves, a dark green alternate propeller and the cowling. There is a tree of clear parts and a tube of glue, some wire and some brass parts. These are all pretty much individually cello bagged in unsealed cellos. TOMY marketed this kit as a motorized one. The brass parts are parts for circuitry and switches. My kit however is the static model kit with no motor. The decal sheet, instructions, a sheet of full color marking instructions complete the kit’s contents.
The instructions consist of a stapled booklet of 8 pages in 13 ¾” x 7 ½” format.
Page one has the history of the George in Japanese only, with a black and white repeat of the box art.
Pages two through six give a total of 10 assembly steps. These are all accompanied by Japanese text only.
Page seven is the parts trees illustrations.
Page eight has what I think is a listing of the names of all the parts in the kit and the individual amounts of each part. (again, in Japanese). This is followed by TOMY’s address and phone number in Japan.
As mentioned, TOMY also markets this kit as a motorized one. This means that assembly steps 3 and 4 show how to mount the electric motor, battery box, wires and brass switches. Since this is the static version of the kit that they market, switch holes will have to be filled with putty that are in the lower wing section and motorization parts discarded. Because the battery box goes below the cockpit, the cockpit part has been abbreviated. The floor of it sits very high and there is a pilot figure molded from just his chest on up to mount to the seat. Some extra scratch building is needed to better detail this area for sure and lower things. There are 2 alternate 4-bladed propellers in the kit. One is for the aircraft if it is motorized and the other is for a static model. However, with the wording on the assembly step that shows this being in Japanese, I only have a slight clue which is which to use…sigh. I believe it is the propeller on the parts tree and it’s nose and back parts. Not the one that’s all one piece.
The good news is that this model has engraved panel lines and rivet detail. Very petite and well done.
The parts on the trees and also the parts tree drawings are not alphabetized, but they are numbered. So extra care will have to be taken to get the right parts for each assembly step.
The first tree illustrated on the parts tree drawings holds the two fuselage halves.
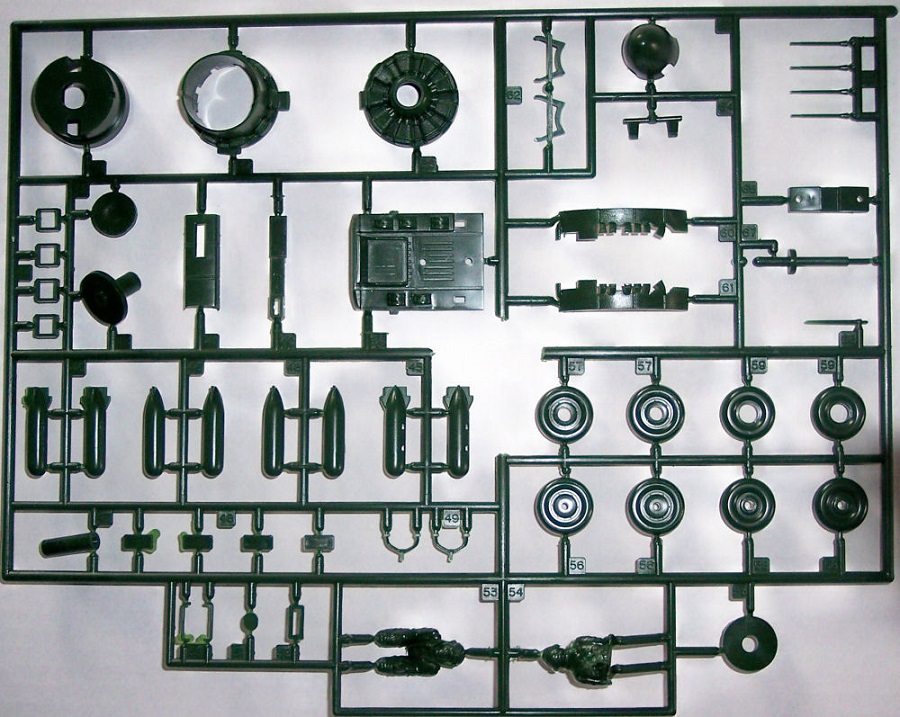
The second tree holds: the pilot figure, main wheels, engine parts, cockpit floor, 20 mm wing cannon barrels, bombs etc. (51 parts)
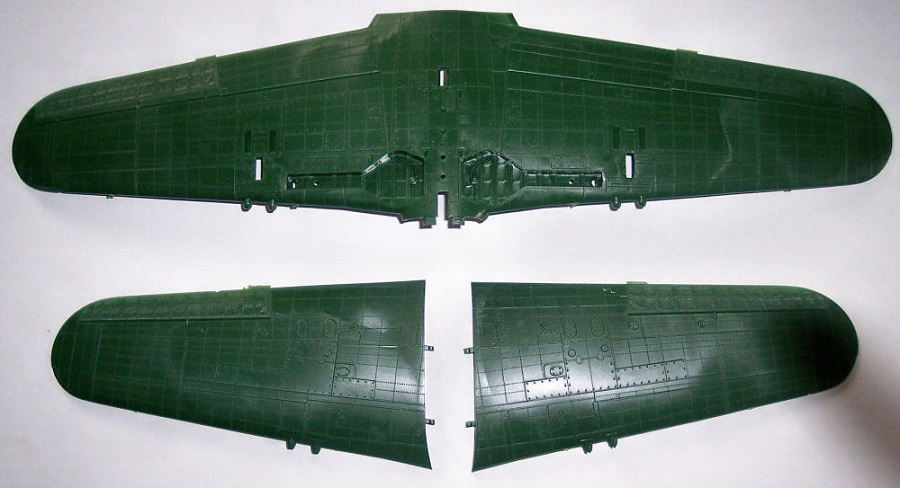
The third tree holds the wing halves. The lower wing half is full-span. (3 parts)
The fourth tree holds: one of the propellers (as mentioned, there is also a loose one in the kit), the dashboard, a drop tank, the horizontal tail surfaces, main landing gear legs, cowling, tail wheel, main gear doors, battery compartment, joy stick, wing flap balances etc. (32 parts)
The clear parts tree holds 3 parts of the canopy. This means that the canopy can be posed open or shut as preferred. However, it maybe should be cemented shut because of the shallow cockpit if a modeler is not going to do major surgery to better accuratize it.

There is a large sheet in the box that is folded in the center to fit the box. It has full color illustrations for 4 painting and marking schemes. One scheme is just shown as a side profile and the other three are profiles and illustrations split down the center to show one half as the undercarriage colors and the other half as the top surfaces. Three schemes are in all dark green upper surfaces. One of them has darker green patches over the dark green and 3 have all grey undercarriages, the fourth one having bare metal below.
Two of the schemes are for what I believe were with the Yokosuka Naval Air Group. One has the tail code of a backwards letter “E” followed by III in white. The second one has the tail code of a backwards letter “E” followed by –104 also in white. I have been told that the backwards letter “E” symbol is “Yo” in Japanese (per Thorpe’s book on Japanese markings). This is the aircraft with the bare metal undersurfaces.
Two schemes for the 343rd Kokutai. One is the boxart subject, already described above. However, the tail code is shown differently here. The letter A is not above the numbers. Instead it is shown as 343A15 all in a row. This same aircraft is shown in Profile no. 213 book that I have, as a 4-view. The tail code appears as being yellow in this illustration and is 343-A15 there. On the kit’s decal sheet, this last arrangement is how the decal shows it, but in white and not yellow.
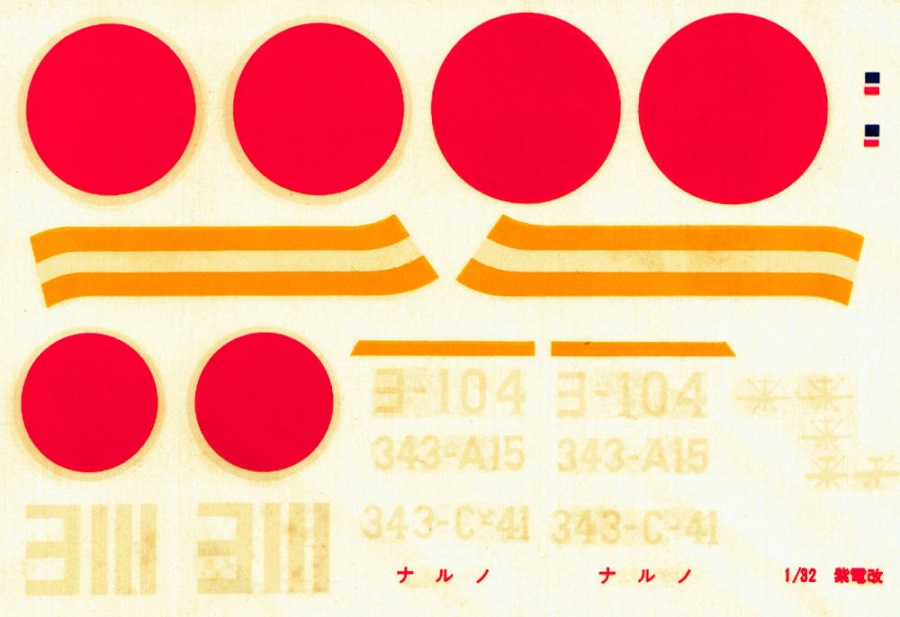
Makes me wonder which is correct? The profile says that the white kill marks on this aircraft are for 5 confirmed kills and one as a probable.
The final scheme is for an aircraft of the 343rd , with the tail code 343-C-41 in white. This is the one with the 2 colors of green on the upper surfaces.
All the schemes have the leading edges of the wings as yellow.
Recommended to modelers of average skills if you can still find a kit anywhere.
I purchased my kit years ago from hobby shop that since went out of business. The price back then was $13.98 according to the price label still on the box.
