SIGA Model 1/72 BRDM-1 build review
Kit 72-M05
MSRP: Approximately $10.00 when I purchased it from The Squadron Shop
Copyright: 2001
Out of production
John Kelley
MSRP: Approximately $10.00 when I purchased it from The Squadron Shop
Copyright: 2001
Out of production
John Kelley
HISTORY:
The BRDM-1 was the first purpose built Armoured Reconnaissance Vehicle since the WWII BA-64. It was built on the BTR-40 chassis. But the BRDM-1,
unlike the BTR-40, had amphibious capabilities and four small chain driven wheels to assist in rough or muddy terrain. These features would carry over
to the BRDM-2. Approximately 10,000 vehicles were produced and many were sold to client states.
THE KIT:
The kit consist of 76 parts on three white plastic trees and a decal sheet for 7 versions:
These are BRDM-1s of
Soviet Guard, Army and VMF ( 3 vehicles)
DDR Army ( 1 vehicle of the East German Army)
Polish Army (2 vehicles)
Egyptian Army (1 vehicle).
The instructions have clear drawings and include two photos of the 7.62mm MG and the wheel assembly.
This is a limited run kit so you will need a good set of files, sprue cutter and sanding sticks to prep the parts prior to assembly.
THE BUILD:
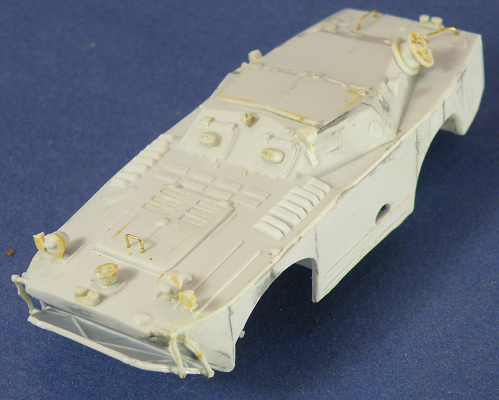
I began by adding the sides and rear plate to the model but I had difficulty in adding them because
I had a gap in one wheel well and nothing really fit well.
I believe this is because the lower hull is wider than the upper hull and needs to be sanded on both sides to eliminate any gaps and the sides needed to be taped to hold them to the lower hull.
I had to make a cut in the left side plate around the wheel well gap in the chassis and re-glue it back together.
I really did not prep the model correctly and this caused me a lot of issues later. I recently picked it up again and began to finish the build.
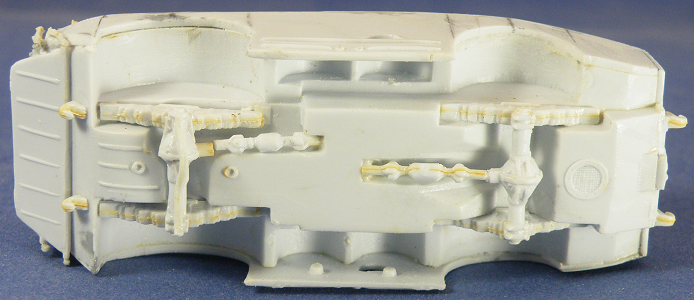
I added the upper hull plates and found a .030 gap between the upper hull parts and the sides due to not preparing the lower hull like I should have and
test fitting the parts.
I filled the gaps with strip styrene and sanded them flush. The gap in the crew compartment was also filled as well as gaps in the front and rear plates.
test fitting the parts.
I filled the gaps with strip styrene and sanded them flush. The gap in the crew compartment was also filled as well as gaps in the front and rear plates.
|
|
Tamiya Putty Basic Type (Grey) was used to fill small gaps and re contour the rear side where I over sanded it! Once I was satisfied with the hull I cleaned up the mold lines on the wheels and assembled the backs.
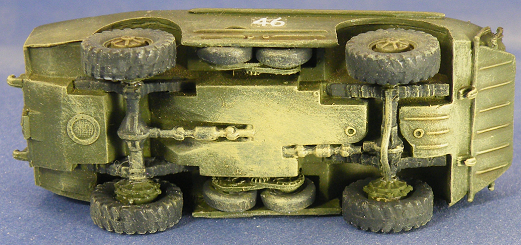
Prior to assembling the suspension, there was a review I had read about the kit that noted that the wheels did not line up with the arches on the sides and subsequently were either too far forward or too far back even though the suspension was assembled as per kit instructions.
With this new information I measured the front and rear wheel arch width on one side and added a mark in the center on top of each arch. I removed about .030 on the back of the rear leaf springs to move them to the back of the hull and .030 on the front of the forward leaf springs and moved them forward.
This brought the axles closer to where photos showed where they should be. After adding the wheels I should have removed more of the springs as they still did not line up.

I drilled holes into the wheel backs and axles and inserted a length of brass wire to hold the wheels in place.
The mounting stubs on the axles are too short and the wheels would fall off so the brass wire and super glue held them in place.
The front axle was short molded on the drive shaft yoke so I added a length of styrene rod so the drive shaft would fit.
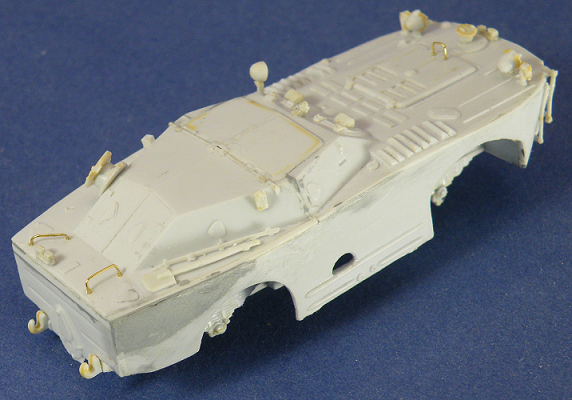
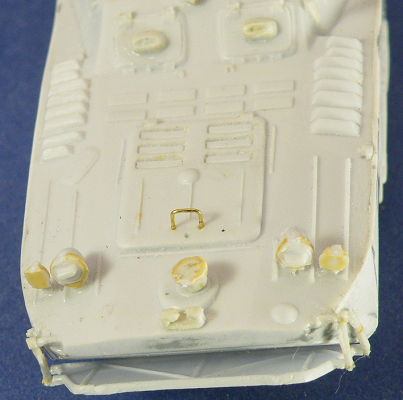
I the added the remainder of the detail parts and bent three pieces of brass wire for hand holds as per the kit instructions.
The bottom of water vane was glued to the hull at an angle and after setting I added the actuating gear. Most photos show it in this position.
I again checked for any gaps that needed filling and I then primed the model with Tamiya Grey Surface Primer.
The mounting stubs on the axles are too short and the wheels would fall off so the brass wire and super glue held them in place.
The front axle was short molded on the drive shaft yoke so I added a length of styrene rod so the drive shaft would fit.
I the added the remainder of the detail parts and bent three pieces of brass wire for hand holds as per the kit instructions.
The bottom of water vane was glued to the hull at an angle and after setting I added the actuating gear. Most photos show it in this position.
I again checked for any gaps that needed filling and I then primed the model with Tamiya Grey Surface Primer.
PAINTING:
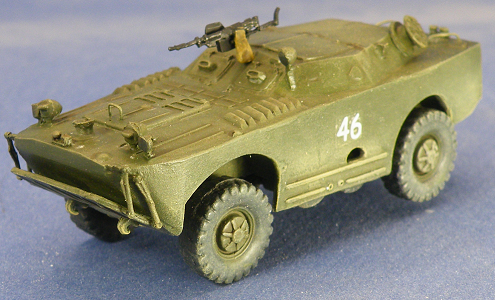
I used Vallejo Model Color paints except where mentioned. For the overall base coat I mixed Vallejo Brown Violet 70.877 and Grey Green 70.886 in a 50:50 mix and stippled the paint on using a Army Painter Dry Brush.
Once the base coat was applied I added Buff 70.976 to the mixture to lighten it and dry brushed the model.
The tires, springs and axles were painted Black Grey 70.862. The model was brushed painted with Citadel ‘Ardcoat and the decals were added. The decals went on without any problems and Ace decals have always been easy to apply.
The model was heavily dry brushed in Buff concentrating on the lower areas and finally sprayed a flat coat. I then assembled the machine gun, primed it with Black Primer 74.602 and and painted the spent cartridge bag in Surface Primer German Dark Yellow 73.604.
Once the paint dried I painted the bag in Khaki 70.988 and the MG. in Black 70.950. A pencil was rubbed over the black portions to give it a metallic look.
I added a pin wash using 3 drops of The Army Painter Dark Tone to 2 drops of The Army Painter Quick Shade Wash Mixing Medium to thin it. I applied this to the details to bring them out better as many are soft.
|
|
CONCLUSIONS:
If I were to build this kit again I would take more time to fit the sides, rear plate and correct the axle spacing better.
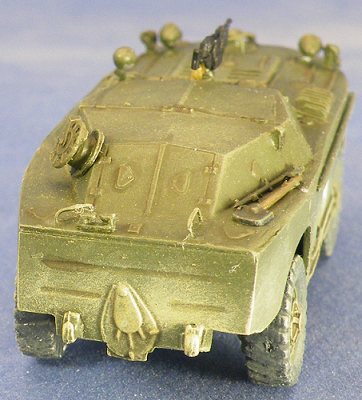
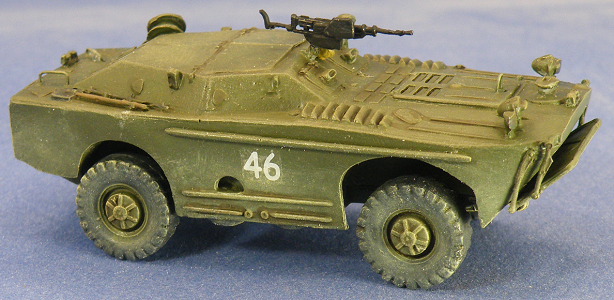
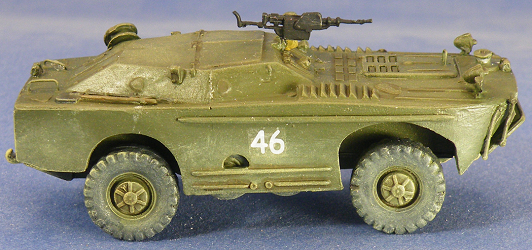
The shape is correct for the BRDM-1 and it builds up into an accurate looking model. I did not check it against any plans or measure it but it looks right compared to photos of the real vehicle.
The small parts such as shovel, MG and other small parts are easily broken due to them being molded to scale so care needs to be used in cutting them from the trees.
I cannot recommend enough a good set of sprue cutters, files, sanding sticks and #11 blades. This is a model for the experienced builder but if you find one do not hesitate to buy and build it.
In spite of the issues I encountered I enjoyed building the model and working on the various issues. In short, I had fun making it and that is what really counts.
If I were to build this kit again I would take more time to fit the sides, rear plate and correct the axle spacing better.
The shape is correct for the BRDM-1 and it builds up into an accurate looking model. I did not check it against any plans or measure it but it looks right compared to photos of the real vehicle.
The small parts such as shovel, MG and other small parts are easily broken due to them being molded to scale so care needs to be used in cutting them from the trees.
I cannot recommend enough a good set of sprue cutters, files, sanding sticks and #11 blades. This is a model for the experienced builder but if you find one do not hesitate to buy and build it.
In spite of the issues I encountered I enjoyed building the model and working on the various issues. In short, I had fun making it and that is what really counts.
Highly recommended for the experienced modeler only.
|
|