
Games Workshop Warhammer 40k Astra Militarum Sentinel Build Review
John Kelley
MSRP $30.00
MSRP $30.00
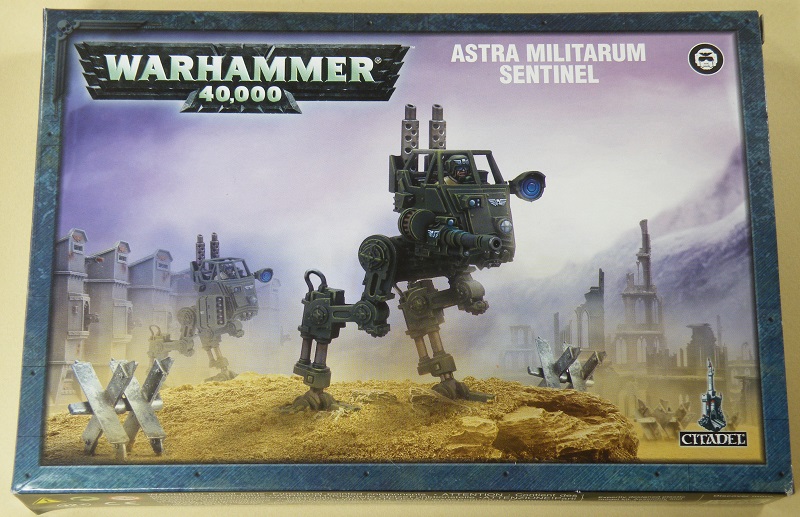
While attending the 2016 Gen-Con I picked up this kit from a dealer I unfortunately cannot remember the name of. I am by no means a gamer but I like the models and miniatures that come with games to build. In this case I chose the Sentinel kit as I always thought it looked cool! Now that my lack of qualifications has been noted let's get to the model. The model comes in a 9 x 6 x 1 inch box with open end flaps.
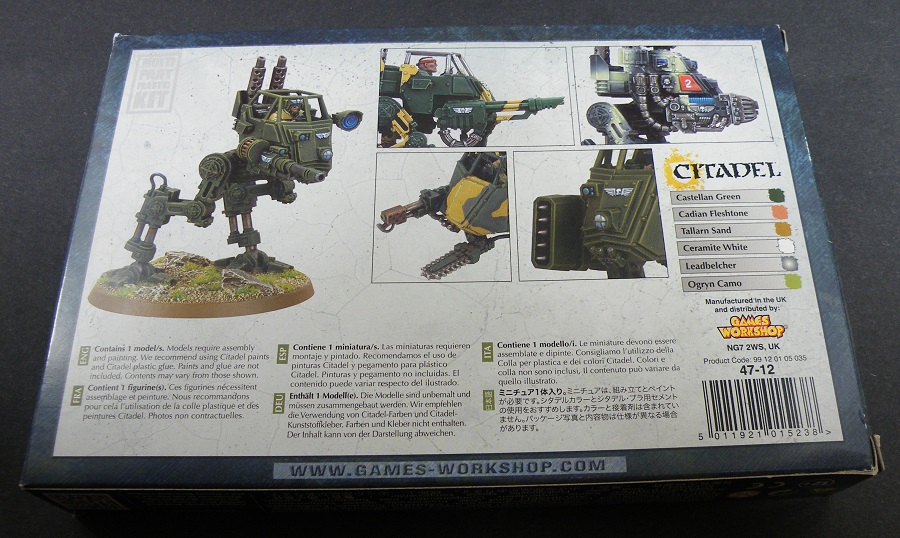
The front of the box has a photo of the finished Cadian version while the back has the same photo and five photos of a Catachan, Steel Legion and Cadian version with rockets. Suggested colors from the Citadel Paints range are listed too along with various warnings and kit content descriptions in six languages.
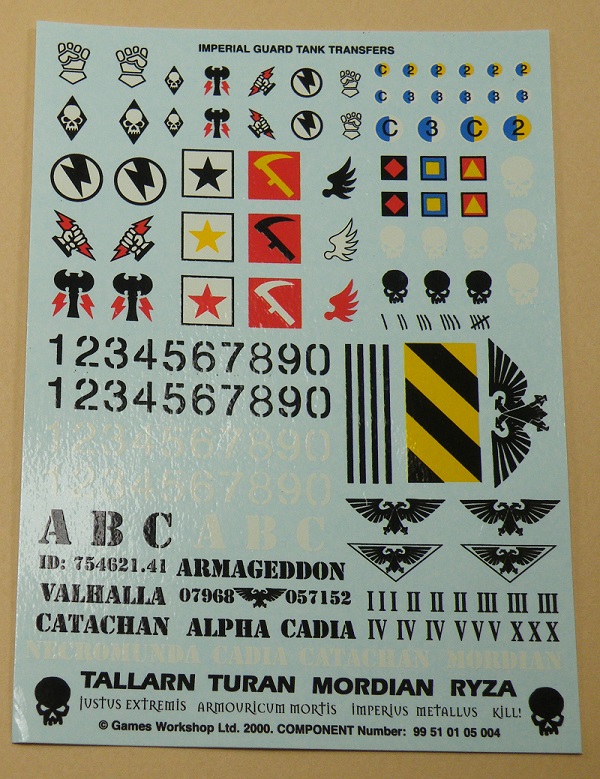
The kit comprises two trees of 59 flash free Grey polystyrene parts and a large decal sheet with numbers, letters,names and various badges.
One tree contains the cab components, cockpit floor and weapons. For the weapons you can choose between an auto cannon, chain saw, multi laser, a heavy flamer, lascannon, a plasma cannon, a rocket launcher and a missile.
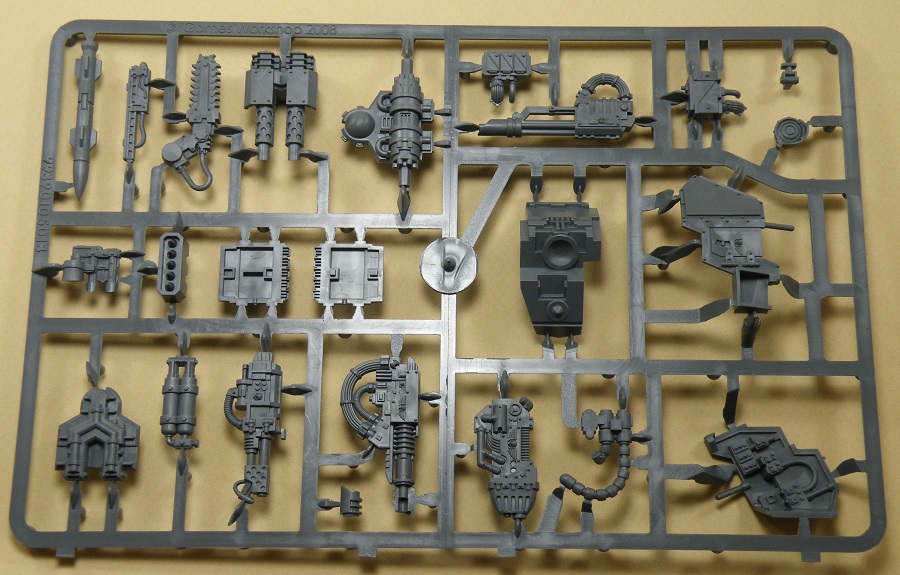

The second tree contains the legs, cab detail and optional parts and crewman.
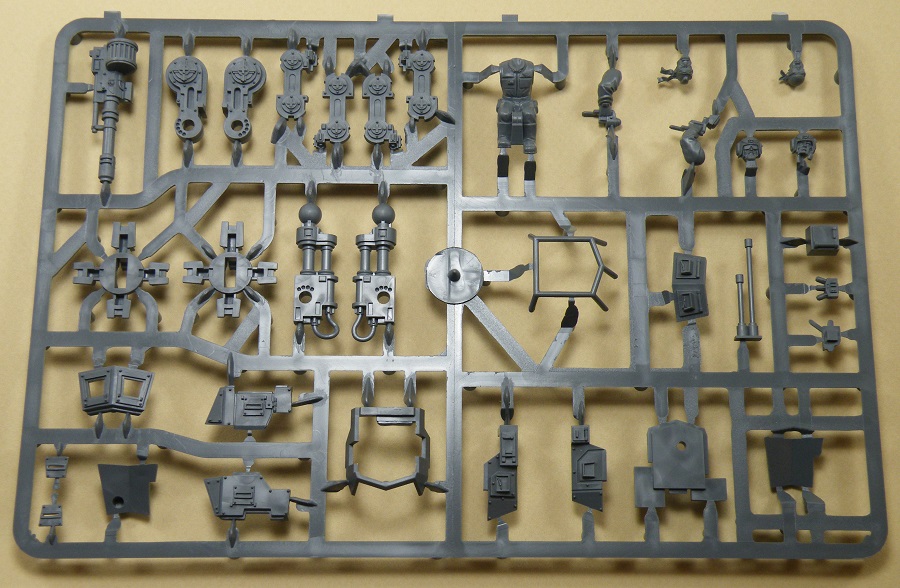
Unfortunately none of the trees or part are identified with numbers or letters. This make reading the instructions prior to assembly very important to be sure you remove the correct parts for each stage of assembly. The model can be assembled in one of three versions. First there is an exposed open top cab with roll cage for a Catachan Scout version, next are armored versions consisting of a Cadian vehicle with armored sides and open top, and finally a fully enclosed armored cab for a Steel Legion version. Even the pilot has a choice of three heads; two Cadian and one Catachan. Those are a lot of options for one model, especially since most models today only come with one version. As to scale I have researched this on the web and as far as I can figure it is possibly Heroic 28 mm scale.
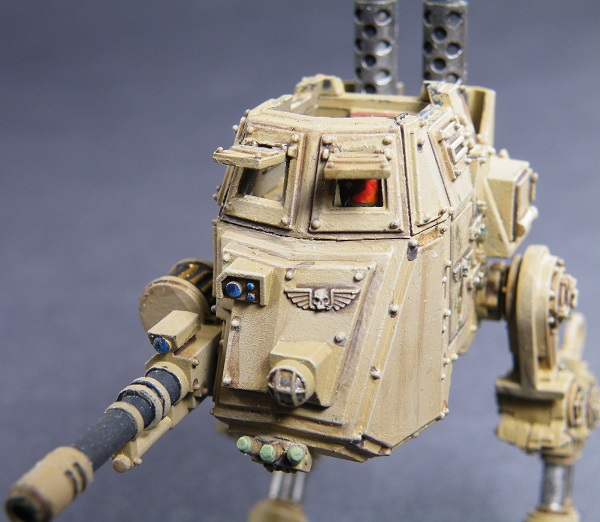
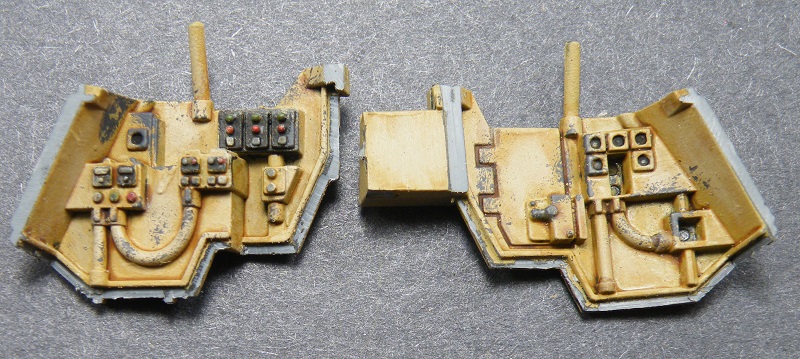
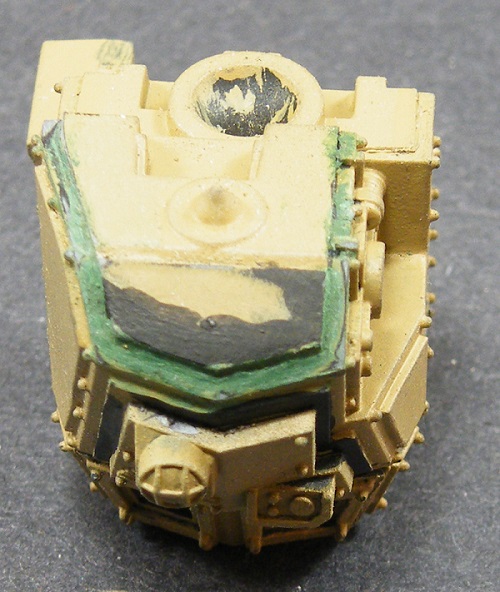
Armored Cab Assembly
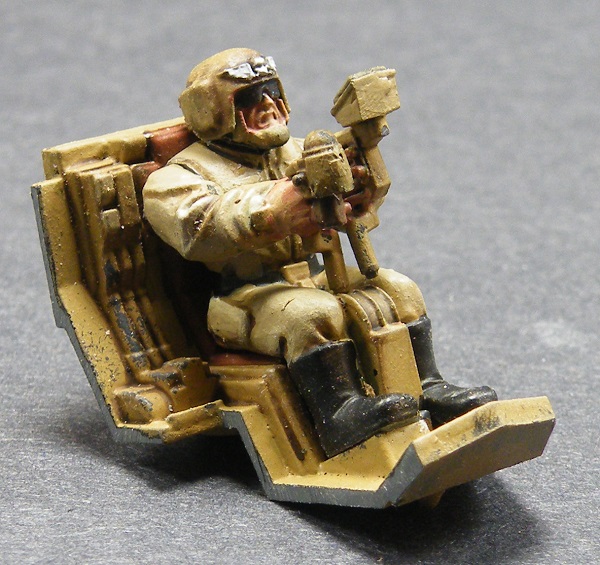
Before painting I noticed the parts had an oily feel to them so I washed them in warm water with dish washing soap and an old tooth brush to remove any release agent from the parts. I primed the entire model with Army Painter Flat Black because I had originally intended to paint the Sentinel Castellen Green but decided to go with a desert scheme instead. Priming it Black just meant that the finish color would be darker than if I had primed it White or Light Gray. I brush painted the cab interior and crewman's uniform with a base coat of Citadel Paints Zandri Dust. Citadel paints were used throughout the painting process except for a few Vallejo colors. Once the base coat had dried I used Agrax Earthshade as a pin wash on the cockpit, seat, conduits, floor and crewman. Vallejo Flat Black was painted on the boxes and the switches were painted red, yellow and green. The crewman's targetting sight was painted Khorne Red in an arc on the left side of the sight. Next Evil Sunz Scarlet was painted over the Khorne Red leaving a little of it in the corner and finally Troll Slayer Orange was painted over the Evil Sunz Scarlet with a White Scar dot in the upper right hand corner to show light reflecting off the lens. The aquillas were painted Celetial Gray and washed with Nuln Oil.
Before painting I noticed the parts had an oily feel to them so I washed them in warm water with dish washing soap and an old tooth brush to remove any release agent from the parts. I primed the entire model with Army Painter Flat Black because I had originally intended to paint the Sentinel Castellen Green but decided to go with a desert scheme instead. Priming it Black just meant that the finish color would be darker than if I had primed it White or Light Gray. I brush painted the cab interior and crewman's uniform with a base coat of Citadel Paints Zandri Dust. Citadel paints were used throughout the painting process except for a few Vallejo colors. Once the base coat had dried I used Agrax Earthshade as a pin wash on the cockpit, seat, conduits, floor and crewman. Vallejo Flat Black was painted on the boxes and the switches were painted red, yellow and green. The crewman's targetting sight was painted Khorne Red in an arc on the left side of the sight. Next Evil Sunz Scarlet was painted over the Khorne Red leaving a little of it in the corner and finally Troll Slayer Orange was painted over the Evil Sunz Scarlet with a White Scar dot in the upper right hand corner to show light reflecting off the lens. The aquillas were painted Celetial Gray and washed with Nuln Oil.
The lenses on the weapons were painted a base coat of Kantor Blue and an arc in the lower left corner of Caladdor Sky was added. After this the interior was dry brushed Karak Stone, a layer paint. I found the Karak Stone an easy paint to dry brush and blend into the base color. I was surprised that an acrylic would blend as well as it did. The crewman was also washed with Agrax Earthshade and dry brushed with the Karak Stone. The face was painted Bugmans Glow and washed with Reikland Fleshshade. Cadian Fleshtone was then added to the highest areas of the face such as the nose, cheeks, chin and lips. The sunglasses were painted flat black and glossed with Pledge Floor Wax with Future Shine. A fine packing sponge was shaped into a ball and dipped in Vallejo German Grey. This was dabbed in various spots to show chipping and wear.

The only areas that needed filler were the cab nose and where the floor is attached under the cab. Citadel Liquid Green Stuff was used to fill the gaps and the area was sanded smooth. This was my first time using this and one of the nice things about it is it can be thinned with water. It worked well but it does take at least two or three applications to fill a gap. After painting the exterior I set it aside and assembled the legs.
Leg Assembly
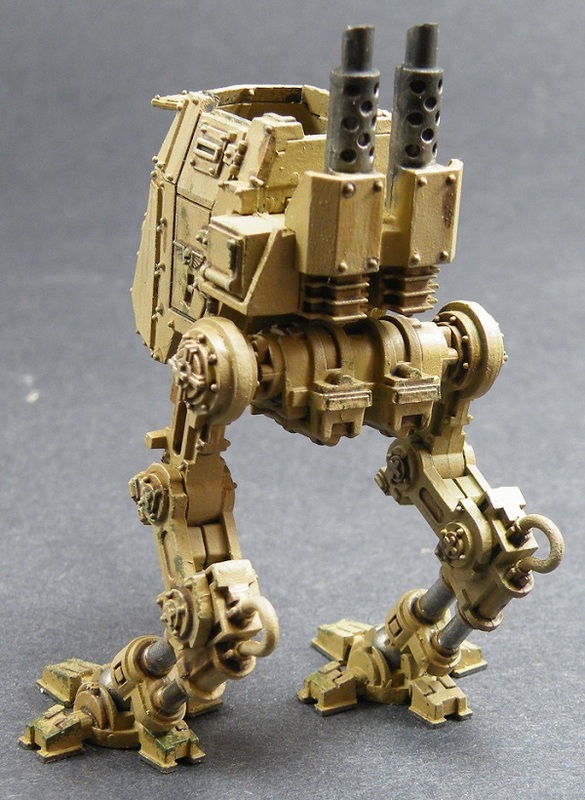
The legs can be positioned using the joint at the top just below the cab and mid way down the leg. The feet are attached to the ball at the end of the legs and will adjust to the stance of the model. The upper joint can be moved in any position but the mid joint or knee has 5 holes with a plate that has pins on it to insert into these holes.
The legs can be positioned using the joint at the top just below the cab and mid way down the leg. The feet are attached to the ball at the end of the legs and will adjust to the stance of the model. The upper joint can be moved in any position but the mid joint or knee has 5 holes with a plate that has pins on it to insert into these holes.
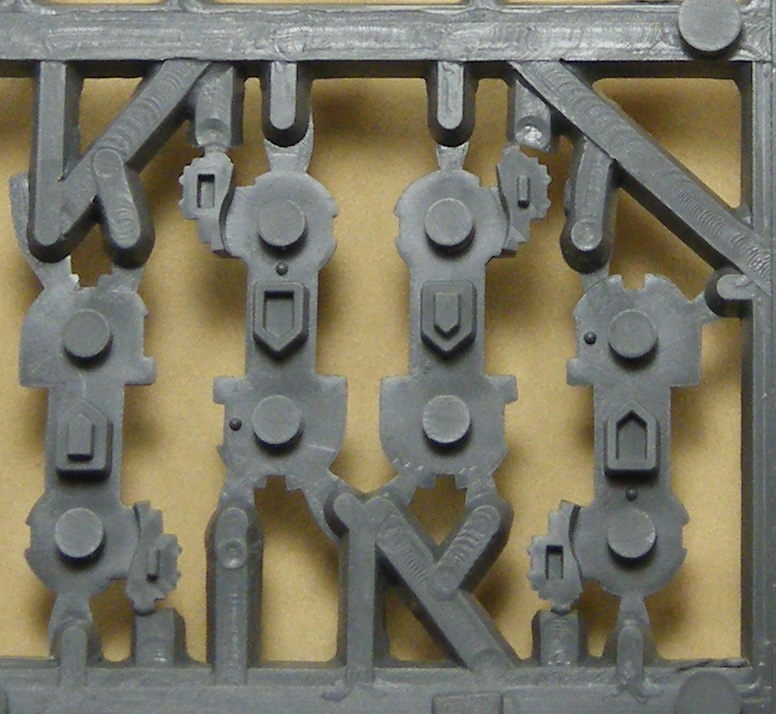
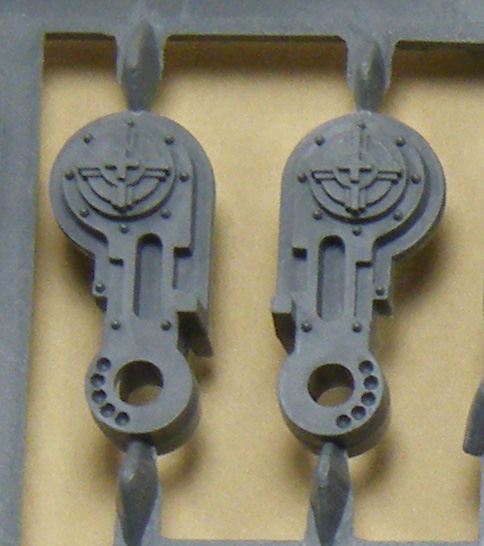
Care needs to be taken when adjusting the leg position since the pins can be easily broken off. Trust me, I know because I had to replace two pins with a brass rod. I used the box and instruction photos to put the legs in a walking mode. I strongly recommend you assemble the legs without using any glue until you have them in the pose you want. Once you have done that then apply the cement to the upper and knee joint. Once this was done I attached the cab, exhaust and auto cannon.
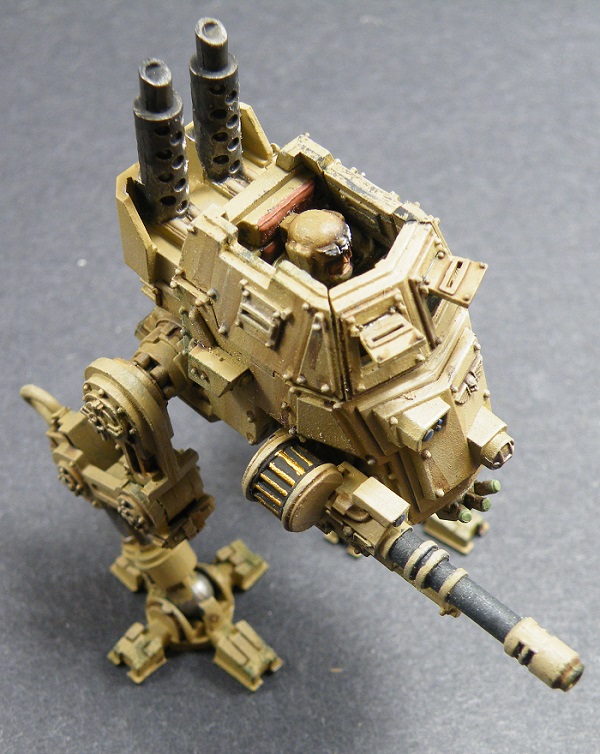
Painting and finishing
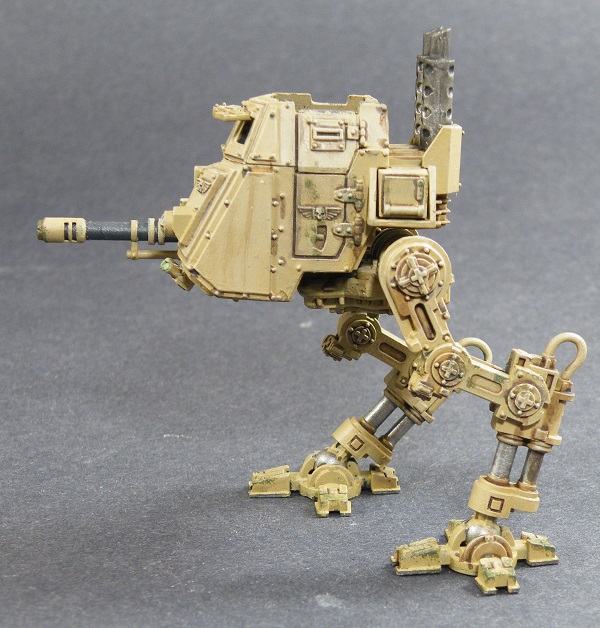
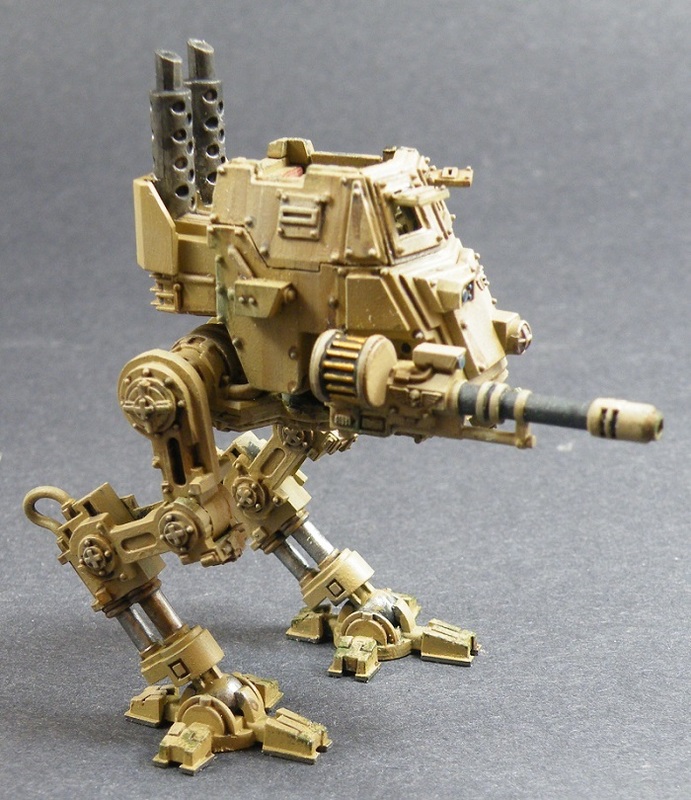
Once the model was completely assembled I chose to brush paint the model with the same colors as the interior. The colors were thinned with water and depending on how much water you use you may need to apply two base coats. As was done to the interior the chipped paint was added using a packing sponge or a piece of foam like on cheap disposable foam brushes you find for painting house trim. To give it an even more used and abused look I took the Agrax Earthshade and added streaks down the sides of the cab and legs. I added a lot of this shade and Seraphim Sepia around the leg pistons to show where the seals leaked oil. The ball joints for the feet were painted Vallejo Silver to show the constant wear of the feet moving against the ball joint. Some nuts and bolts were painted with Typhus Corrosion and streaked down wards to show rust streaks. The auto cannon was painted the same way but the barrel was painted with a half and half mix of Vallejo Model Color German Grey and Oily Steel. The smoke dischargers were painted Vallejo Model Color Pastel. For the exhaust stacks these were painted Leadbelcher with repeated washes of Nuln Oil to give them a sooty appearance. A dry brushing of Termanatis Stone was lightly applied to all of the edges. I chose not to add decals as a personal preference but I have not read of any negative issues with Games Workshop decals.
Once the model was completely assembled I chose to brush paint the model with the same colors as the interior. The colors were thinned with water and depending on how much water you use you may need to apply two base coats. As was done to the interior the chipped paint was added using a packing sponge or a piece of foam like on cheap disposable foam brushes you find for painting house trim. To give it an even more used and abused look I took the Agrax Earthshade and added streaks down the sides of the cab and legs. I added a lot of this shade and Seraphim Sepia around the leg pistons to show where the seals leaked oil. The ball joints for the feet were painted Vallejo Silver to show the constant wear of the feet moving against the ball joint. Some nuts and bolts were painted with Typhus Corrosion and streaked down wards to show rust streaks. The auto cannon was painted the same way but the barrel was painted with a half and half mix of Vallejo Model Color German Grey and Oily Steel. The smoke dischargers were painted Vallejo Model Color Pastel. For the exhaust stacks these were painted Leadbelcher with repeated washes of Nuln Oil to give them a sooty appearance. A dry brushing of Termanatis Stone was lightly applied to all of the edges. I chose not to add decals as a personal preference but I have not read of any negative issues with Games Workshop decals.
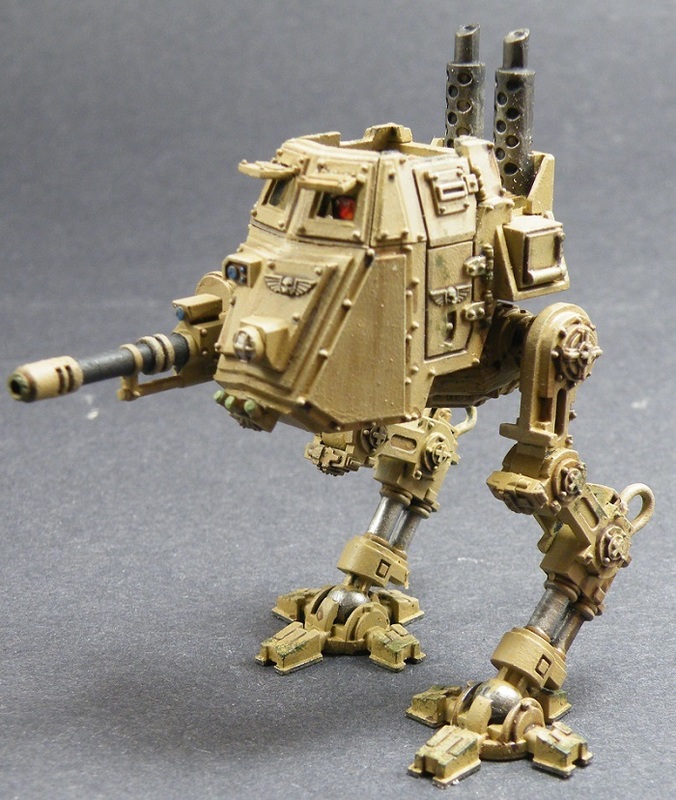

Final thoughts
I really like this kit and it is surprisingly easy and enjoyable to build. The fit is very good and except for a few areas very little filler was used. The cockpit detail is quite well done and the crewman is well detailed and has a choice of different heads. While the kit is really good the instructions are vague in a few places such as the different versions that can be built and the leg construction. Again,careful study of the instructions is necessary to ensure that the correct version is built. One thing I did I would not do again is that when I began painting the cockpit I went ahead and primed everything while it was still on the trees. While this made priming easier it made assembly a little more difficult than necessary since I needed to re-prime after I had scraped off the primer to glue and to sand seam lines. I would recommend you prime and paint the cab interior first. After this mask the interior and finish assembling, priming and painting the model. For U.S. $30.00 this kit is worth purchasing and building even if you are a non gamer like myself. You get quite a few extra parts and with the possibility of different versions I think you get good value for your money and I highly recommend this kit.
I really like this kit and it is surprisingly easy and enjoyable to build. The fit is very good and except for a few areas very little filler was used. The cockpit detail is quite well done and the crewman is well detailed and has a choice of different heads. While the kit is really good the instructions are vague in a few places such as the different versions that can be built and the leg construction. Again,careful study of the instructions is necessary to ensure that the correct version is built. One thing I did I would not do again is that when I began painting the cockpit I went ahead and primed everything while it was still on the trees. While this made priming easier it made assembly a little more difficult than necessary since I needed to re-prime after I had scraped off the primer to glue and to sand seam lines. I would recommend you prime and paint the cab interior first. After this mask the interior and finish assembling, priming and painting the model. For U.S. $30.00 this kit is worth purchasing and building even if you are a non gamer like myself. You get quite a few extra parts and with the possibility of different versions I think you get good value for your money and I highly recommend this kit.

Resources:
Warhammer TV Channel on You Tube
I highly recommend this channel for learning how to paint Warhammer 40k models and using Citadel paints.
Warhammer TV Channel on You Tube
I highly recommend this channel for learning how to paint Warhammer 40k models and using Citadel paints.
