
An Experiment In Oils
John Kelley
As the title states, this is truly an experiment. I had recently decided to step out of my comfort zone by adding weathering to my models using artist oil paints and to not limit their use strictly to pin washes or filters. I have always felt that adding weathering to a model should add interest to the subject and should never be used as a method of hiding poor workmanship. Since I have (and still do) limited skills in using oils, I scoured the internet for information and videos and in the process I learned quite a bit. In this regard, I hope to pass information along in this article to inspire other modelers to try oils for themselves.
One of the things I learned is that oils are a forgiving medium to work with. If you don't like what you have done, simply take a dry brush and work the oils with it until they are gone. It is really difficult to make a mistake and not be able to correct it, or to make changes to them, until you are satisfied with the results. This is by no means an exhaustive article about "how to do it" but rather it is a "how I did it." While I build in 1/72 scale, these methods can be easily used on 1/35 scale,....you just need a bigger brush!
One of the things I learned is that oils are a forgiving medium to work with. If you don't like what you have done, simply take a dry brush and work the oils with it until they are gone. It is really difficult to make a mistake and not be able to correct it, or to make changes to them, until you are satisfied with the results. This is by no means an exhaustive article about "how to do it" but rather it is a "how I did it." While I build in 1/72 scale, these methods can be easily used on 1/35 scale,....you just need a bigger brush!
MODELS
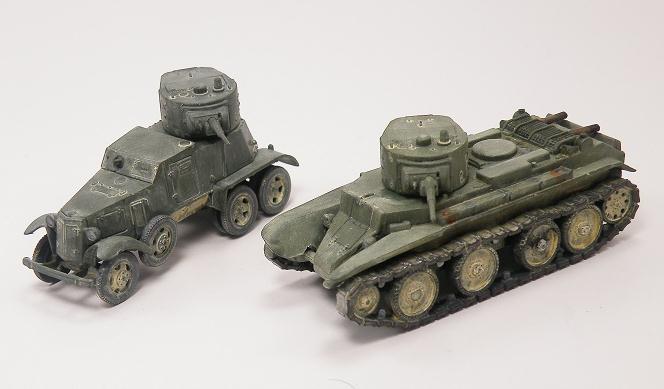
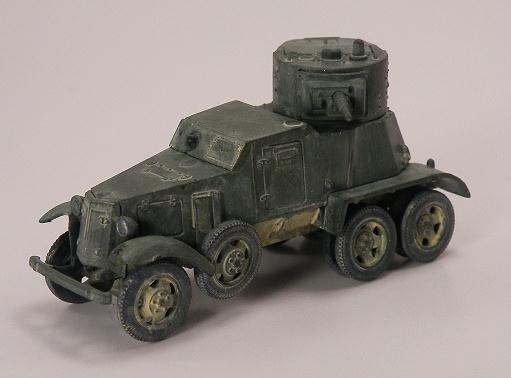
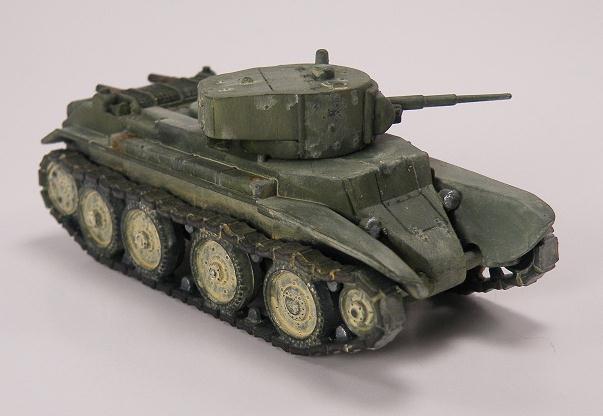
I wanted to use a kit that was easy and fast to assemble without much trouble so I chose two kits I already had in my stash. They are the 1/72 Pegasus Hobbies BT-7 #7673 and the BA-6 #7273 that I purchased from my local Hobby Town. The BT-7 needed filler on the seams on the front and the rear plate while the BA-6 lower rear plates did not mate well with the upper hull. To remedy this I filed the lower plates flat and covered them with sheet plastic strips to reduce the gap and make better defined plates. The models were primed with Tamiya Rubber Black Spray TS82 and then everything except the tracks, air intake and rubber parts of the model were painted Vallejo Model Color Reflective Green #890(90) with a brush. The track guide teeth and lights on both vehicles were painted Silver and the exhaust was painted Mahogany Brown #846(139). I probably should have painted the tracks Gun Metal but to be honest, well...I forgot to!
I wanted to use a kit that was easy and fast to assemble without much trouble so I chose two kits I already had in my stash. They are the 1/72 Pegasus Hobbies BT-7 #7673 and the BA-6 #7273 that I purchased from my local Hobby Town. The BT-7 needed filler on the seams on the front and the rear plate while the BA-6 lower rear plates did not mate well with the upper hull. To remedy this I filed the lower plates flat and covered them with sheet plastic strips to reduce the gap and make better defined plates. The models were primed with Tamiya Rubber Black Spray TS82 and then everything except the tracks, air intake and rubber parts of the model were painted Vallejo Model Color Reflective Green #890(90) with a brush. The track guide teeth and lights on both vehicles were painted Silver and the exhaust was painted Mahogany Brown #846(139). I probably should have painted the tracks Gun Metal but to be honest, well...I forgot to!
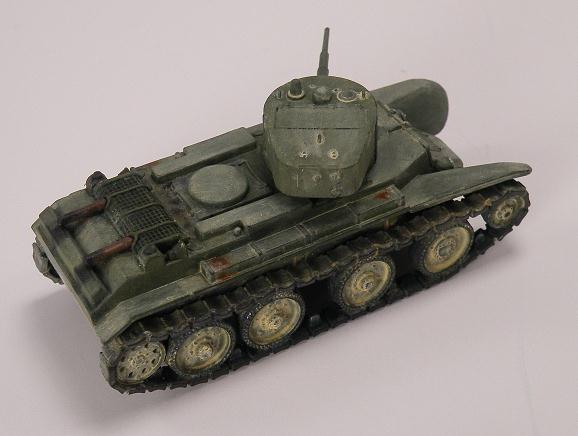
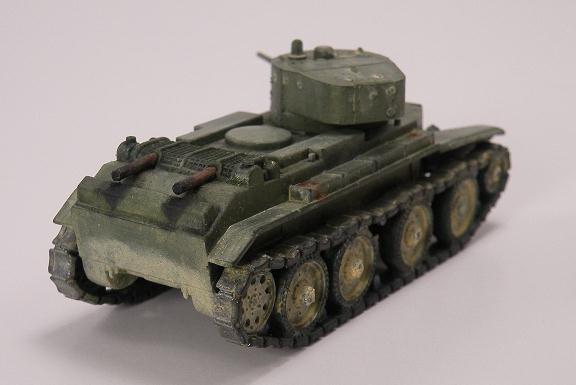
After the paint had thoroughly dried, I decided to give the Green on the BT-7 a more faded and worn appearance. For this I mixed Vallejo Iraqi Sand #819(124) into the #890 Green at about a 2 to 1 ratio, respectively, and thoroughly dry brushed this over the entire model. The BT-7 would receive the most weathering to show a heavily used tank in need of maintenance while the BA-6 would have lighter weathering to show a newer looking vehicle that has been better maintained. The goal was to show a tank and armored car that had been running down a dusty Soviet road during the Summer around 1941 to 1942. Since I did not plan to add markings I did not use a clear coat over the models; however, I would recommend using a Satin Or Gloss coat to aid in applying the washes and decals. Since the oils will dull the finish a Flat coat will not be necessary, but it can be added after the oils have dried.
OILS
Oils can be bought from beginner sets to professional. I obtained my oils through my local Michael's Arts and Craft Store and I chose Windsor and Newton Winton Oil Colours which are a student grade of paint but are quite acceptable for what we are doing. While there are other oil colors available to be honest, these just happened to be handy and the price was pretty good (about $7.00 for a 1.25 U.S. fl. ounce (37ml) tube of paint). This may seem a little pricey but you can buy a starter set which comes with six basic oils for around $30.00 and just one tube of paint will last quite a while.
Oils can be bought from beginner sets to professional. I obtained my oils through my local Michael's Arts and Craft Store and I chose Windsor and Newton Winton Oil Colours which are a student grade of paint but are quite acceptable for what we are doing. While there are other oil colors available to be honest, these just happened to be handy and the price was pretty good (about $7.00 for a 1.25 U.S. fl. ounce (37ml) tube of paint). This may seem a little pricey but you can buy a starter set which comes with six basic oils for around $30.00 and just one tube of paint will last quite a while.
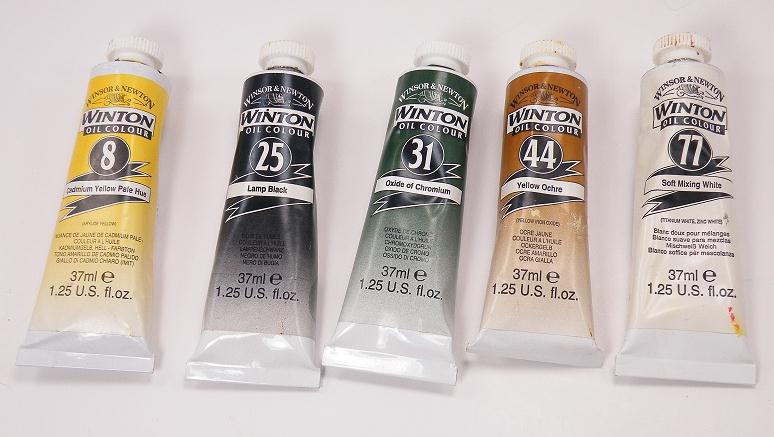
For this little experiment, I used #25 Lamp Black for pin washes, #44 Yellow Ochre and #77 Soft Mixing White for the dust, and for a filter I used #31 Oxide of Chromium and #8 Cadmium Yellow Pale Hue. You really don't need a lot of oils and just using the White, Black, and Yellow Ochre will produce the wash and dust effect alone.
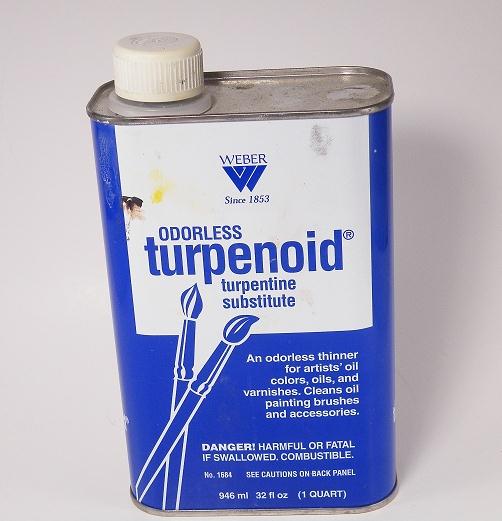
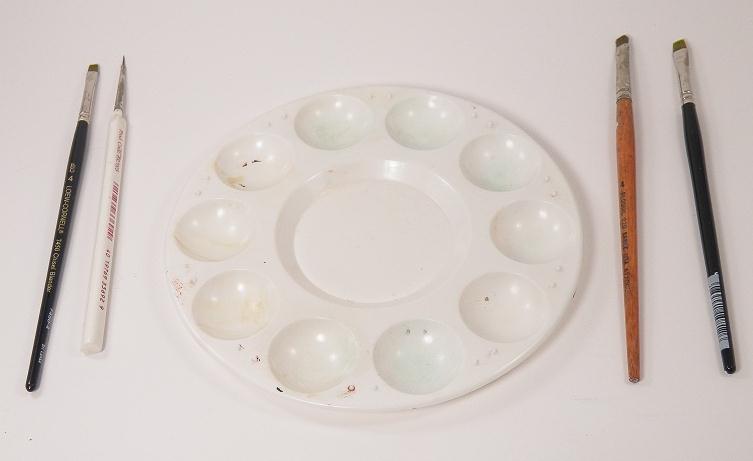
I use a plastic mixing pallet with ten small bowls molded into it to hold paint or thinner. To thin the oils I use Turpenoid which is an odorless form of turpentine and can be found wherever you purchase your paints. In this case I use Weber's Turpenoid because in my research I found this product to be frequently recommended by modelers who use oils for modeling. Do not use Natural Turpenoid as this does not thin the oils well at all. One very helpful tip I learned was to do all your paint mixing on cardboard or a 3 x 5 card. The paper wicks up the oil and leaves more pigment to paint which helps speed up the drying time. While we are talking about that, don't be surprised if it takes a couple of weeks for the finish to dry well enough to be handled as one of the advantages of oils is their slow drying time, which allows for corrections to the finish.
For the brushes I use various styles designed for model paints, but I have found round and flat brushes to be the best for models. Most were synthetic and were no wider then about a 1/4 inch. For 1/35th scale a wider set of brushes would be better. Since writing this article, I have invested in synthetic brushes to be used for all paint mediums. I have two flat and two Filbert brushes to be used for weathering in oils.
For the brushes I use various styles designed for model paints, but I have found round and flat brushes to be the best for models. Most were synthetic and were no wider then about a 1/4 inch. For 1/35th scale a wider set of brushes would be better. Since writing this article, I have invested in synthetic brushes to be used for all paint mediums. I have two flat and two Filbert brushes to be used for weathering in oils.
PAINTING
I began with a wash of Lamp Black to accentuate the details. To do this I put some paint on a 3x5 card and in the mixing pallet bowl I added the Turpenoid. I dipped the brush in the paint then the Turpenoid, and I touched the pallet with the brush to see if it is thin enough. If not, I just dip the brush back in the Turpenoid. I find this is an easier method for me as I can control the amount of thinner and paint more precisely. If you apply too much paint, just remove the excess with a clean brush dipped in thinner. I applied the wash to all details on the model and allowed it to dry. For a filter, I mixed the Yellow and Cadmium Green to make a very light green and thinned the mix to the consistency of water. I applied it to all of the Green surfaces with a wide flat brush and this changed the color to a more Greener shade with the effect of lightening the overall color. This, I found out later, should have been done before the wash!
(Well, I did say it was an experiment.)
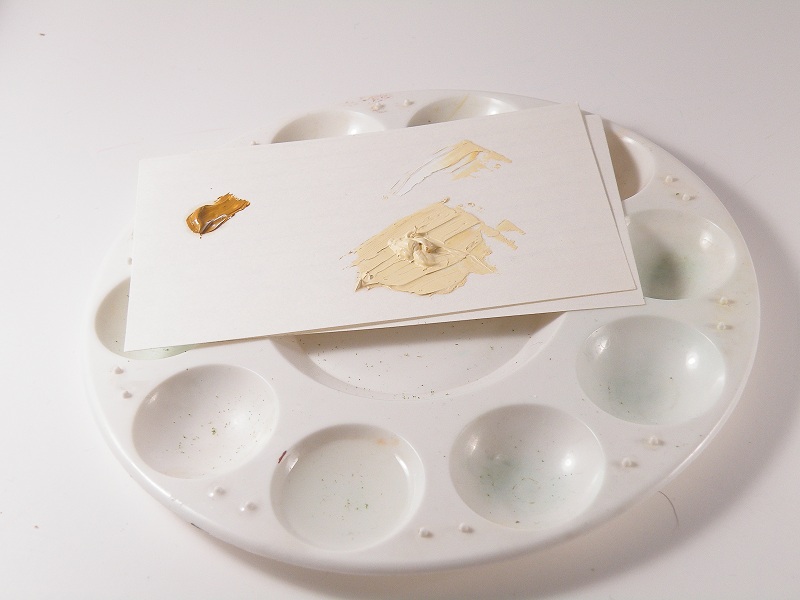
To create the dust color, I mixed a very small amount of Yellow Ochre to about a 1/4 teaspoon of Tinting White to create a very light Tan or Buff color. I cannot give a more specific measurement of paint as the mixing is really done by eye, but something to keep in mind is that the Yellow Ochre is a very strong color and a little goes a long way. If you are not sure how light it should be, just look at any car and see how the dust ranges from a pale brown to a very light buff color.
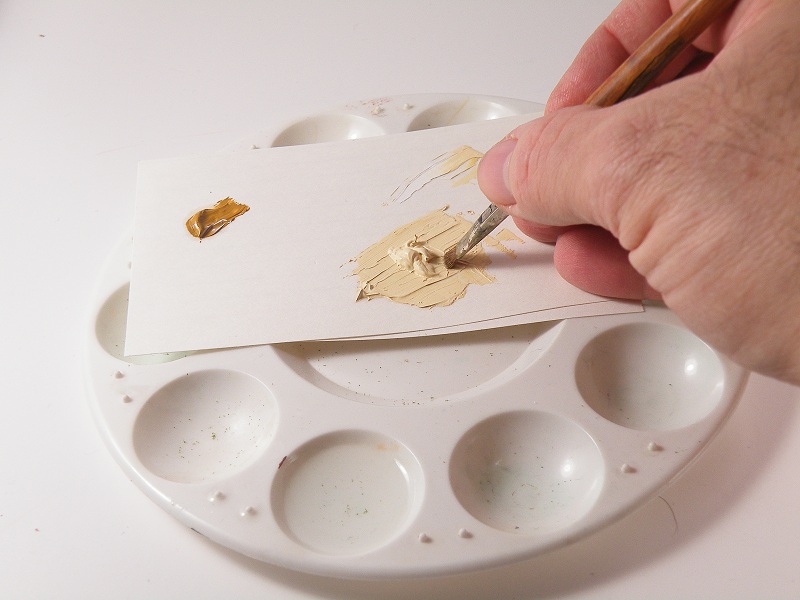

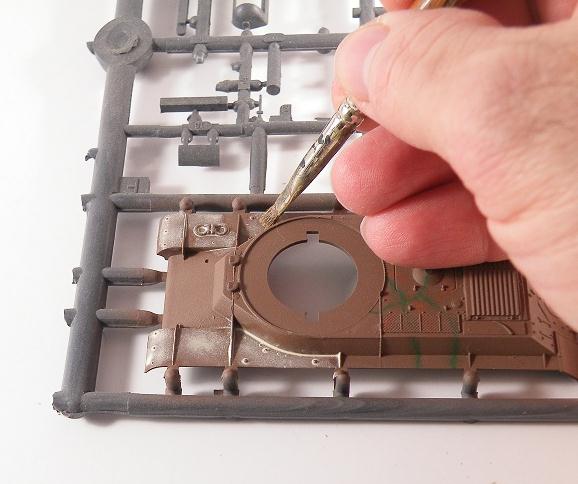
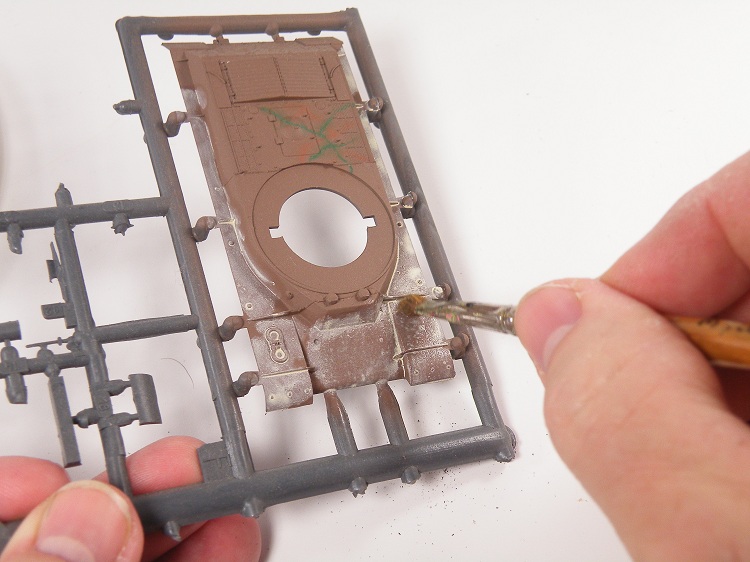
Just like the wash, I mixed the paint on the 3x5 card, dipped the brush in the paint, and then into the Turpenoid. I added the dust heavily to the road wheels and lighter as I went up the side of the model. The method to my madness was to take a 1/4 inch wide flat brush and paint the dust over all of the surfaces. On the horizontal surfaces, I moved the brush from front to back and on the vertical surfaces from bottom to top. I let the paint set for about an hour to let the thinner evaporate and allow the paint to set up a little. You can wait even longer as oils take a week or more to really cure. The key is to apply thin layers of oils until you achieve the effect you want and not just a single heavy coat. If you apply too much, just remove the excess with a clean brush dipped in the thinner. Since this was done before I wrote the article, I used an old kit to show how I applied the dust.

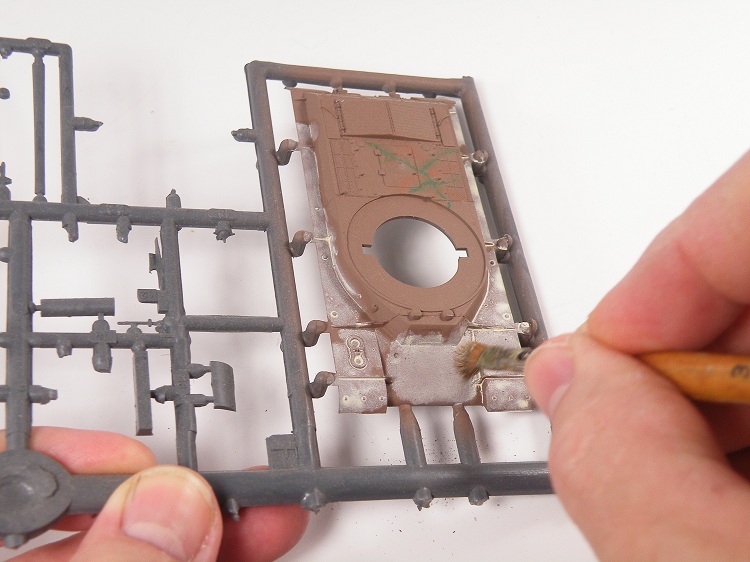
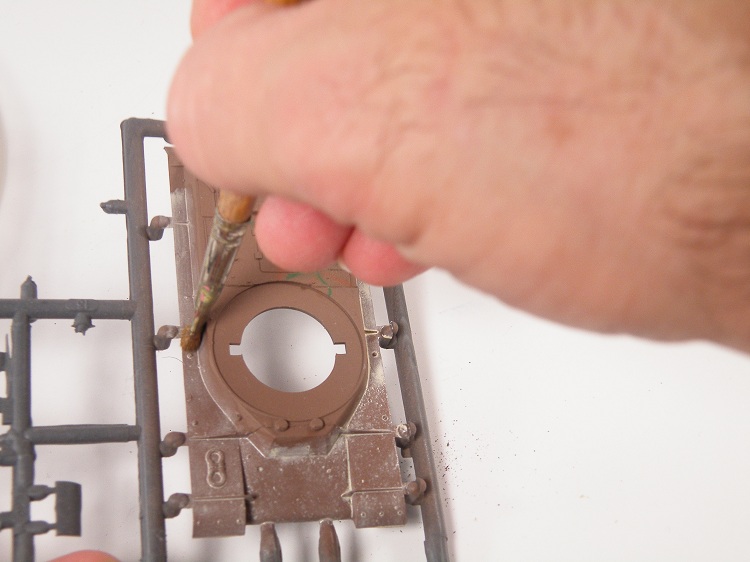
The dust looks pretty bad by now but don't worry, just take a short wide brush and on the horizontal surfaces move the brush in a circular motion to blend the dust colored paint into the base coat to simulate the dust lying on the surface. For the vertical surfaces, I moved the brush up and down to give a streaky appearance. The idea is to blend the oil into the paint to create a dusty look. You will remove some of the oil paint which is fine. It is easier to add more than take away too much. To add heavier dust to the road wheels I applied the dust colored paint directly to the model without thinning it; then I went back with a brush dampened in thinner to blend the finish. If I went too far, I just repeated the process until I was happy with the results. To show where dust has built up, I used a round brush and applied the dust as I would a wash and slowly built up the color until it looked like a heavy build up of dust. I did this around the hatches, periscopes, bolts and the tracks.
STAINS AND LEAKS
The fuel stains were made with # 64 Burnt Umber and were blended in like the dust. The oil stains on the deck were dots of thinned Lamp Black with a little Burnt Umber laid on top to give a oily look. For the leaking wheel bearing I painted lines emanating from the hub with the Lamp Black, and used a damp brush to thin and reduce the heaviness of the leak to what I thought was appropriate. This color was also used to make the stains on the ends of the exhaust pipes and the tool boxes beneath them. This was applied with a round brush using no thinner.
THE BA-6
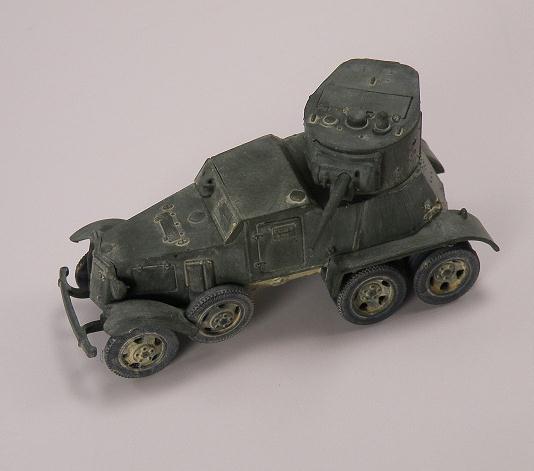
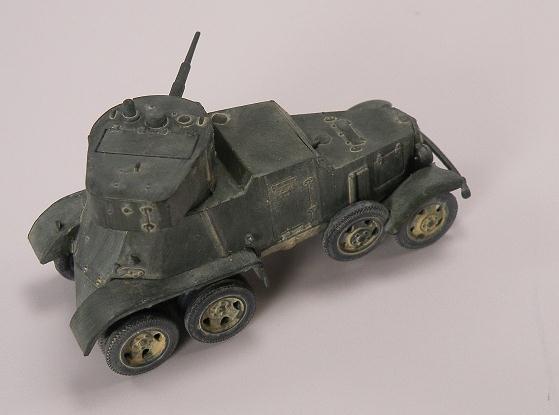
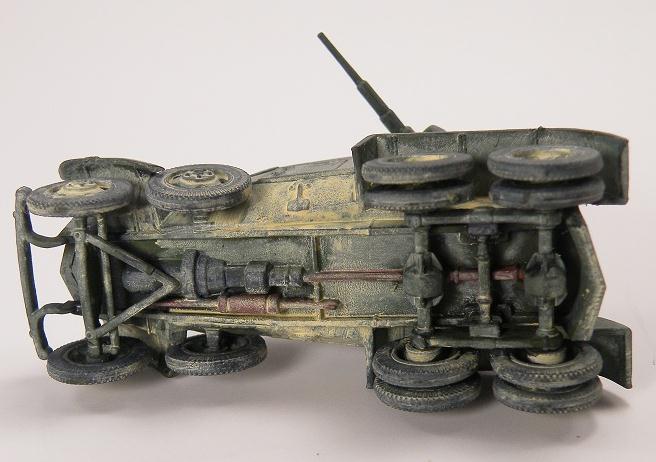
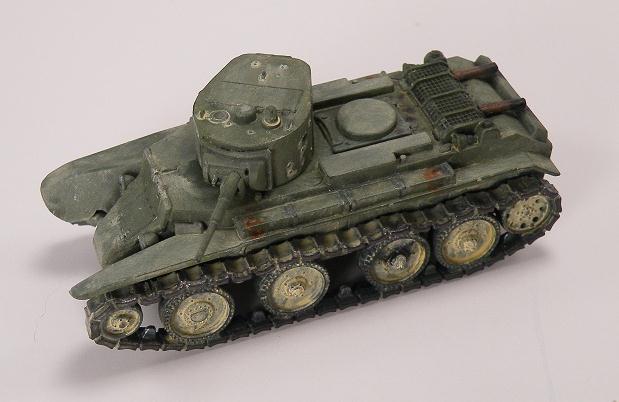
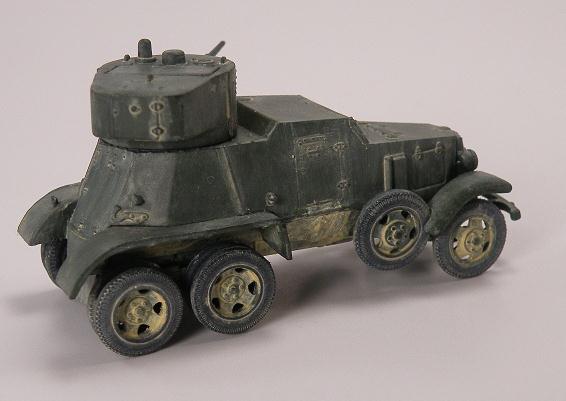
I intend to put these models on a diorama base at a later date and since I did not want both vehicles to look identical, the BA-6 paint finish is not as worn looking as the BT-7. For this model I finished it the same as the BT-7 except I used no filters or heavy dry brushing and instead went with a strictly dusty finish. The technique of applying the oils to simulate the dust is identical to the BT-7. The result is a darker finish that looks like a newer vehicle which is very dusty and dirty. By finishing the model like this it shows how weathering alone can alter the tone of the base vehicle colors and give them a slightly darker finish to them.
IN THE END......
I learned that no matter how many tutorials you read or how many "how to" videos you watch it all boils down to picking up a kit, painting it and breaking out the oil paints and giving it a try. This attempt to convey the methods that worked for me will show how an ordinary quick build model built with little or no modifications can be turned into a unique subject. Properly done weathering can actually enhance a model and give a single color camouflage scheme some life, and artist oils go a long way in creating this effect.
I learned that no matter how many tutorials you read or how many "how to" videos you watch it all boils down to picking up a kit, painting it and breaking out the oil paints and giving it a try. This attempt to convey the methods that worked for me will show how an ordinary quick build model built with little or no modifications can be turned into a unique subject. Properly done weathering can actually enhance a model and give a single color camouflage scheme some life, and artist oils go a long way in creating this effect.

REFERENCES
These are some of the sources that helped me out in working with oils:
1. Scale Model Medic by Jon Hayward
2. www.emptyeasel.com for types of brushes.
3. Imperial Armour Model Masterclass Volume One by Forge World
ISBN: 978-1-84154-902-6
This book is intended for modeling and finishing Warhammer 40K tanks, figures and aircraft but there is a good amount of information on weathering and using oils in general that can be used for all military models. I purchased mine at Gen-Con for $45.00 but it can be found at www.gamesworkshop.com or your local game shop can order it.
4. www.missing-lynx.com where I found information on oil weathering in the Tips And Tricks discussion group.
