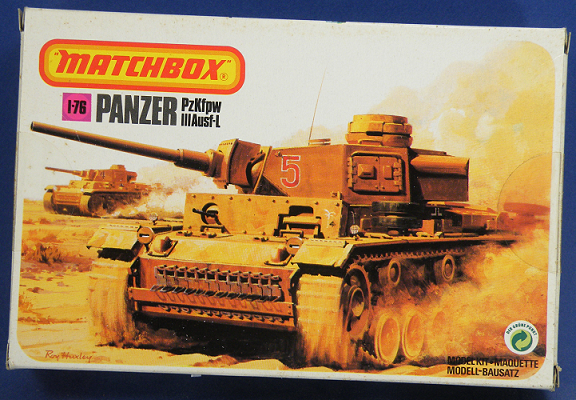
Matchbox 1/76th Scale Pz.Kpfw. III Ausf- L Build Review
John Kelley
Kit No. 40074
Out of production
MSRP: Too long ago to remember.
One is listed on Ebay as of this writing.
Out of production
MSRP: Too long ago to remember.
One is listed on Ebay as of this writing.
History:
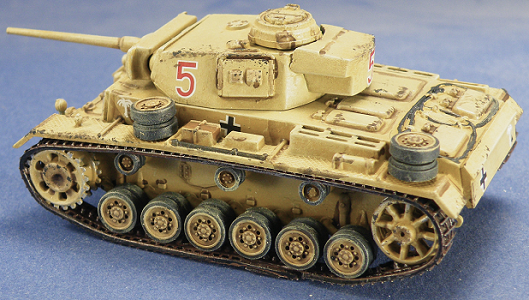
The Panzer III was originally developed in the 1930’s with the 3.7cm KwK 36 L/45 main gun which was eventually replaced with the 5cm KwK 39 L/60 by 1942. The change to the 5cm KwK 39 L/60 was due to the earlier main guns being unable to penetrate soviet armor. The British referred to the Panzer III with the 5cm KwK 39 L/60 as the Panzer III Special. For this build I chose the Western Desert color scheme as I had not built any German vehicles in the desert scheme for many years.
The kit:
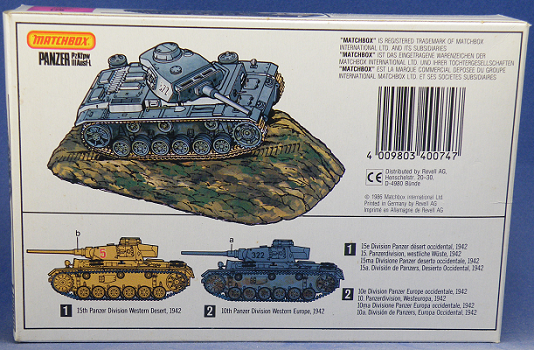
I admit that I have always liked Matchbox model kits. Rather it was aircraft or military vehicles I just liked them. They were easy to build, had interesting decals, bases for vehicles and weapons stores for aircraft. This was an original issue at a time when there were few Panzer III kits in 1/76-1/72 scale. The Matchbox model was easily obtained from my local hobby shop and I finally decided to build it after many years. The model represents an early Pz.Kpfw. III Ausf. L with the hull side escape hatches and comes molded in green plastic with 2 decal options. The box bottom shows the color schemes and decals for a 15th Panzer Division, Western Desert 1942 tank and the other is for a 10th Panzer Division, Western Europe 1942 tank.
The Panzer III was originally developed in the 1930’s with the 3.7cm KwK 36 L/45 main gun which was eventually replaced with the 5cm KwK 39 L/60 by 1942. The change to the 5cm KwK 39 L/60 was due to the earlier main guns being unable to penetrate soviet armor. The British referred to the Panzer III with the 5cm KwK 39 L/60 as the Panzer III Special. For this build I chose the Western Desert color scheme as I had not built any German vehicles in the desert scheme for many years.
The kit:
I admit that I have always liked Matchbox model kits. Rather it was aircraft or military vehicles I just liked them. They were easy to build, had interesting decals, bases for vehicles and weapons stores for aircraft. This was an original issue at a time when there were few Panzer III kits in 1/76-1/72 scale. The Matchbox model was easily obtained from my local hobby shop and I finally decided to build it after many years. The model represents an early Pz.Kpfw. III Ausf. L with the hull side escape hatches and comes molded in green plastic with 2 decal options. The box bottom shows the color schemes and decals for a 15th Panzer Division, Western Desert 1942 tank and the other is for a 10th Panzer Division, Western Europe 1942 tank.
The Build:
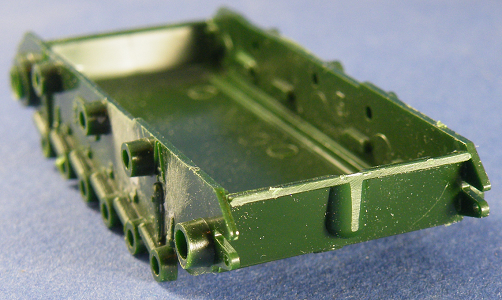
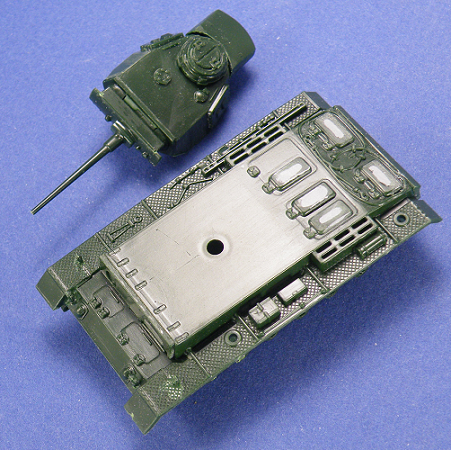
I began by assembling the lower hull parts on Step 1 along with filling and sanding sink marks on parts 2 and 3.
I began by assembling the lower hull parts on Step 1 along with filling and sanding sink marks on parts 2 and 3.
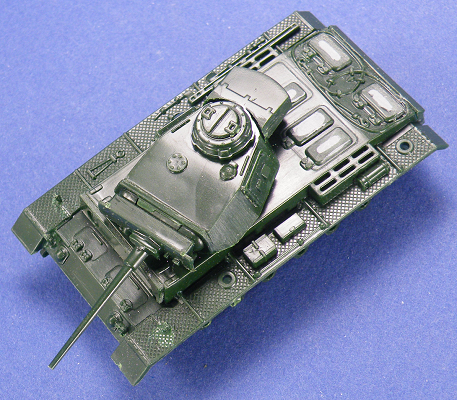
After this I skipped ahead to the turret assembly Step 8 and completed this. I then assembled the upper hull parts on Step 9 and filled and sanded sink marks in the air intake covers.
|
|
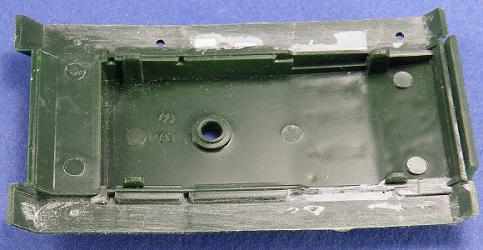
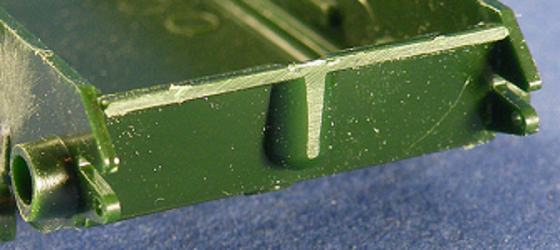
Under the fenders are openings from the molding process and I filled these in with strip styrene and Tamiya Putty and once dry they were sanded down. You could skip this part as the openings do not really show once the tracks are on.
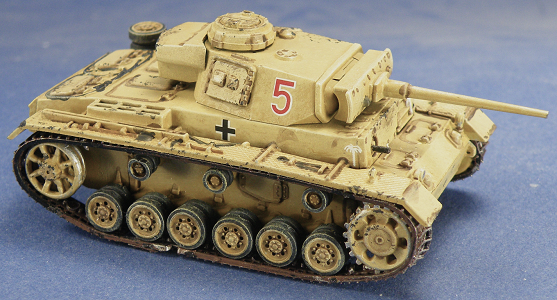
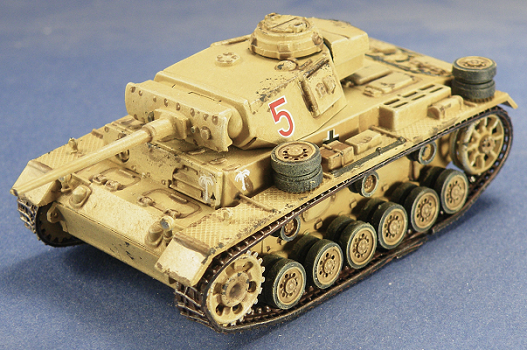
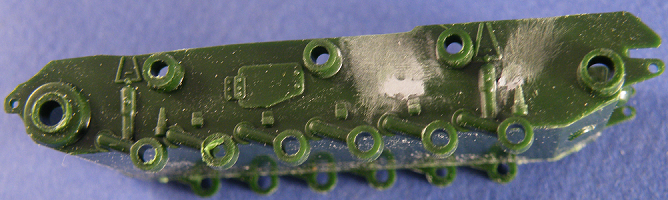
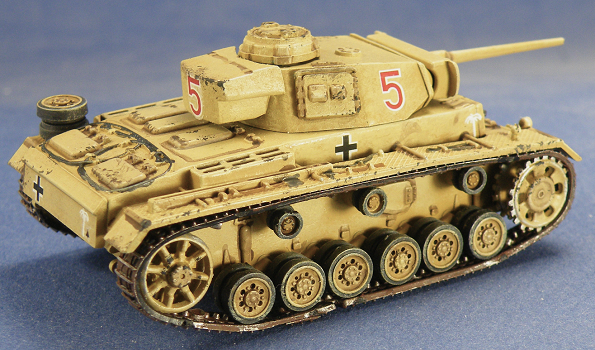
I sprayed the upper hull, lower hull turret and running gear with Tamiya Light Grey Primer. No assembly issues were encountered except for opening up a few flashed over holes for the road wheel mounts. I went on to brush paint the finish coat using Vallejo Model Color Green Ocher 70.914 slightly thinned. The rubber on the road wheels and return rollers were painted Vallejo Model Color German Grey 70.995. The vinyl tracks were given a coat of Mod Podge to give the paint a surface to stick to. The tracks were painted with Ceramcoat Brown Iron Oxide 02023 and dry brushed with Citadel Stormhost Silver to show the wear on the tracks moving through the desert. The headlight lenses were also painted this same silver With the base coats applied to the model I heavily dry brushed the model with Vallejo Model Color Dark Sand 70.847. An edge highlight of Vallejo Model Color Pale Sand 70.837 was applied to all of the sharp edges. After the paint had fully dried I added the road wheels and the return rollers. I glued the return rollers into the hull side too deep which caused the tracks to not line up with them. To correct my mistake I sanded to flange off the finale drive which allowed the rollers to line up with everything. If I built the model again I would add the rollers last and carefully line them up with the road wheels and drive sprocket. Once this was done the metal tools were painted in the German Grey and and the wooden parts painted in Vallejo Flat Brown 70.984 the metal parts were painted in Citadel Runefang Steel. The model was then given a pin wash of thinned Agrax Earthshade and the model was dry brushed again to clean up areas where the wash was had overflowed. Citadel Ardcoat was applied to the areas where the decals were to be added. The decals went on with no problem but it did take about 1-2 minutes for the decals to slide off the backing paper. Of course being a 30 plus year old decal sheet may have been a issue but the decals went on nicely. After drying I applied a coat of Citadel Lahmian Medium to flatten the Ardcoat.
|
|
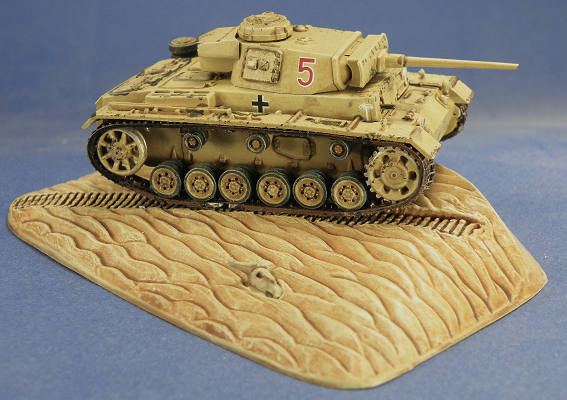
The Base:
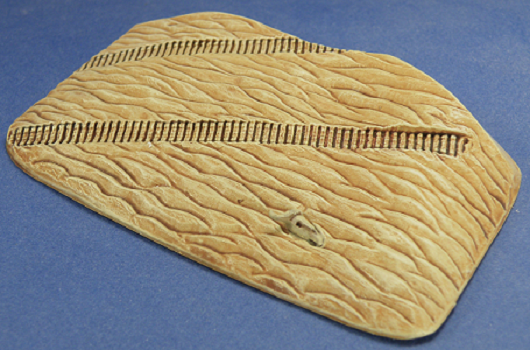
After priming, the base was brush painted with the Vallejo Green Ocher and given a wash of Citadel Seraphim Sepia. The base was then heavily dry brushed with Dark Sand and finally a dry brushing of Pale Sand was given to the base. The skull was painted Vallejo Air White then a coat of the Seraphim Sepia was applied. Next Citadel Karak Stone was added to the raised areas and a dry brush of Citadel Tyrant Skull Dry was applied to all of the edges.
After priming, the base was brush painted with the Vallejo Green Ocher and given a wash of Citadel Seraphim Sepia. The base was then heavily dry brushed with Dark Sand and finally a dry brushing of Pale Sand was given to the base. The skull was painted Vallejo Air White then a coat of the Seraphim Sepia was applied. Next Citadel Karak Stone was added to the raised areas and a dry brush of Citadel Tyrant Skull Dry was applied to all of the edges.
This was an enjoyable build but the kit has some simplified details such as:
1. The shocks are molded to the hull and the mounting detail is only an outline of the mount.
1. The shocks are molded to the hull and the mounting detail is only an outline of the mount.
2. The gun mantlet spaced armor, part 13, lacks 3 rectangular openings on the top strip behind the mantlet face plate. These openings can be replicated with strip styrene to create the framework with the openings.
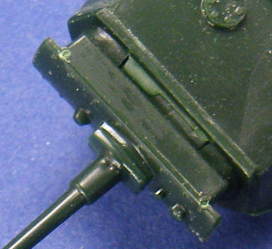
3. The spaced armor on the drivers plate, part 24, needs opened at the top and the ball machine gun mount attached to the plate instead of on the spaced armor itself.

4. The exhaust lacks the curved shield, exhaust boxes and exhaust pipes but instead has a half round hump on the rear plate.
Good reference material will show these issues and they can be corrected. I chose to build the model out of the box to show the model as it will appear when built without any changes.
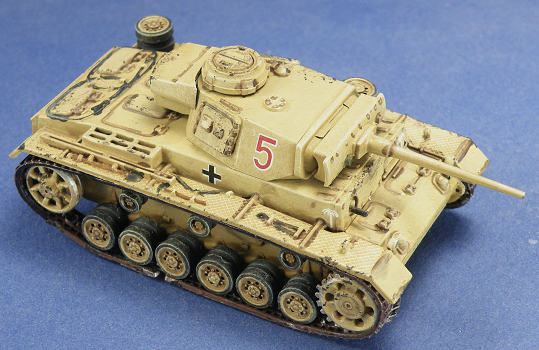
Conclusions:
Is this the best Panzer III kit on the market? Well, no as it has long been superseded by 1/72nd scale kits from Dragon, UM, Revell of Germany, and ESCI. In 1/76th scale there is the Fujimi kit but it too has been long replaced by these newer kits. I have left out the wargame versions as these require far less assembly than the Matchbox kit. If you want a model that is easy to build and looks like a Panzer III and you are willing to do a little scratch building this is a good kit. But even without any corrections it still looks good. So, if you have one in your stash think about building it. I did and it was a lot of fun and allowed me test out my painting skills.
Is this the best Panzer III kit on the market? Well, no as it has long been superseded by 1/72nd scale kits from Dragon, UM, Revell of Germany, and ESCI. In 1/76th scale there is the Fujimi kit but it too has been long replaced by these newer kits. I have left out the wargame versions as these require far less assembly than the Matchbox kit. If you want a model that is easy to build and looks like a Panzer III and you are willing to do a little scratch building this is a good kit. But even without any corrections it still looks good. So, if you have one in your stash think about building it. I did and it was a lot of fun and allowed me test out my painting skills.
Recommended, if you can find one and with the issues stated in this review.
|
|