
In Box Review of Tamiya 1/35th Scale
German 38 cm Assault Mortar “Sturmtiger” RW61
Kit no. 35177-4100
By Ray Mehlberger
MSRP: $54.99
By Ray Mehlberger
MSRP: $54.99
HISTORY:
The German 38cm assault mortar “Sturmtiger” was a very rare variant of the much feared Tiger I heavy tank. It was an assault weapon that mounted a gigantic 38cm caliber mortar on the tank chassis. Development was initiated in August 1943 and was intended for use against heavily fortified areas. The short-barreled L/5.4, type RW61 mortar was originally developed by Rheinmetall-Borsig, for the German Navy’s land-based protection against and enemy submarine attack. In order to withstand the heavy recoil of up to 40 tons, the Tiger I’s sturdy chassis was selected. A decision was made to use only those chassis/hulls that were sent back from the front, so that new production of the tank would not be affected.
A fighting compartment was formed of a box-like superstructure, which was bolted to the lower hull itself. It’s armor plate measured 150mm thick at the front and 80mm on the sides. Later, a steel ring counterweight was added to the mouth of the mortar barrel on some vehicles to make elevation aiming easier. The mortar’s huge self propelled rocket projectile was 149cm long and weighed 330kg. For loading these heavy rockets aboard, a hand cranked crane was mounted to the right aft side of the upper hull. Due to the rocket’s size, storage space was very limited and only 14 shells could be carried. Conversion production of the Sturmtiger began in August 1944, and by the end of December a total of 18 units had been completed and sent to the front for action during the final stages of WWII.
Tamiya is a prolific model company based in Japan. They produce armor, aircraft, car and motorcycle kits, as well as military figures.
THE KIT:
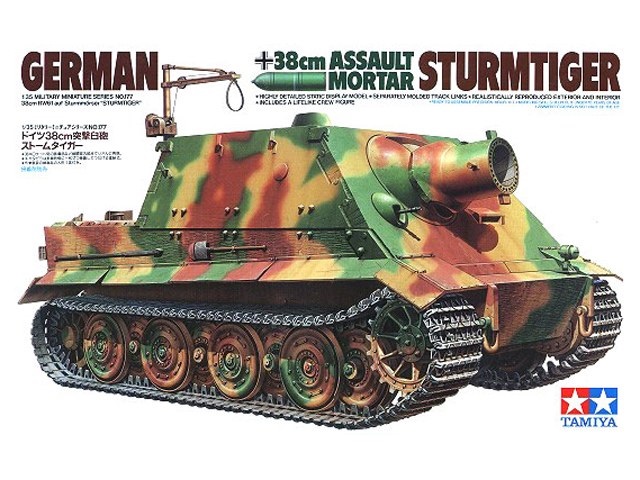
This kit is a re-pop of the Sturmtiger, which was first released by Tamiya in 1994. It comes in a tray and lid type box. The box art is in typical Tamiya style, with the kit subject illustrated against an all white background. A Sturmtiger is shown in a wave pattern of dark green over a earth yellow base. It carries no markings. The box art also announces that the kit has individual tread links, interior details and one crew figure included.
A side panel has a color 3-view illustration of a Sturmtiger in an ambush pattern. Next to this is a paragraph in Japanese, the copyright date 1994 and Tamiya’s address. It is said here also that the kit was molded in the Philippines. The kit is aimed at modelers over 10 years of age that have some modeling skills.
The other side panel has the box art scheme repeated as another color 3-view illustration. Next to this is a color illustration of the crew figure in the kit and what colors to use on him, plus another paragraph in Japanese.
WHAT’S IN THE BOX:
Inside the box are 2 large light tan trees of parts (each in its own stapled shut cello bag), 2 medium sized light tan trees in another stapled cello, 3 black parts trees in yet another stapled cello, a loose light tan hull tub part, the small decal sheet (inside one of the bags with a large tree) and a small cello bag of metal Phillips screws, washers and hex nuts. The instructions complete the kit’s contents.
The instructions consist of a single sheet that accordion-folds out into 10 pages in 6 ¾” x 10 ¼” format, plus a single sheet that is printed on both sides.
Page 1 of the instructions begins with a black and white photo of the model made up in the box art scheme with the single crew figure posed standing beside it. The bottom of the page has the history of the Sturmtiger in English, German, French and Japanese.
Page 2 begins with READ BEFORE ASSEMBLY instructions, illustrations of hobby tools and glue to use and a Tamiya paint listing (in the same 4 languages). The bottom of the page has the first 2 assembly drawings.
In the first step, you opt for whether you are going to attach the fender skirts in the kit. If so, you are directed to remove about 20 square shaped lugs from each side. The illustrated parts are shaded where zimmerit would appear on Sturmtiger (more on this later).
Pages 3 through 10 give a balance of a total of 24 assembly steps. These are followed by an after-market service card in Japanese only.
In step 16, the mortar’s center section is shown to have assembly with the metal phillips screws, washers and hex nuts provided. This will leave the head of the Phillips screw visible when done and those of us with AMS will probably want to cover it with putty or hide it someway…although it may result in being hidden from view when looking through the roof hatches. It will remain to see what results after building it.
The breech of the mortar can be posed open or shut. The engine compartment and roof hatches are separate, but there is no engine or engine compartment detail to be seen.
The only other interior detail consists of a driver’s seat and steering wheel with ammo racks full of ammo behind the seat. A dashboard, control levers etc. would have been nice to have to further detail the interior.
There are no parts trees illustrations in the instructions. However, the trees and the assembly steps are alphabetized and parts are numbered.
The single sheet in the kit has a 4-view on one side in a pattern of red-brown and dark green wave pattern over a earth yellow base. It only has small black national crosses on the sides with white borders. No division or tactical marks are given. The other side of this sheet has painting and decal application instructions in the 4 languages. An illustration of the crew figure, with labels on him as to what color to paint parts of him is provided here also. Instructions are also given here for using Tamiya brand putty and a razor saw to produce zimmerit anti-magnetic paste on the model if desired. Wartime photos of Sturmtigers mostly show them with zimmerit on them.
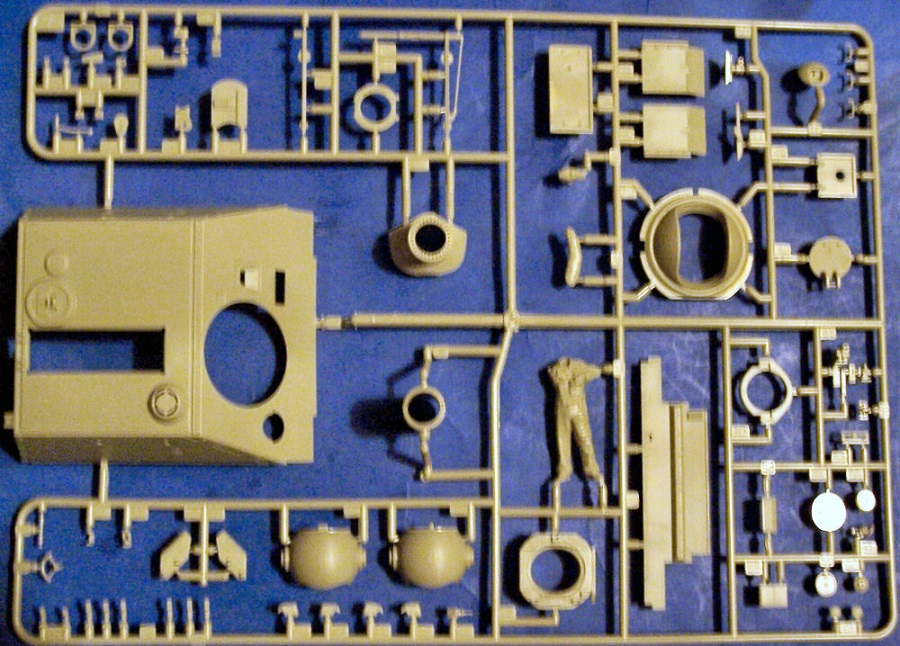
Large light tan letter A parts tree holds: the hull roof, mortar parts, crew figure (divided into separate body, head and right arm (his left arm molded to him), fender ends, a hull plate, shell hoist parts etc. (68 parts).
The German 38cm assault mortar “Sturmtiger” was a very rare variant of the much feared Tiger I heavy tank. It was an assault weapon that mounted a gigantic 38cm caliber mortar on the tank chassis. Development was initiated in August 1943 and was intended for use against heavily fortified areas. The short-barreled L/5.4, type RW61 mortar was originally developed by Rheinmetall-Borsig, for the German Navy’s land-based protection against and enemy submarine attack. In order to withstand the heavy recoil of up to 40 tons, the Tiger I’s sturdy chassis was selected. A decision was made to use only those chassis/hulls that were sent back from the front, so that new production of the tank would not be affected.
A fighting compartment was formed of a box-like superstructure, which was bolted to the lower hull itself. It’s armor plate measured 150mm thick at the front and 80mm on the sides. Later, a steel ring counterweight was added to the mouth of the mortar barrel on some vehicles to make elevation aiming easier. The mortar’s huge self propelled rocket projectile was 149cm long and weighed 330kg. For loading these heavy rockets aboard, a hand cranked crane was mounted to the right aft side of the upper hull. Due to the rocket’s size, storage space was very limited and only 14 shells could be carried. Conversion production of the Sturmtiger began in August 1944, and by the end of December a total of 18 units had been completed and sent to the front for action during the final stages of WWII.
Tamiya is a prolific model company based in Japan. They produce armor, aircraft, car and motorcycle kits, as well as military figures.
THE KIT:
This kit is a re-pop of the Sturmtiger, which was first released by Tamiya in 1994. It comes in a tray and lid type box. The box art is in typical Tamiya style, with the kit subject illustrated against an all white background. A Sturmtiger is shown in a wave pattern of dark green over a earth yellow base. It carries no markings. The box art also announces that the kit has individual tread links, interior details and one crew figure included.
A side panel has a color 3-view illustration of a Sturmtiger in an ambush pattern. Next to this is a paragraph in Japanese, the copyright date 1994 and Tamiya’s address. It is said here also that the kit was molded in the Philippines. The kit is aimed at modelers over 10 years of age that have some modeling skills.
The other side panel has the box art scheme repeated as another color 3-view illustration. Next to this is a color illustration of the crew figure in the kit and what colors to use on him, plus another paragraph in Japanese.
WHAT’S IN THE BOX:
Inside the box are 2 large light tan trees of parts (each in its own stapled shut cello bag), 2 medium sized light tan trees in another stapled cello, 3 black parts trees in yet another stapled cello, a loose light tan hull tub part, the small decal sheet (inside one of the bags with a large tree) and a small cello bag of metal Phillips screws, washers and hex nuts. The instructions complete the kit’s contents.
The instructions consist of a single sheet that accordion-folds out into 10 pages in 6 ¾” x 10 ¼” format, plus a single sheet that is printed on both sides.
Page 1 of the instructions begins with a black and white photo of the model made up in the box art scheme with the single crew figure posed standing beside it. The bottom of the page has the history of the Sturmtiger in English, German, French and Japanese.
Page 2 begins with READ BEFORE ASSEMBLY instructions, illustrations of hobby tools and glue to use and a Tamiya paint listing (in the same 4 languages). The bottom of the page has the first 2 assembly drawings.
In the first step, you opt for whether you are going to attach the fender skirts in the kit. If so, you are directed to remove about 20 square shaped lugs from each side. The illustrated parts are shaded where zimmerit would appear on Sturmtiger (more on this later).
Pages 3 through 10 give a balance of a total of 24 assembly steps. These are followed by an after-market service card in Japanese only.
In step 16, the mortar’s center section is shown to have assembly with the metal phillips screws, washers and hex nuts provided. This will leave the head of the Phillips screw visible when done and those of us with AMS will probably want to cover it with putty or hide it someway…although it may result in being hidden from view when looking through the roof hatches. It will remain to see what results after building it.
The breech of the mortar can be posed open or shut. The engine compartment and roof hatches are separate, but there is no engine or engine compartment detail to be seen.
The only other interior detail consists of a driver’s seat and steering wheel with ammo racks full of ammo behind the seat. A dashboard, control levers etc. would have been nice to have to further detail the interior.
There are no parts trees illustrations in the instructions. However, the trees and the assembly steps are alphabetized and parts are numbered.
The single sheet in the kit has a 4-view on one side in a pattern of red-brown and dark green wave pattern over a earth yellow base. It only has small black national crosses on the sides with white borders. No division or tactical marks are given. The other side of this sheet has painting and decal application instructions in the 4 languages. An illustration of the crew figure, with labels on him as to what color to paint parts of him is provided here also. Instructions are also given here for using Tamiya brand putty and a razor saw to produce zimmerit anti-magnetic paste on the model if desired. Wartime photos of Sturmtigers mostly show them with zimmerit on them.
Large light tan letter A parts tree holds: the hull roof, mortar parts, crew figure (divided into separate body, head and right arm (his left arm molded to him), fender ends, a hull plate, shell hoist parts etc. (68 parts).
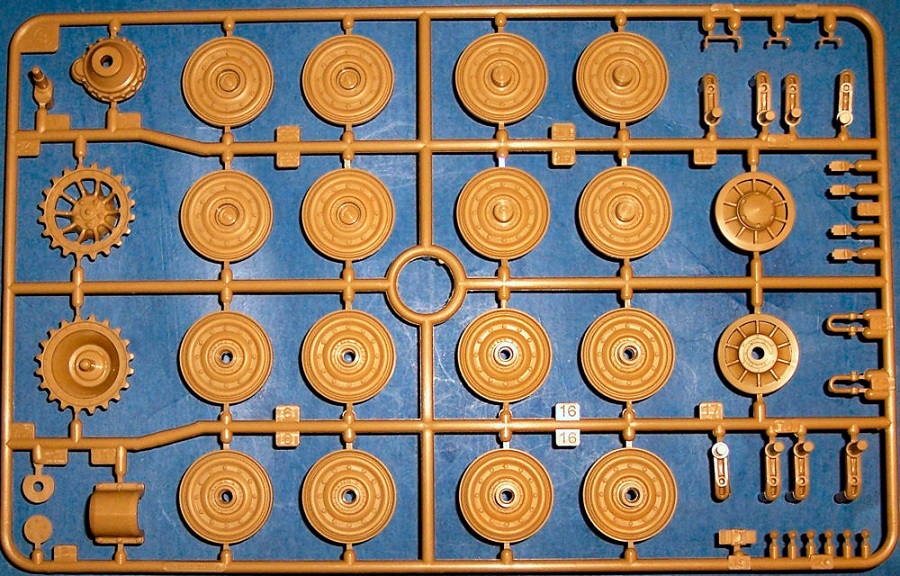
There are 2 identical medium sized light tan letter B parts trees. They hold: suspension arms, final transfer covers, drive sprockets, idler and road wheels, return rollers, grab handles, tow rings etc. (49 parts per tree).
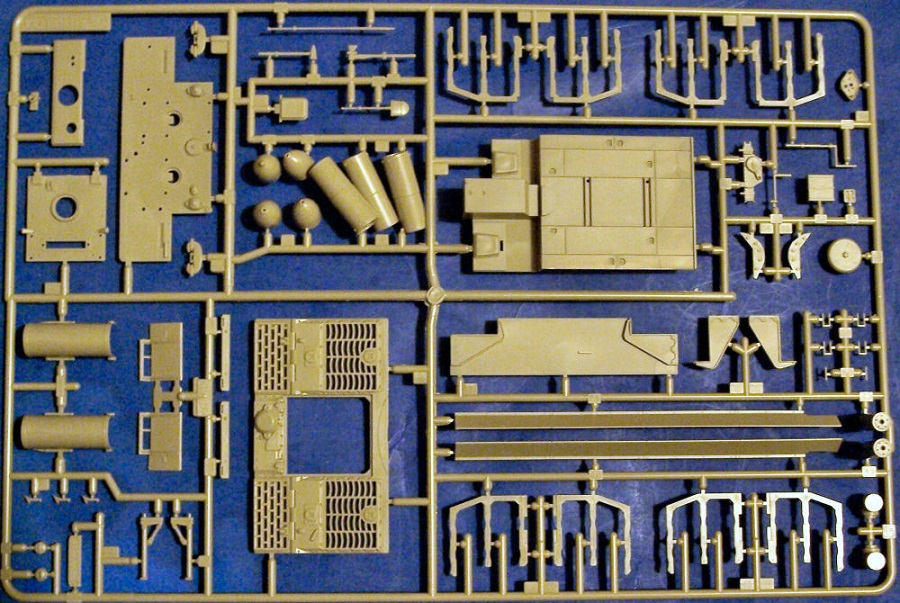
Large light tan letter C tree holds: mortar rounds, interior mortar round racks, engine compartment grill plate, side skirts (optional), fighting compartment floor and detail parts, tools etc. (59 parts).
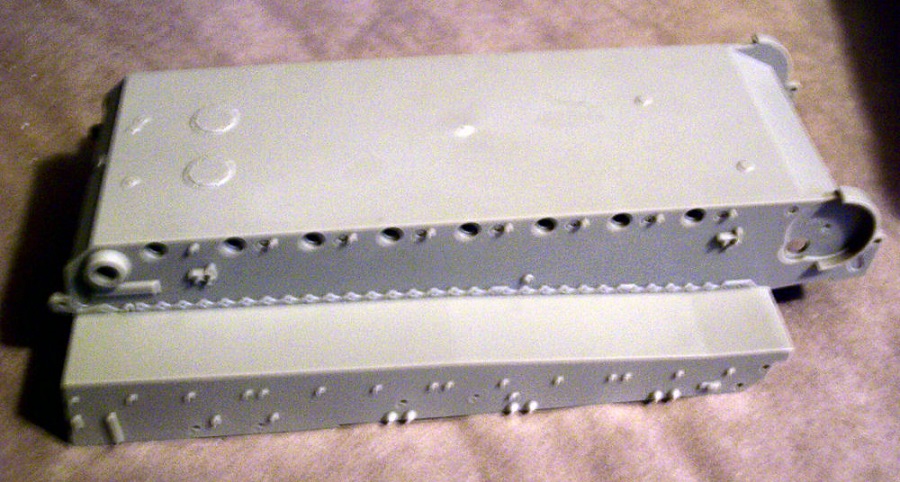
The single hull tub part is the last of the light tan parts. It is not alphabetized or numbered, as it is obvious what it is.
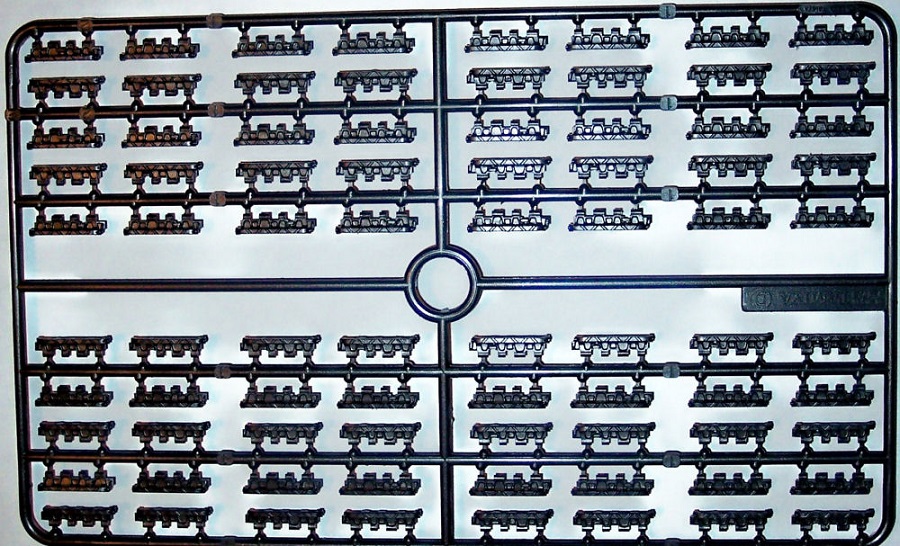
The three identical black letter D parts trees hold the individual track links (80 links per tree).
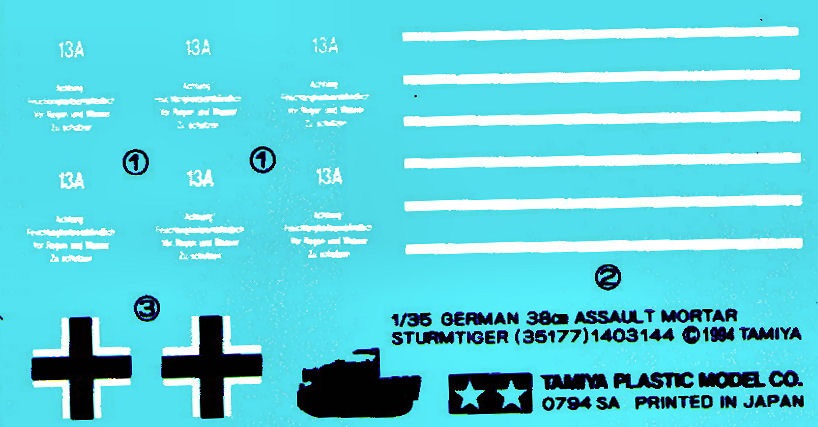
The small decal sheet has small generic German national crosses and white stenciling to go onto the mortar rounds and some white stripes to use as kill rings around the mortar barrel.
The Phillips screws, washers and hex nuts complete the kit’s contents.
As mentioned already, Tamiya released this kit at first back in 1994. It was kit no. 35177 at that time. Italeri did a Sturmtiger in 1/35th scale in 1997 as kit no. 299. Their kit had rather soft detail here and there and visible mold ejector marks on some parts. AFV Club has the newest 1/35th scale kit of a Sturmtiger, as kit no. AF35103 and it is said to have the sharpest detail of the 3.
This is one neat, big honking variant of the famous Tiger tank. Highly recommended to modelers of average skills.
I bought my kit at Hobby Lobby with a 40% off coupon.
