
Build Review of Maquette 1/35th Scale
OT-34 Soviet Close Support Flamethrower Tank
Red Army Collection
Kit no. MQ 3521
By Ray Mehlberger
MSRP: $15.98
By Ray Mehlberger
MSRP: $15.98
HISTORY:
The OT-34 was a flamethrower adaptation of the T-34/76 tank. The 'O' in OT-34 stands for Ognemetnyj (flamethrower). Externally the OT-34 appeared like any other T-34/76 except for the bow machine gun. The 76mm main gun and coaxial machine gun were still fully funtional.
The ATO-41 flamethower was mounted through the machine gun port and its fuel cell had enough capacity for 10 shots. In combat, the ATO-41 had a range of 60-100 meters. In other words, you needed the armor of the T-34 to get close enough to the Germans to employ the flamethrower.
While the Soviets experimented with flamethrower tanks based on the T-34 as early as January 1941, the OT-34 didn't enter production until mid 1942. The ATO-41 flamethrower was soon replaced with the improved ATO-42, and these were not only installed in the hulls of the T-34/76, they were also employed in place of the coaxial machine gun in the turrets of the KV-8.
THE KIT:
Maquette is a model company based in Russia
This kit came in a shrink wrapped tray and lid type box.
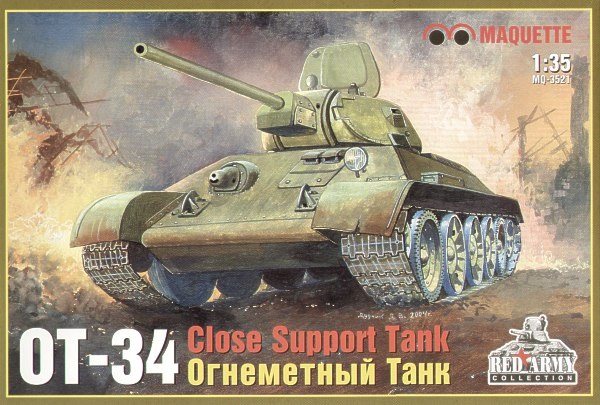
The box art shows a OT-34 moving past destroyed buildings, one of which is burning. It is overall dark green with no markings.
One side panel of the box shows a small color repeat of the box art, followed by the statement that the kit is for experienced modeler only. Resin parts are included, decals and assembly instructions. Paint and cement not included.
The other side panel shows the smaller color repeat of the box art again, followed by a color side profile of it.
WHAT’S IN THE BOX:
The Maquette kit is molded in several different colors of styrene. The sprues are Technicolor and remind me of the way Matchbox molded their kits in multiple colors tool. It is clear that this kit is a combination of new parts and parts from several previous releases. As a result, the kit offers some interesting features.
The kit contains 5 dark green parts trees, 4 blue grey ones, 2 plastic white ones and 4 white resin parts. The tiny decal sheet, a length of white braded string, a section of plastic screen and the instructions complete the kits contents,.
The instructions consist of a single sheet that is folded in the center to create 4 pages in 9 ½” x 12 ½” page format.
Page 1 begins with the history of the OT-34 in Russian and English, followed by international assembly symbol explanations and 2 side profiles for painting and marking.
The first profile is of a OT-34 used by the Red Army in 1942. No division is mentioned. It is in overall khaki green color 4BO (the nearest match to this is Federal Standard color FS-14151. It has 5 all-steel road wheels on each side and no markings. It carries 2 jerry cans on the fenders.
The second profile is of a OT-34 used by the Red Army in 1943, in the same overall khaki green color 4BO. It has a white number 4 on the turret sides. It has 3 all-steel road wheels on the center axles and a rubber-tired road wheel on either side of those. Again, no division is mentioned. A spare rubber-tired road wheel is on each side of the hull above the fenders and an external fuel drum is mounted at the rear above the fenders.
Page 2 begins with the parts trees illustrations. Some parts are “Xd” out, meaning they are excess and not needed to complete the model. Below these is the first 2 assembly steps. In step 2 you opt for which arrangement of the road wheels you care to do.
Page 3 & 4 give a grand total of 17 assembly steps. In step 8 you opt for open or closed cooling flaps in the engine air intake.
There is no interior detail inside the hull or the turret, so I am going to glue the separate turret roof hatch door shut.
Large dark green letter A parts tree holds: the hull tub, roof and sides (4 parts)
The OT-34 was a flamethrower adaptation of the T-34/76 tank. The 'O' in OT-34 stands for Ognemetnyj (flamethrower). Externally the OT-34 appeared like any other T-34/76 except for the bow machine gun. The 76mm main gun and coaxial machine gun were still fully funtional.
The ATO-41 flamethower was mounted through the machine gun port and its fuel cell had enough capacity for 10 shots. In combat, the ATO-41 had a range of 60-100 meters. In other words, you needed the armor of the T-34 to get close enough to the Germans to employ the flamethrower.
While the Soviets experimented with flamethrower tanks based on the T-34 as early as January 1941, the OT-34 didn't enter production until mid 1942. The ATO-41 flamethrower was soon replaced with the improved ATO-42, and these were not only installed in the hulls of the T-34/76, they were also employed in place of the coaxial machine gun in the turrets of the KV-8.
THE KIT:
Maquette is a model company based in Russia
This kit came in a shrink wrapped tray and lid type box.
The box art shows a OT-34 moving past destroyed buildings, one of which is burning. It is overall dark green with no markings.
One side panel of the box shows a small color repeat of the box art, followed by the statement that the kit is for experienced modeler only. Resin parts are included, decals and assembly instructions. Paint and cement not included.
The other side panel shows the smaller color repeat of the box art again, followed by a color side profile of it.
WHAT’S IN THE BOX:
The Maquette kit is molded in several different colors of styrene. The sprues are Technicolor and remind me of the way Matchbox molded their kits in multiple colors tool. It is clear that this kit is a combination of new parts and parts from several previous releases. As a result, the kit offers some interesting features.
The kit contains 5 dark green parts trees, 4 blue grey ones, 2 plastic white ones and 4 white resin parts. The tiny decal sheet, a length of white braded string, a section of plastic screen and the instructions complete the kits contents,.
The instructions consist of a single sheet that is folded in the center to create 4 pages in 9 ½” x 12 ½” page format.
Page 1 begins with the history of the OT-34 in Russian and English, followed by international assembly symbol explanations and 2 side profiles for painting and marking.
The first profile is of a OT-34 used by the Red Army in 1942. No division is mentioned. It is in overall khaki green color 4BO (the nearest match to this is Federal Standard color FS-14151. It has 5 all-steel road wheels on each side and no markings. It carries 2 jerry cans on the fenders.
The second profile is of a OT-34 used by the Red Army in 1943, in the same overall khaki green color 4BO. It has a white number 4 on the turret sides. It has 3 all-steel road wheels on the center axles and a rubber-tired road wheel on either side of those. Again, no division is mentioned. A spare rubber-tired road wheel is on each side of the hull above the fenders and an external fuel drum is mounted at the rear above the fenders.
Page 2 begins with the parts trees illustrations. Some parts are “Xd” out, meaning they are excess and not needed to complete the model. Below these is the first 2 assembly steps. In step 2 you opt for which arrangement of the road wheels you care to do.
Page 3 & 4 give a grand total of 17 assembly steps. In step 8 you opt for open or closed cooling flaps in the engine air intake.
There is no interior detail inside the hull or the turret, so I am going to glue the separate turret roof hatch door shut.
Large dark green letter A parts tree holds: the hull tub, roof and sides (4 parts)

There are 2 identical medium sized blue grey letter B part trees. They each hold: drive sprockets, idler wheels, suspension arms, hub caps etc. (50 parts per tree) 26 parts are Xd out on the parts trees illlustrations as being excess.
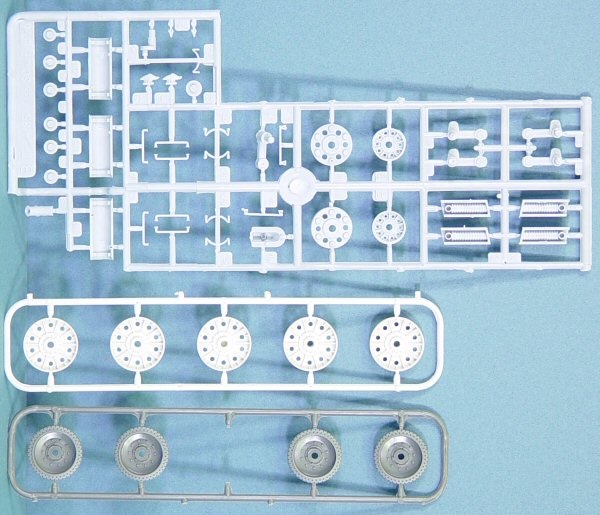
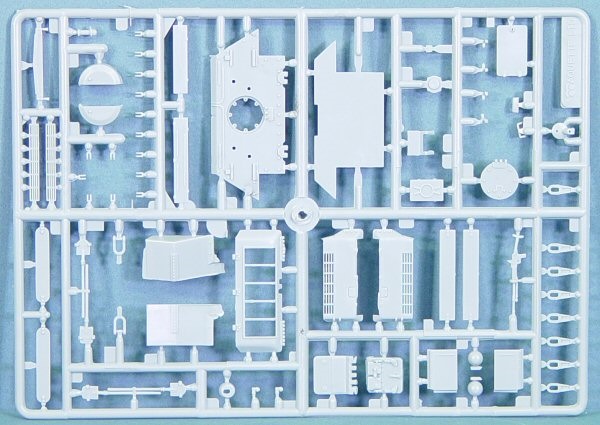
Large blue grey letter C parts tree holds: the rear hull wall, an interior bulkhead wall, shovels, hatch doors, engine air intake housings etc. (64 parts) 6 are excess.
Small dark green letter D parts tree holds: the main gun barrel, mantle and muzzle etc. (6 parts)
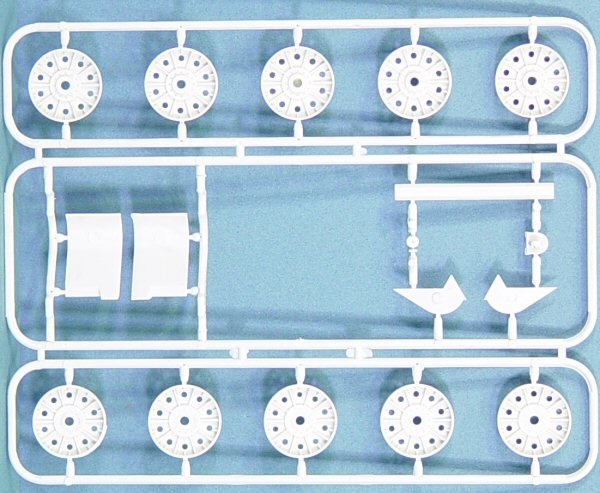
There are 2 identical chalk white letter E parts trees. They each hold: fender front sections and all-steel road wheels etc. (23 parts each) I am not sure if these parts are plastic or resin.
There is no letter F parts tree.
There is no letter F parts tree.
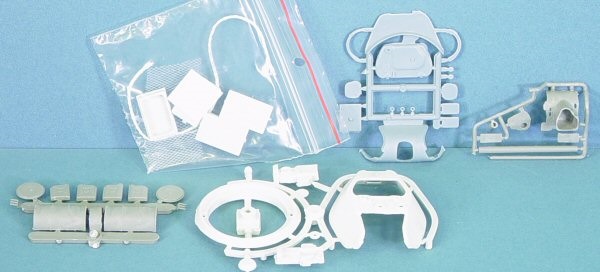
Small chalk white letter G parts tree I am pretty sure is resin. It holds: the turret top and rotation ring, main gun breech halves and front part (7 parts). Small blue grey letter H parts tree holds: the turret bottom, top hatch door, vision ports, lift rings etc. (13 parts)
There is no letters I or J parts trees.
There is no letters I or J parts trees.
Small dark green letter L parts tree holds: an external fuel drum’s halves and it’s top and bottom part, jerry can halves (no handles or spout provided for these, even though the assembly step drawings shows these as being on this tree, they ARE NOT there) (8 parts)
There are four loose white wood crates. I believe these may be resin. The length of braded white string and the section of plastic screen and the tiny decal complete the kit’s contents.
The string is to use for making tow cables by gluing end loop parts C80 on the ends of it. The screen is to go inside the largest engine air intake. The tiny decal just has white number 4’s on it.
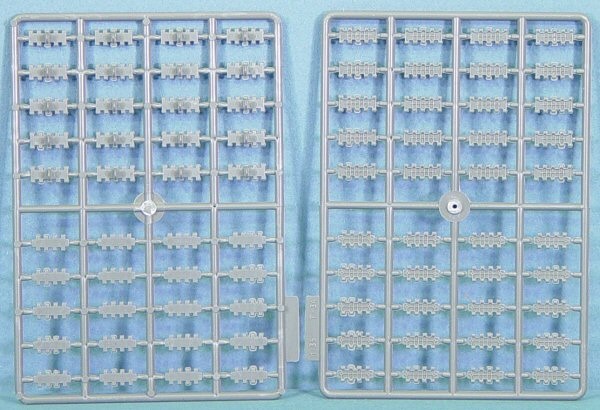
There are 4 identical medium sized dark green letter K parts trees. They hold the individual track links. (40 parts per tree)
I have started to build this kit.
In step 1, you are to remove 7 mm off the bow of the hull roof part. I made a mistake and took too much off and then had to putty up the gap…sigh.
In step 2 I assembled some of the two types of road wheels…the all-steel ones and the rubber tired ones.
In steps 3 & 4, hub caps (parts B10) were added to the road wheels. E tree part numbers where shown in the assembly steps for the road wheel halves, but those parts are actually on the B parts tree. A typo in the instructions to beware of.
In step 5, the hull tub, sides, suspension spring housings to the inner walls, suspension arms, drive sprockets and idler wheels were added. The suspension arms had quite a bit of flash on the ends of them to remove and their were push out pins on the face of the side parts to remove.
In step 6, you are directed to install the inner bulkhead wall. This part is very ill-fitting and not really necessary. So, I did not install it. There is no interior details inside to see anyway.
In step 7, I assembled the main gun and it’s breech. The breech parts (G2 & G3) are resin for sure and need to be cemented with super glue. The resin repels any plastic cement.
In step 8 you are to opt to assemble the large engine air intake flaps either opened or closed (C57) I will pose mine open. The engine hatch door, rear hull wall with it’s circular door, the exhaust pipes and their shield parts were added. I also attached the tool box to the fender and the radio aerial base to the fender too.
In step 9, I added the two smaller side engine air intakes and the rear fender flaps. Cable ends were added to the string here too.
I jumped ahead to step 11 and assembled the bow hatch door. The 2 periscopes on it can be posed up or down.
I then glued the hull roof to the bottom tub next. It was a poor fit.
The suspension arms on the lower hull can be positioned . There are slots in the hull sides for the suspension arms to articulate against what would be heavy springs inside the hull. In fact, the spring housings inside the hull are also provided.
While we're on the interior, the kit includes a bulkhead that divides the crew compartment from the engine compartment. In addition, the main gun features nice breech detailing, so it will be visible through open hatches in the turret. Aside from these points, there is no interior provided, but it wouldn't be hard for the super-detailer to have fun here.
The engine deck is also nicely done. The and as already mentioned the cooling louvers are positionable.
You have a choice of solid steel road wheels or the rubber wheeled type. In fact, one of the profiles shows a mix of these wheels on one tank, reflecting how maintenance was done in the field, use what you've got !!
The kit features individual track links which are nicely cast. If you have one of those nice track link jigs, assembly here will be a snap. Unlike rubber band track, the nice thing about individual track links is that they can be posed with sag or wrapping around some obstacle shape that the tank is passing over. This gives the completed model a more dynamic look with very little effort.
This is a nice kit, especially for the price! This is also an interesting subject as this is one vehicle that has not been previously offered in this scale to my recollection.
Highly recommended. I purchased my kit at my local shop.
