
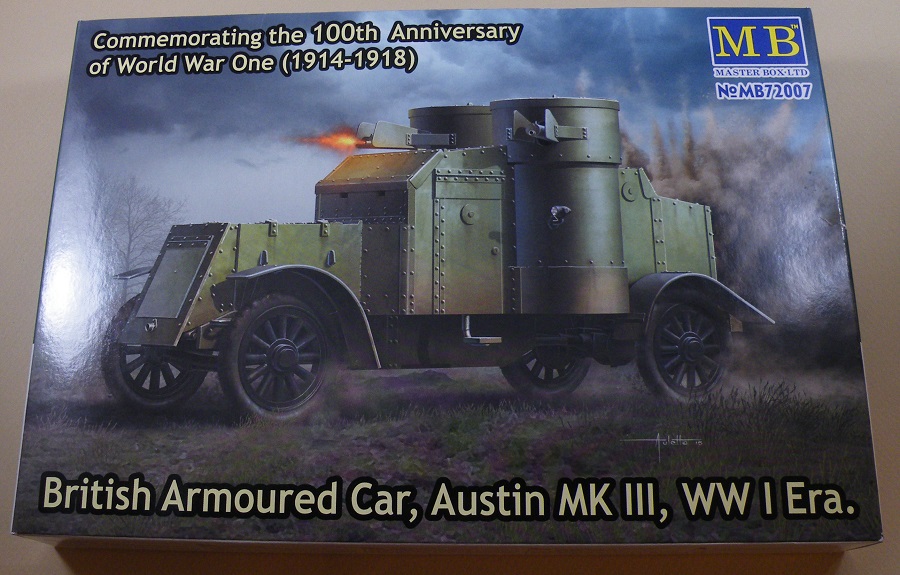
MasterBox 1/72nd Scale W.W. I Austin Mk. III Armored Car Build Review
John Kelley
Kit #72007
Price $27.95
Kit #72007
Price $27.95
History
The Austin Mk. III armored car served in W.W. I in the British Army as a reconnaissance vehicle. It was also used by the Red and White armies and their allies during the Russian Civil War of 1918 – 1922.
The Austin Mk. III armored car served in W.W. I in the British Army as a reconnaissance vehicle. It was also used by the Red and White armies and their allies during the Russian Civil War of 1918 – 1922.
The kit
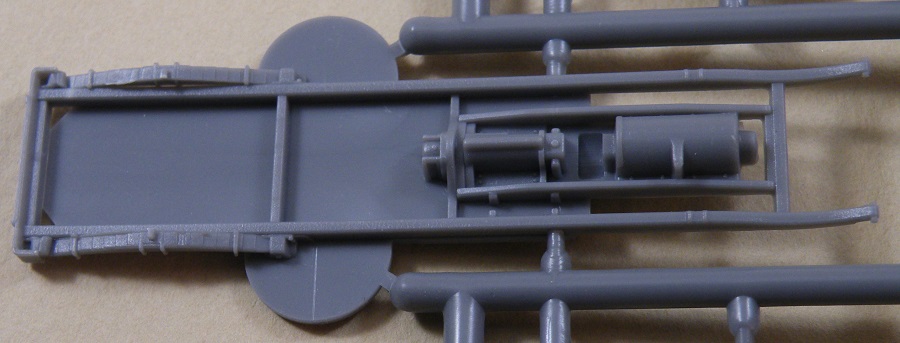
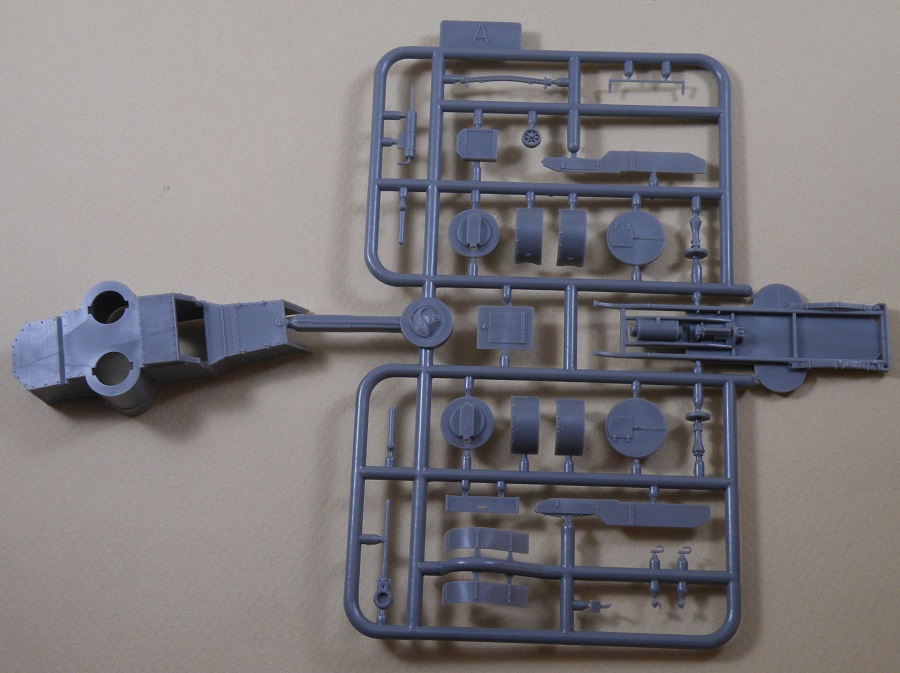
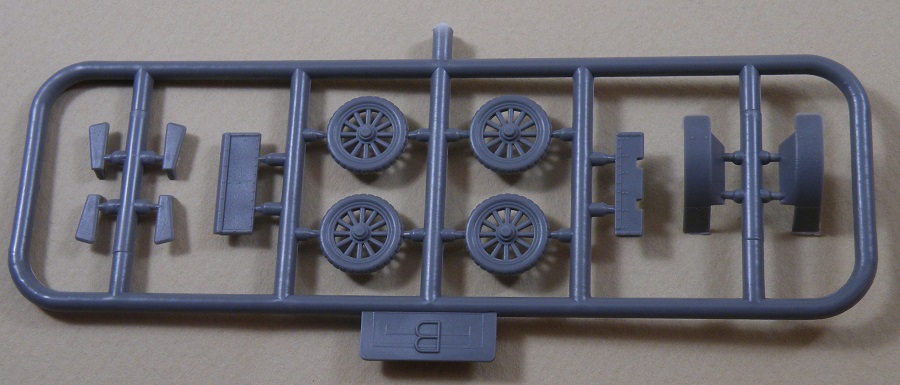
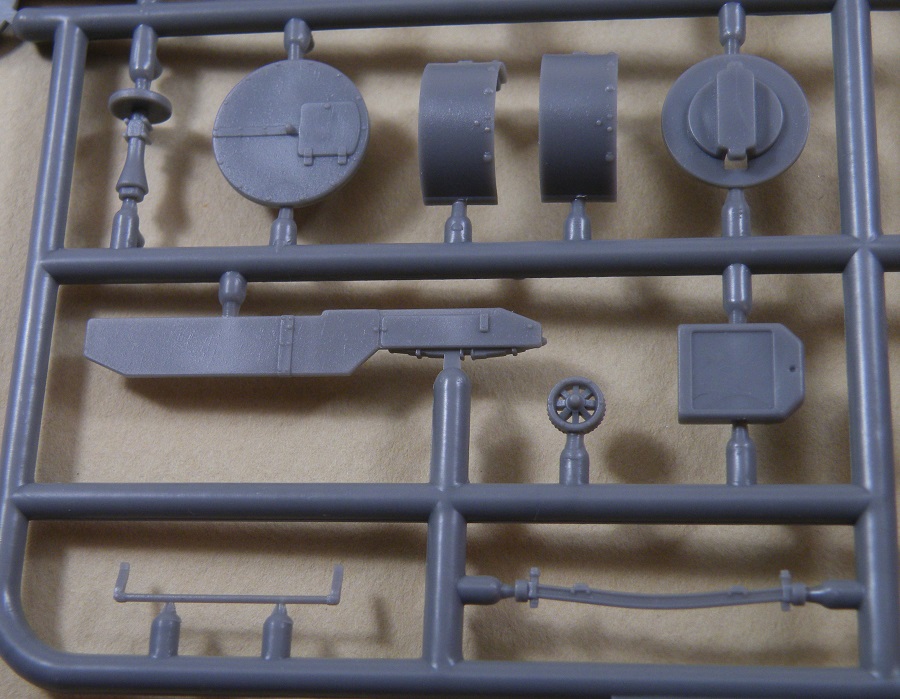
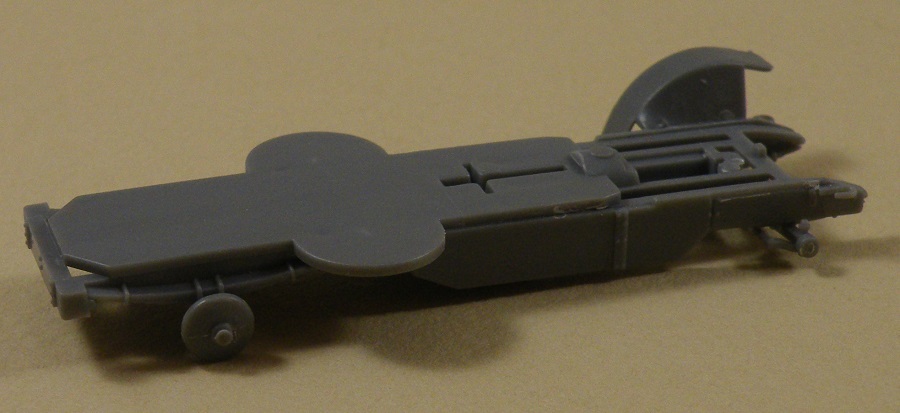
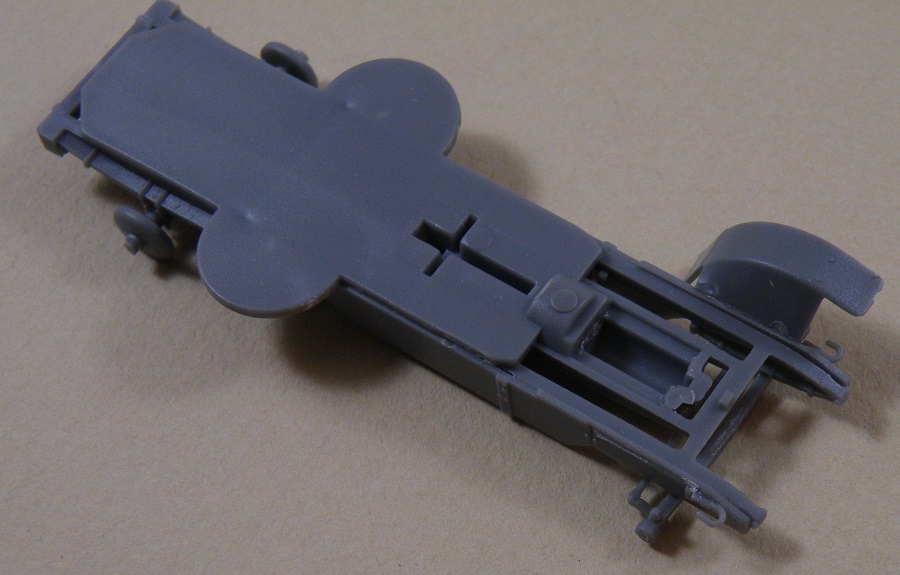
MasterBox has released the Austin Mk. III which is probably one of the more important vehicles of the First World War as well as the post war era. The kit is of the same quality as their Mk. I and II tanks and consists of 43 flash free parts molded in a Medium Grey polystyrene on two trees. All hatches are molded shut on the model and there is no interior but the detail is very well done. The engine and transmission are molded into the chassis.
MasterBox has released the Austin Mk. III which is probably one of the more important vehicles of the First World War as well as the post war era. The kit is of the same quality as their Mk. I and II tanks and consists of 43 flash free parts molded in a Medium Grey polystyrene on two trees. All hatches are molded shut on the model and there is no interior but the detail is very well done. The engine and transmission are molded into the chassis.
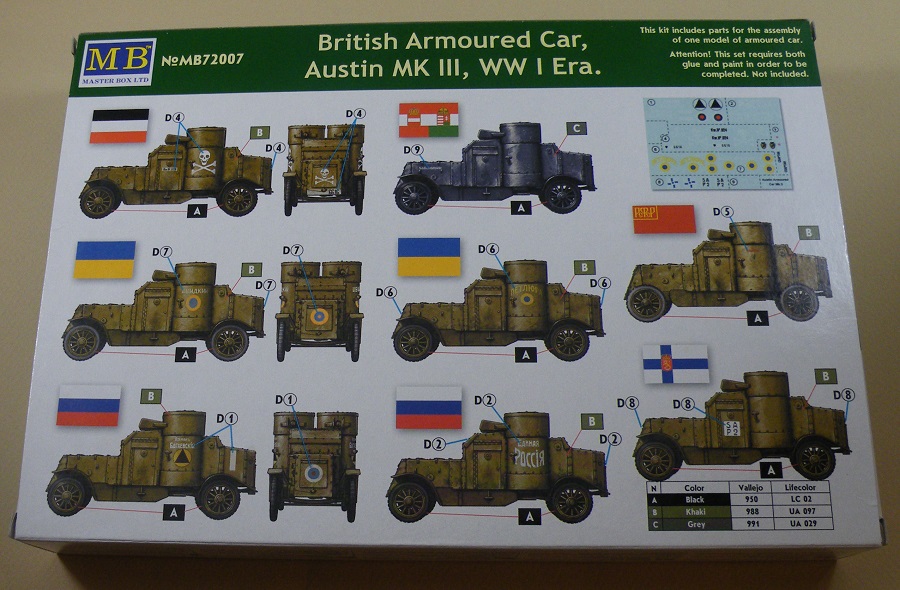
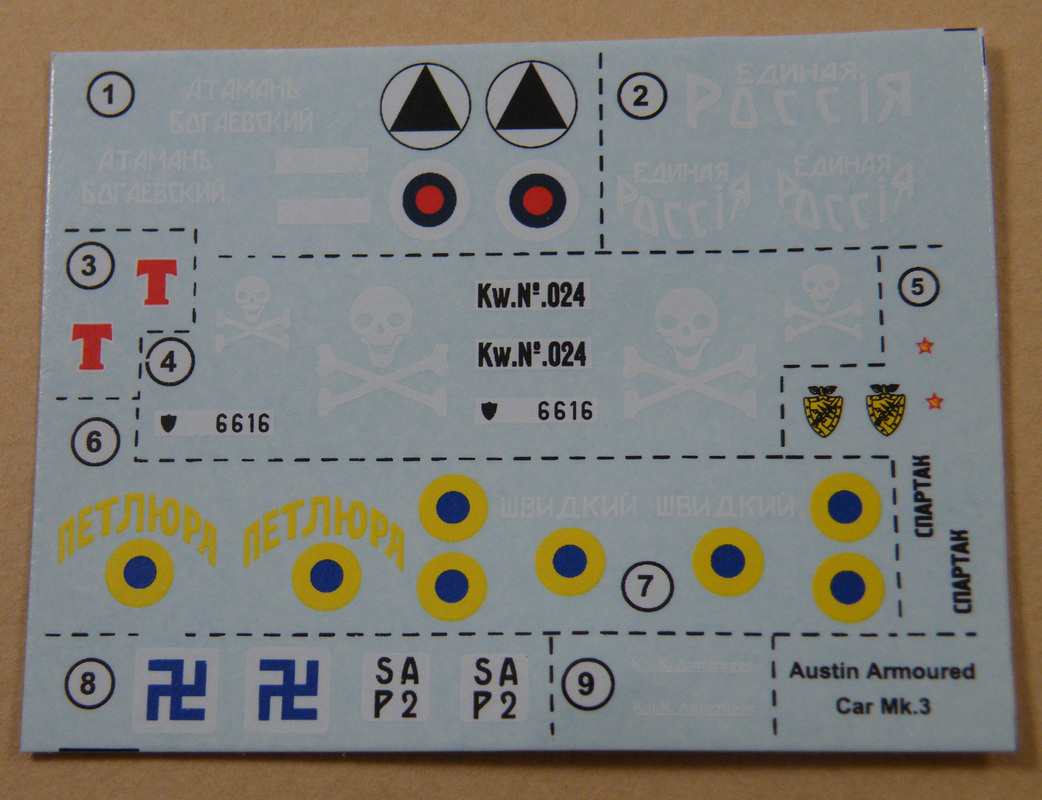
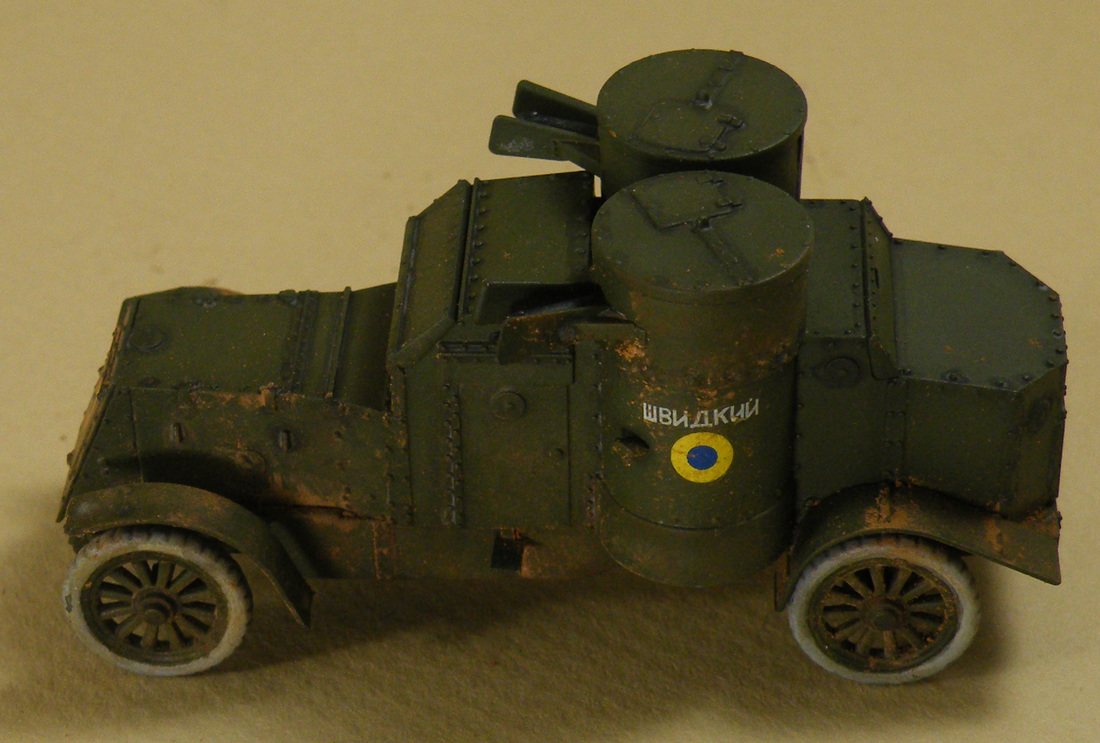
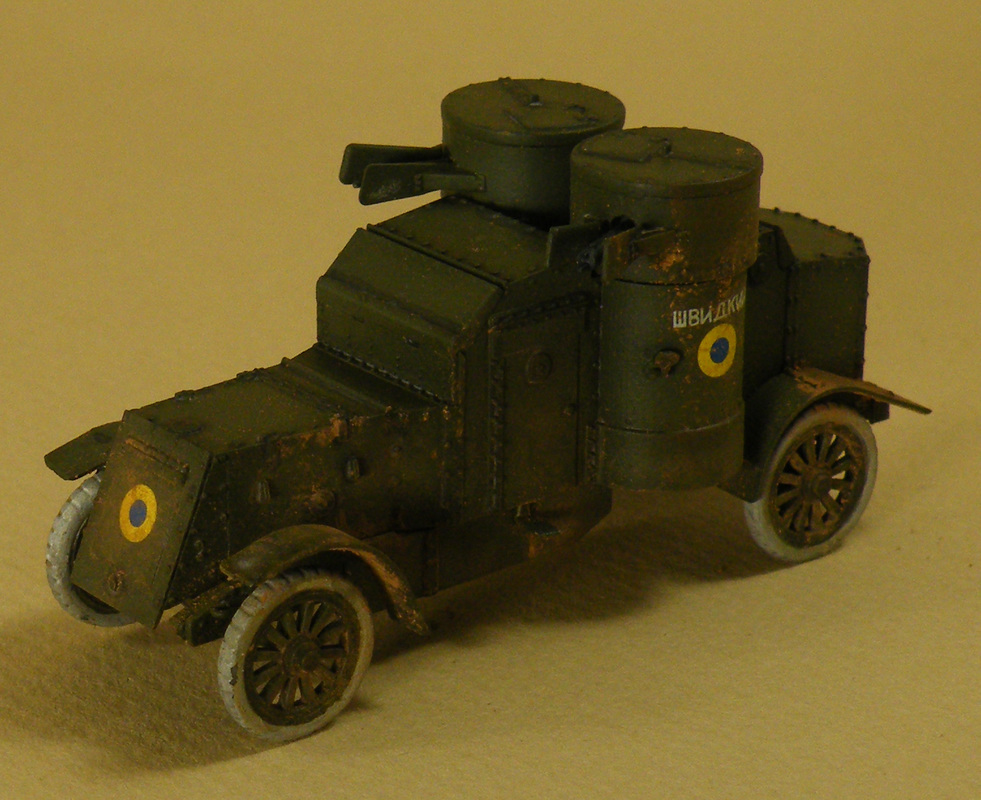
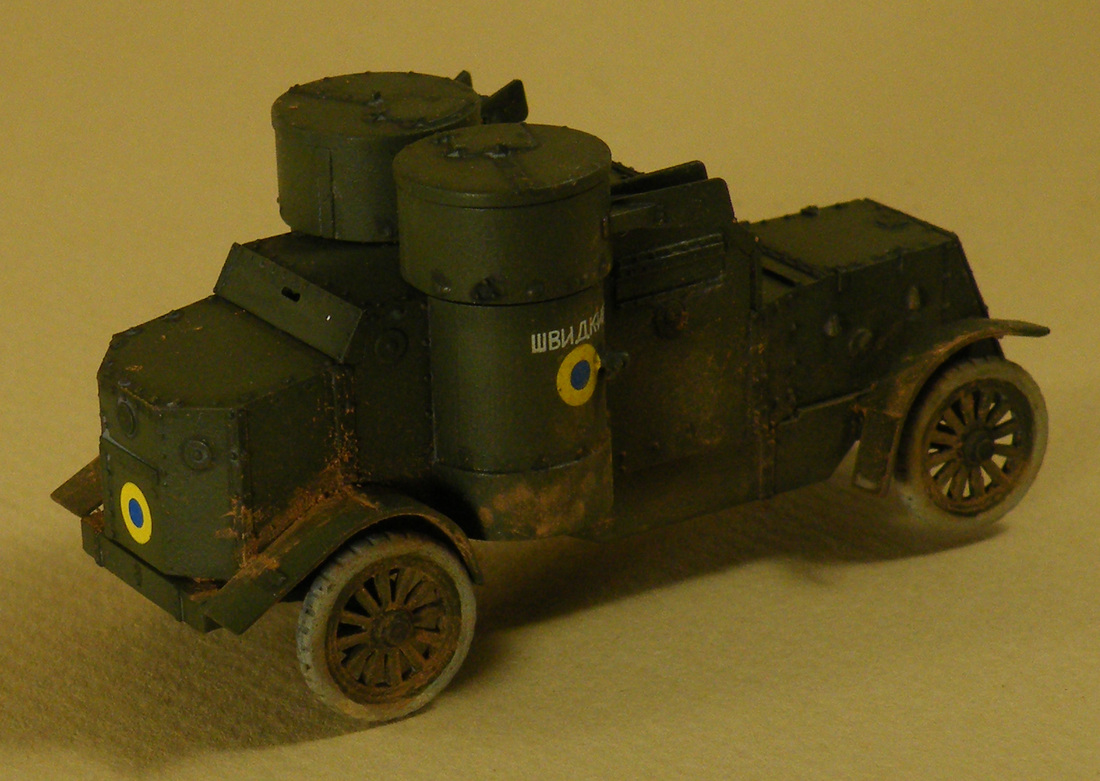
Eight different sets of markings are provided on the decal sheet with the decal and color schemes on the back of the box. Two White Russian cars with one being a Don Cossack Army car during the Russian Civil War, two Ukrainian cars during the Russian Civil War, one German, one Finnish, one Austro-Hungarian, and a Russian Federative Socialist Republic car. The Don Cossack Army vehicle includes a marking that consist of a black triangle on a white circular background with a thin black line around the circle. All of the information I have found on these markings, including the kit box art, indicates that the background should be yellow. It is possible MasterBox have found information that contradicts yellow as being the background color but until I can find definitive information about it I will use a marking with the yellow background. For that reason I modeled one of the Ukrainian cars.
The instructions have 15 assembly steps which are well drawn but some of the locations for the parts are a bit vague. Fortunately MasterBox have included five line drawings for the right, left, front, rear and top view. There are also 3 additional drawings that are ¾ front and rear views of the chassis. The kit went together quite easily but I did have a little trouble locating some of the parts locations on the sheet but referencing the drawings helped a great deal. Some of the issues I have to admit were my own doing and not a kit issue.
Construction
Step 1
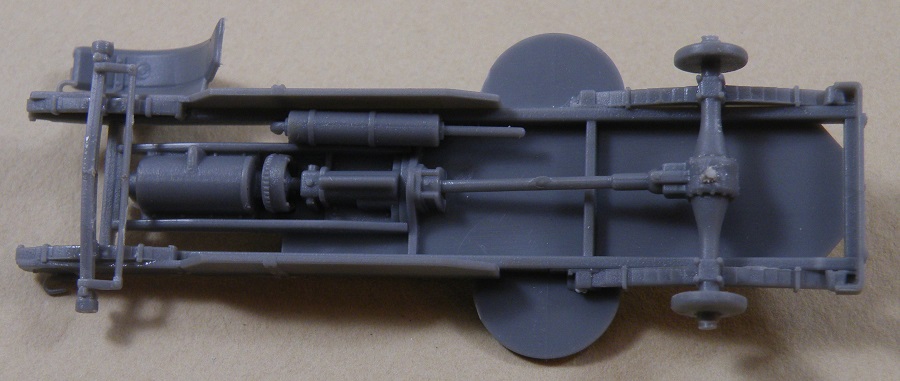
Part A21, the flywheel, is located between the engine and transmission while the exhaust is located in a slot between the transmission and the frame.
Step 1
Part A21, the flywheel, is located between the engine and transmission while the exhaust is located in a slot between the transmission and the frame.
Step 2
The frame sides A10 and A22 lack location pins and are added to the frame with the front of the sides in line with the ends of the curved frame. Referencing the line drawings is very helpful in setting them to the correct position. I recommend using a slow setting cement to be sure you have plenty of time for alignment.
The frame sides A10 and A22 lack location pins and are added to the frame with the front of the sides in line with the ends of the curved frame. Referencing the line drawings is very helpful in setting them to the correct position. I recommend using a slow setting cement to be sure you have plenty of time for alignment.
Step 3
The tow hooks are located forward of the axle in front of a square of plastic on Parts A10 and A22 close to the end of the frame.
The tow hooks are located forward of the axle in front of a square of plastic on Parts A10 and A22 close to the end of the frame.
Step 4
This is where I did not pay attention to the kit parts and instructions and made the mistake of not adding the axles to the differential, Part A4, correctly. There is a small location hole on the bottom of axle Parts A18 which fit into a pin on the rear leaf springs. Part A4 has no location pins to orientate the axles so that the location hole points down toward the springs and the drain on top of the differential. Instead I glued the axles the wrong way and wound up with the location holes on the top and the drain plug on the bottom when I added it to the springs. I rectified the error by removing the drain plug and adding another one to the top of A4 after realizing my mistake. The moral of this story? Read the directions!
Step 5
While I had no issues with assembly I did have the axle and tie rod break in two. I was able to repair this but when you remove them from the tree I would carefully saw the tree section that contains the parts free then try removing them very carefully using a fine saw or at least a sharp knife blade. The plastic is very soft and is easily broken.
Step 6
Fenders B1 and B2 fit into a small step or notch in the upper part of the frame and there is little gluing surface for the fenders to attach to. Care needs to be taken when handling the model after adding the fenders as I knocked off B1 at least twice in the course of construction. Adding a bead of super glue adds to the strength of the joint.
Fenders B1 and B2 fit into a small step or notch in the upper part of the frame and there is little gluing surface for the fenders to attach to. Care needs to be taken when handling the model after adding the fenders as I knocked off B1 at least twice in the course of construction. Adding a bead of super glue adds to the strength of the joint.
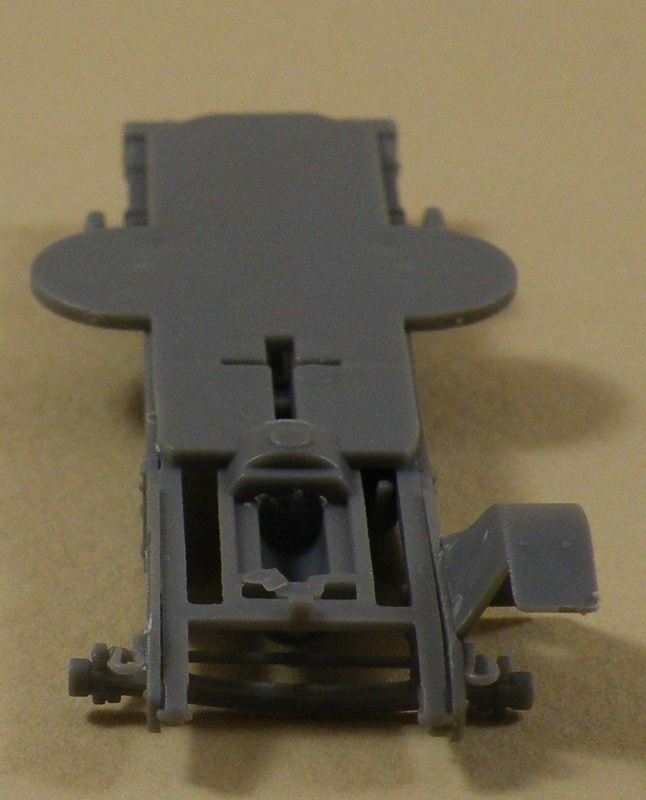
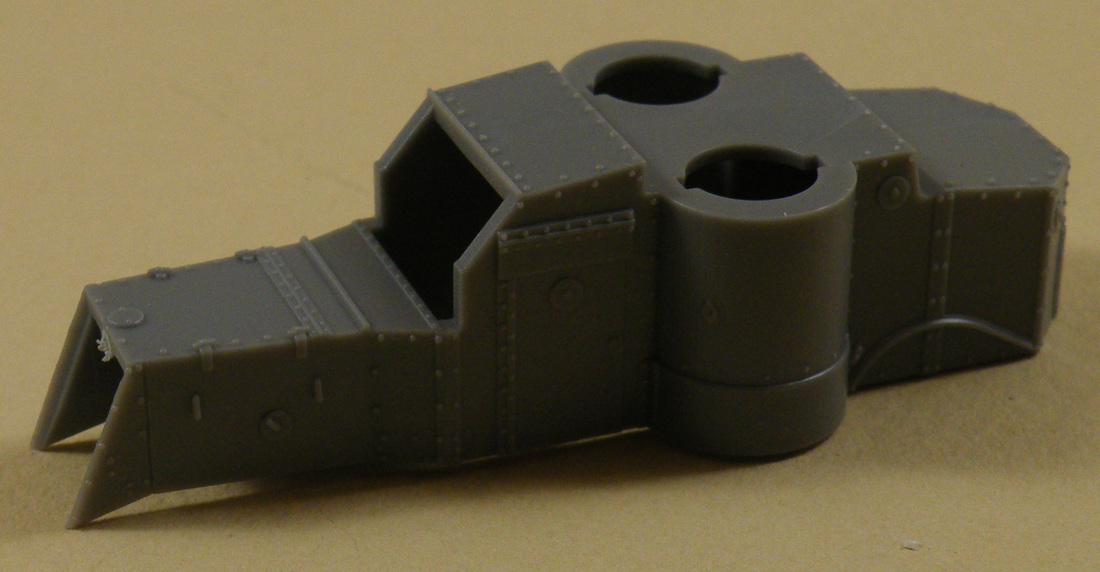
The rest of the assembly went together easily and the fit of the hull parts was excellent. Fenders A6 and A7 attach above the arch that is molded onto the hull side and obtaining the correct location is easy as the parts lock into position. Removing and installing the marker lights A13 and A12 went without any problems but I could just see myself losing these parts during the build so I took the easy way out and cemented the lamp stem and the back of the lamp to the hull. The turrets assembled well but some putty was needed on the front to fill a small gap on one turret and remove the seam on the other. I would suggest test fitting of the turrets to see if any excess plastic on the mating parts needs to be sanded down for a better fit. Looking back I wonder if the turret sides could be assembled first then after sanding adding the machine gun. As with any review it has become a tradition to lose at least one part during the build and not wanting to break from any bad habits the driver's door step was dutifully knocked off never to be seen again! I scratch built a new one from “L” shaped angle strip and sheet plastic.
Painting and finishing
From the resources I listed I decided to paint the model Dark Green. I used Vallejo acrylics starting with painting the inside of the hood, radiator and the back of the vision slits Black 70.950 to hide any light that might be seen through the openings. The model was then primed with Surface Primer Russian Green 70609 and a base coat of Model Air Russian Green 71017. I liked it but I felt it was too dark so I sprayed the inside of the panels with thinned Vallejo Model Color U.S. Dark Green 70.893 which lightened it up considerably. Around the W.W. 1 and post war period natural rubber tires were common and from my research could be colored white,light gray or even red brown. I chose to brush paint them Model Color 70.989 Sky Grey (F.S.36463 RAL 7004) but I have to say my brush skills need some brushing up! The drive shaft and exhaust were painted Model Color Chocolate Brown 70.872 and the oil pan and transmission were painted Black Grey 70.862 and dry brushed with Natural Steel 70.864. The model was over sprayed with Pledge Floor Wax with Future Shine and after curing the model was given a filter using Vallejo Sepia 73.200 Wash heavily thinned to the consistency of water. I next applied a wash using Vallejo Black Shade Wash 73.201. Are you starting to see a theme here? Anyway, I sprayed a Matt Varnish 70.520 over it and added Mig Pigments European Dust P028 to the chassis, fenders, wheels and body. I set the pigment with Mig Pigment Fixer.
From the resources I listed I decided to paint the model Dark Green. I used Vallejo acrylics starting with painting the inside of the hood, radiator and the back of the vision slits Black 70.950 to hide any light that might be seen through the openings. The model was then primed with Surface Primer Russian Green 70609 and a base coat of Model Air Russian Green 71017. I liked it but I felt it was too dark so I sprayed the inside of the panels with thinned Vallejo Model Color U.S. Dark Green 70.893 which lightened it up considerably. Around the W.W. 1 and post war period natural rubber tires were common and from my research could be colored white,light gray or even red brown. I chose to brush paint them Model Color 70.989 Sky Grey (F.S.36463 RAL 7004) but I have to say my brush skills need some brushing up! The drive shaft and exhaust were painted Model Color Chocolate Brown 70.872 and the oil pan and transmission were painted Black Grey 70.862 and dry brushed with Natural Steel 70.864. The model was over sprayed with Pledge Floor Wax with Future Shine and after curing the model was given a filter using Vallejo Sepia 73.200 Wash heavily thinned to the consistency of water. I next applied a wash using Vallejo Black Shade Wash 73.201. Are you starting to see a theme here? Anyway, I sprayed a Matt Varnish 70.520 over it and added Mig Pigments European Dust P028 to the chassis, fenders, wheels and body. I set the pigment with Mig Pigment Fixer.


Final thoughts
I really enjoyed building this model. The fit is simply great and MasterBox thoughtfully beveled the edges of the armor plates so that there are no seams that require putty when the body parts are glued together. In fact the overall fit of the model was really good. I plan to buy the Mk IV version next so if you like armored cars from The Great War, I highly recommend The MasterBox kit. I purchased my kit from my local hobby shop.
Resources
1. Warpaint Colors and Markings of British Army Vehicles 1903 – 2003 Volume 1 No. 4104
Author; Dick Taylor
Published by Mushroom Model Publications and in Poland by Stratus
ISBN: 978-83-89450-63-0
http://www.mmpbooks.biz
2. Landships II
www.landships.info
There are several photos on this site of the Austin Mk. III Armored Car.
3. Armored Units of the Russian Civil War
White and Allied
D Bullock & A Deryabin Illustrated by A Aksenov
Osprey Publishing New Vanguard 83
ISBN: 1-84176-544-9
http://www.ospreypublishing.com
